Tutorial 6: Introduction to Flutter
Platform-Based Programming (CSGE602022) — Organized by the Faculty of Computer Science Universitas Indonesia, Odd Semester 2023/2024
Learning Objectives
After completing this tutorial, students are expected to be able to:
- Understand Flutter installation.
- Understand and perform basic Flutter commands.
- Understand the basic flow of the development and execution of a Flutter application.
- Understand basic elements in Flutter.
Introduction to Flutter
Flutter is an open source mobile application development framework, created by Google in 2017. Flutter is used to develop an Android and iOS application. Flutter also support developing web-based application, Windows, Linux, and MacOS natively.
The main benefit of Flutter is the ability to develop applications for different platforms with just one codebase. Besides that, the JIT (Just in Time) feature also allows the developer to view the live changes in the codebase without the need to recompile the application.
Flutter Installation
Access the following link based on your operating system.
a. Mac OS
If you use Homebrew, you can install Flutter with
brew install --cask flutter.b. Windows
c. Linux
Install the latest version of Flutter by following the guide in the link above.
For Mac users, you can skip the
iOS Setupstep and go straight to theAndroid Setupstep.Install an IDE of your choice that will be used to develop Flutter applications.
a. Android Studio (Recommended)
You can use Visual Studio Code for Flutter development by installing extensions Dart and Flutter.
You can also read the IDE functionality provided by the Flutter extension in the link above.
Tutorial: Getting Started with Flutter
Open The Terminal or Command Prompt.
Navigate to the directory where you want to save your Flutter project.
Generate a new Flutter Project with the name
shopping_list, then navigate into the project directory.flutter create <APP_NAME>
cd <APP_NAME>Run the project using the Terminal or Command Prompt.
flutter runFor macOS user, there are multiple options to run a Flutter Project. The easiest way is:
Use Google Chrome
Run the following command to enable web support (only needs to be done once):
flutter config --enable-webThen, in your project directory, run the project in Google Chrome with the command:
flutter run -d chrome
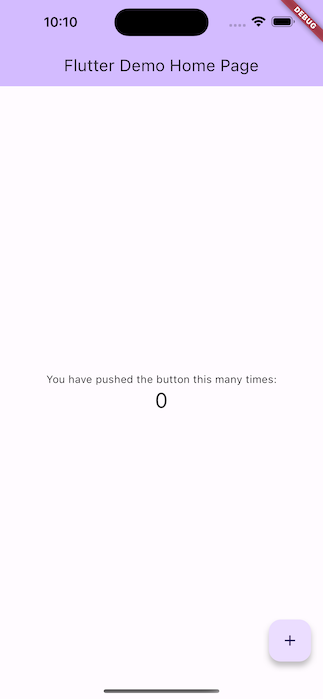
You will see a screen like the one below.
Perform
git initin the root folder andadd-commit-pushthe project to a new GitHub repository. You can name your new repositoryshopping-list-mobile.
Tutorial: Organizing Project Structure
Before delving further into Flutter, you will organize the file structure of your project to make the code more understandable. This is a best practice in application development, known as clean architecture.
Create a new file named
menu.dartin theshopping_list/libdirectory. At the first line of this file, add the following code:import 'package:flutter/material.dart';From the
main.dartfile, move (cut) the code from line 39 to the end, which includes the two classes below:class MyHomePage ... {
...
}
class _MyHomePageState ... {
...
}Move this code to the newly created
menu.dartfile.You will notice that in the
main.dartfile, there will be an error on line 34, which contains the following code:home: const MyHomePage(title: 'Flutter Demo Home Page'),This error occurs because the
main.dartfile no longer recognizes theMyHomePageclass, which has been moved to another file,menu.dart. To resolve this issue, add the following code at the beginning of the file:import 'package:shopping_list/menu.dart';Run the project through the Terminal or Command Prompt to ensure that the application still runs correctly.
Tutorial: Creating a Simple Widget in Flutter
In this tutorial, you will learn how to create a simple widget in Flutter. You will display the name of your shop as a header and create cards representing items for sale. When the "Buy" button is pressed, a notification will appear at the bottom of the screen.
First, you can change the application's theme color to indigo.
Open the
main.dartfile.Change the code in your application's theme section that has the type
Material Colorto:colorScheme: ColorScheme.fromSeed(seedColor: Colors.indigo),Try running your project to see if the application's theme color has changed to indigo.
After changing the application's theme color, you will convert the widget of the menu page to a stateless widget.
In the
main.dartfile, removeMyHomePage(title: 'Flutter Demo Home Page')so that it becomes:MyHomePage()In the
menu.dartfile, you will change the nature of the page's widget from stateful to stateless. Make the following changes in the widget section:- Replace
({super.key, required this.title})with({Key? key}) : super(key: key);. - Remove
final String title;and add theWidget buildmethod so that the code looks like this:
class MyHomePage extends StatelessWidget {
    MyHomePage({Key? key}) : super(key: key);

    @override
    Widget build(BuildContext context) {
        return Scaffold(
            ...
        );
    }
}
Don't forget to remove the State class that is located below the stateless widget section.
- Replace
After changing the nature of the menu page widget to stateless, you will add text and cards to represent items for sale.
To add text and cards, define the types of items you are selling. You can start by defining the type in your list:
class ShopItem {
  final String name;
  final IconData icon;

  ShopItem(this.name, this.icon);
}
Under the
MyHomePage({Key? key}) : super(key: key);code, add items for sale (name, price, and the item's icon):final List<ShopItem> items = [
ShopItem("View Products, Icons.checklist),
ShopItem("Add Product", Icons.add_shopping_cart),
ShopItem("Logout", Icons.logout),
];Next, add the following code inside the
Widget buildmethod:return Scaffold(
appBar: AppBar(
title: const Text(
'Shopping List',
),
),
body: SingleChildScrollView(
// Scrolling wrapper widget
child: Padding(
padding: const EdgeInsets.all(10.0), // Set padding for the page
child: Column(
// Widget to display children vertically
children: <Widget>[
const Padding(
padding: EdgeInsets.only(top: 10.0, bottom: 10.0),
// Text widget to display text with center alignment and appropriate style
child: Text(
'PBP Shop', // Text indicating the shop name
textAlign: TextAlign.center,
style: TextStyle(
fontSize: 30,
fontWeight: FontWeight.bold,
),
),
),
// Grid layout
GridView.count(
// Container for our cards.
primary: true,
padding: const EdgeInsets.all(20),
crossAxisSpacing: 10,
mainAxisSpacing: 10,
crossAxisCount: 3,
shrinkWrap: true,
children: items.map((ShopItem item) {
// Iteration for each item
return ShopCard(item);
}).toList(),
),
],
),
),
),
);Although there may have been an error previously, you only need to create a new stateless widget to display the card.
class ShopCard extends StatelessWidget {
  final ShopItem item;

  const ShopCard(this.item, {Key? key}); // Constructor

  @override
  Widget build(BuildContext context) {
    return Material(
      color: Colors.indigo,
      child: InkWell(
        // Responsive touch area
        onTap: () {
          // Show a SnackBar when clicked
          ScaffoldMessenger.of(context)
            ..hideCurrentSnackBar()
            ..showSnackBar(SnackBar(
                content: Text("You pressed the ${item.name} button!")));
        },
        child: Container(
          // Container to hold Icon and Text
          padding: const EdgeInsets.all(8),
          child: Center(
            child: Column(
              mainAxisAlignment: MainAxisAlignment.center,
              children: [
                Icon(
                  item.icon,
                  color: Colors.white,
                  size: 30.0,
                ),
                const Padding(padding: EdgeInsets.all(3)),
                Text(
                  item.name,
                  textAlign: TextAlign.center,
                  style: const TextStyle(color: Colors.white),
                ),
              ],
            ),
          ),
        ),
      ),
    );
  }
}
The result of your work will look like this:

Closing
Congratulations! You have successfully completed Tutorial 6. 😄
Run the following commands to
add,commit, andpush:git add .
git commit -m "<pesan_commit>"
git push -u origin <branch_utama>- Replace
<commit_message>with your desired message. For example:git commit -m "Completed tutorial 6". - Replace
<your_main_branch>with your main branch name. For example:git push -u origin mainorgit push -u origin master.
- Replace
Additional References
- Flutter Docs
- Write your first Flutter app, part 1
- An Introduction to Flutter: The Basics by FreeCodeCamp
- Flutter Course for Beginners – 37-hour Cross Platform App Development Tutorial by FreeCodeCamp
- An Introduction to Flutter Clean Architecture
Contributors
- Alanna
- Alvaro Austin
- Naila Shafirni Hidayat
- Shayna Putri Fitria
- Aidah Novallia Putri (EN Translator)
- Bonaventura Galang (EN Translator)
- Ferry (EN Translator)
Credits
This tutorial was developed based on PBP Odd 2023 and PBP Even 2023 written by the 2023 Platform-Based Programming Teaching Team. All tutorials and instructions included in this repository are designed so that students who are taking Platform-Based Programming courses can complete the tutorials during lab sessions.