Tutorial 7: Flutter Navigation, Layouts, Forms, and Input Elements
Platform-Based Programming (CSGE602022) — Organized by the Faculty of Computer Science Universitas Indonesia, Odd Semester 2024/2025
Learning Objectives
Upon completing this tutorial, students should be able to:
- Understand basic navigation and routing in Flutter.
- Understand input elements and forms in Flutter.
- Understand the flow of form creation and data handling in Flutter.
- Understand and apply a simple clean architecture.
Page Navigation in Flutter
In web development, you’ve learned that on a website, we can navigate from one page to another based on the accessed URL. The same concept applies in application development, where we can navigate between 'pages' as well. However, in an application, navigation is not done by accessing different URLs.
Flutter provides a comprehensive system for page navigation. One of the ways to navigate between pages is by using the Navigator widget. The Navigator widget displays pages on the screen as if they were arranged in a stack. To navigate to a new page, we can access Navigator through BuildContext and call functions such as push(), pop(), and pushReplacement().
Note: In Flutter, screens and pages are often referred to as routes.
Below is an explanation of some of the most commonly used Navigator functions in app development.
Push (push())
...
    if (item.name == "Add Mood") {
        Navigator.push(context,
            MaterialPageRoute(builder: (context) => const MoodEntryFormPage()));
    }
...
The push() method adds a route to the route stack managed by Navigator. This method places the new route at the top of the stack, making it visible to the user.
Pop (pop())
...
    onPressed: () {
        Navigator.pop(context);
    },
...
The pop() method removes the route currently displayed to the user (or in other words, the route at the top of the stack) from the route stack managed by Navigator. This action returns the application from the current route back to the route below it on the stack.
Push Replacement (pushReplacement())
...
    onTap: () {
        Navigator.pushReplacement(
        context,
        MaterialPageRoute(
            builder: (context) => MyHomePage(),
        ));
    },
...
The pushReplacement() method removes the current route displayed to the user and replaces it with a new route. This method swaps out the current route on top of the stack with the new route, leaving the stack elements below unchanged.
While push() and pushReplacement() may seem similar, the difference lies in what happens to the route at the top of the stack. push() adds a new route on top of the existing stack, whereas pushReplacement() replaces the top route with the new route. Take care with the stack’s order and contents, as pressing the Back button on an empty stack will exit the app.
In addition to the three methods above, Navigator has other methods that make routing easier, such as popUntil(), canPop(), and maybePop(). Feel free to explore these methods independently. To learn more about Navigator, check the documentation at: (https://api.flutter.dev/flutter/widgets/Navigator-class.html)[https://api.flutter.dev/flutter/widgets/Navigator-class.html]
Input and Forms in Flutter
Just like on the web, an app can interact with users through inputs and forms. Flutter provides a Form widget that can hold multiple input field widgets. Similar to web input fields, Flutter offers various types of input fields, such as the TextField widget.
To try a sample Form widget, run the following command:
flutter create --sample=widgets.Form.1 form_sample
To learn more about the Form widget, refer to the documentation: Flutter Form Class
Tutorial: Adding a Drawer Menu for Navigation
To simplify navigation in a Flutter app, we can add a drawer menu, which slides in from the left or right of the screen. It typically contains links to other pages within the app.
Follow the tutorial carefully. Pay attention to the TODO comments that require your input.
-
Open the project created in tutorial 6 in your favorite IDE.
-
Create a new directory named
widgetsinside thelib/subdirectory. Then, create a file namedleft_drawer.dartand add the following code:import 'package:flutter/material.dart';
class LeftDrawer extends StatelessWidget {
const LeftDrawer({super.key});
Widget build(BuildContext context) {
return Drawer(
child: ListView(
children: [
DrawerHeader(
// TODO: Drawer header section
),
// TODO: Routing section
],
),
);
}
} -
Next, add imports for the pages you want to include in the Drawer Menu. In this example, we’ll add navigation to
MyHomePageandMoodEntryFormPage.import 'package:flutter/material.dart';
import 'package:mental_health_tracker/menu.dart';
// TODO: Import MoodEntryFormPage if it has already been createdinfoThe
MoodEntryFormPagepage will be created in later steps. -
Once imported, add routing for the pages to the
TODO: Routing section. Replace the comment with the following code....
ListTile(
leading: const Icon(Icons.home_outlined),
title: const Text('Home Page'),
// Redirection part to MyHomePage
onTap: () {
Navigator.pushReplacement(
context,
MaterialPageRoute(
builder: (context) => MyHomePage(),
));
},
),
ListTile(
leading: const Icon(Icons.mood),
title: const Text('Add Mood'),
// Redirection part to MoodEntryFormPage
onTap: () {
/*
TODO: Add routing to MoodEntryFormPage here,
after MoodEntryFormPage is created.
*/
},
),
...If you're copying and pasting directly, make sure that the ellipsis ("...") at the top and bottom of the code is not copied.
-
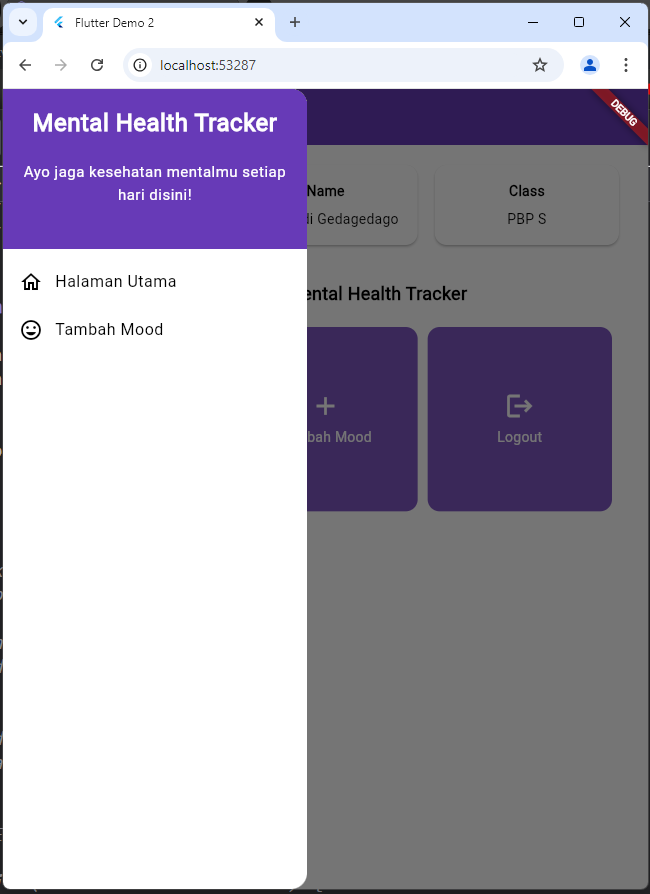
Next, customize the drawer by adding a drawer header where the
TODO: Drawer header sectionis located. Replace the comment with the following code....
decoration: BoxDecoration(
color: Theme.of(context).colorScheme.primary,
),
child: const Column(
children: [
Text(
'Mental Health Tracker',
textAlign: TextAlign.center,
style: TextStyle(
fontSize: 24,
fontWeight: FontWeight.bold,
color: Colors.white,
),
),
Padding(padding: EdgeInsets.all(8)),
Text(
"Track your mental health every day here!",
// TODO: Add text style with center alignment, font size 15, white color, and normal weight
),
],
),
... -
Great job! You have successfully created a drawer menu. Now add this drawer to the page where you want it. In this example, let’s add it to
menu.dart....
// Impor drawer widget
import 'package:mental_health_tracker/widgets/left_drawer.dart';
...
class MyHomePage extends StatelessWidget {
...
Widget build(BuildContext context) {
// Scaffold provides the basic structure of a page with an appBar and a body.
return Scaffold(
appBar: AppBar(
...
// Set drawer icon color to white
iconTheme: const IconThemeData(color: Colors.white),
),
// Add drawer as a parameter value for the drawer attribute of the Scaffold widget
drawer: const LeftDrawer(),
...
);
}
}
... -
Congratulations! Your drawer and navigation are complete. Run the app to see the result. Complete any remaining
TODOs before submitting the tutorial (The submitted tutorial no longer has a singleTODO). Make sure to add the drawer toMoodEntryFormPageas well if that page has already been created.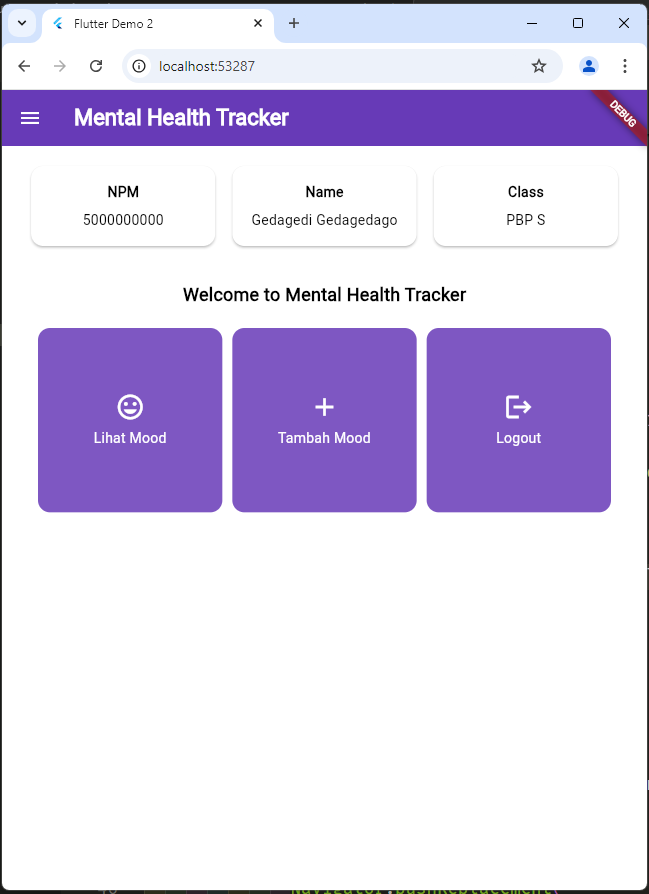
Tutorial: Adding Forms and Input Elements
Now, we’ll create a simple form to input data into the app so you can add new data for display.
-
Create a new file in the
libdirectory namedmoodentry_form.dartand add the following code:import 'package:flutter/material.dart';
// TODO: Import the previously created drawer
class MoodEntryFormPage extends StatefulWidget {
const MoodEntryFormPage({super.key});
State<MoodEntryFormPage> createState() => _MoodEntryFormPageState();
}
class _MoodEntryFormPageState extends State<MoodEntryFormPage> {
Widget build(BuildContext context) {
return Placeholder();
}
} -
Replace the
Placeholderwidget with the following code.Scaffold(
appBar: AppBar(
title: const Center(
child: Text(
'Add Your Mood Today',
),
),
backgroundColor: Theme.of(context).colorScheme.primary,
foregroundColor: Colors.white,
),
// TODO: Add the created drawer here
body: Form(
child: SingleChildScrollView(),
),
);Code Explanation:
-
The
Formwidget serves as a container for the input field widgets we’ll add. -
SingleChildScrollViewmakes the widgets inside it scrollable.
-
-
Create a new variable
_formKeywith a value ofGlobalKey<FormState>();and assign_formKeyto thekeyattribute of theFormwidget. This key handles form state, validation, and storage....
class _MoodEntryFormPageState extends State<MoodEntryFormPage> {
final _formKey = GlobalKey<FormState>();
...
......
body: Form(
key: _formKey,
child: SingleChildScrollView(),
),
... -
Replace
TextFormFieldwith the following code to complete the input widget....
class _MoodEntryFormPageState extends State<MoodEntryFormPage> {
final _formKey = GlobalKey<FormState>();
String _mood = "";
String _feelings = "";
int _moodIntensity = 0;
... -
Create a
Columnwidget as a child ofSingleChildScrollView....
body: Form(
key: _formKey,
child: SingleChildScrollView(
child: Column()
),
... -
Create a
TextFormFieldwidget wrapped by aPaddingwidget as one of the children of theColumnwidget. Then, add thecrossAxisAlignmentattribute to align the children of theColumn....
child: Column(
crossAxisAlignment: CrossAxisAlignment.start,
children: [
Padding(
padding: const EdgeInsets.all(8.0),
child: TextFormField(
decoration: InputDecoration(
hintText: "Mood",
labelText: "Mood",
border: OutlineInputBorder(
borderRadius: BorderRadius.circular(5.0),
),
),
onChanged: (String? value) {
setState(() {
_mood = value!;
});
},
validator: (String? value) {
if (value == null || value.isEmpty) {
return "Mood cannot be empty!";
}
return null;
},
),
),
],
),
...Code Explanation:
onChangedwill be executed whenever the content ofTextFormFieldchanges.validatorwill validate the content ofTextFormFieldand return aStringif there is an error.- There is null-safety implementation in the
String?andvalue!parts. The?operator indicates that the variable can contain aStringornull. Meanwhile, the!operator indicates that the variable will not containnull.
To learn more about null-safety, you can read the documentation at: Dart Null Safety
-
Create two
TextFormFieldwidgets wrapped byPaddingas the next child of theColumnlike before for thefeelingsandmood intensityfields....
Padding(
padding: const EdgeInsets.all(8.0),
child: TextFormField(
decoration: InputDecoration(
hintText: "Feelings",
labelText: "Feelings",
border: OutlineInputBorder(
borderRadius: BorderRadius.circular(5.0),
),
),
onChanged: (String? value) {
setState(() {
_feelings = value!;
});
},
validator: (String? value) {
if (value == null || value.isEmpty) {
return "Feelings cannot be empty!";
}
return null;
},
),
),
Padding(
padding: const EdgeInsets.all(8.0),
child: TextFormField(
decoration: InputDecoration(
hintText: "Mood intensity",
labelText: "Mood intensity",
border: OutlineInputBorder(
borderRadius: BorderRadius.circular(5.0),
),
),
onChanged: (String? value) {
setState(() {
_moodIntensity = int.tryParse(value!) ?? 0;
});
},
validator: (String? value) {
if (value == null || value.isEmpty) {
return "Mood intensity cannot be empty!";
}
if (int.tryParse(value) == null) {
return "Mood intensity must be a number!";
}
return null;
},
),
),
... -
Create a button as the next child of
Column. Wrap the button withPaddingandAlign. This time, we haven't saved the data to the database, but we will display it in a pop-up that appears after the button is pressed....
Align(
alignment: Alignment.bottomCenter,
child: Padding(
padding: const EdgeInsets.all(8.0),
child: ElevatedButton(
style: ButtonStyle(
backgroundColor: WidgetStateProperty.all(
Theme.of(context).colorScheme.primary),
),
onPressed: () {
if (_formKey.currentState!.validate()) {}
},
child: const Text(
"Save",
style: TextStyle(color: Colors.white),
),
),
),
),
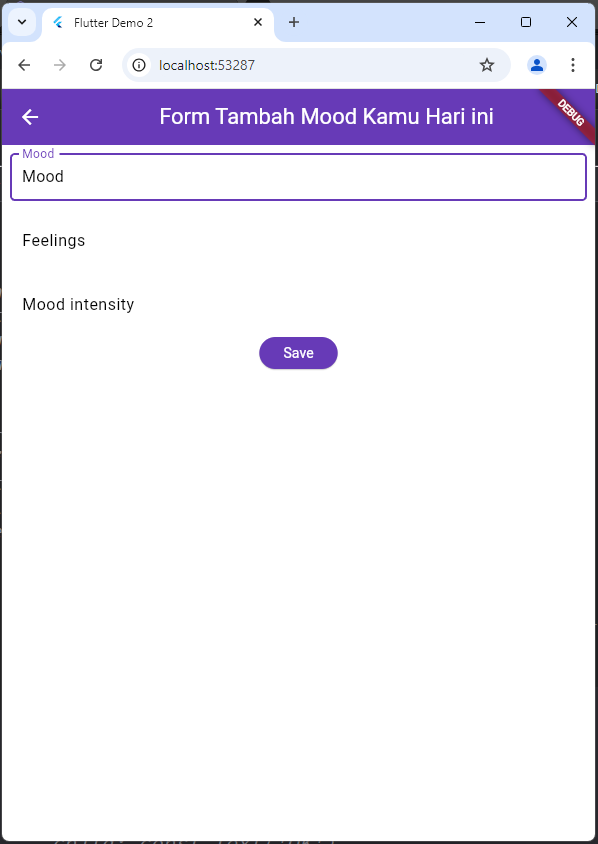
... -
Congratulations! Now the form is complete. Run the program to see the result. The form should look like the image below.
Tutorial: Displaying Data
-
Add the
showDialog()function to theonPressed()part of the code you added before. Display theAlertDialogwidget in the function. Then, add a function to reset the form. Your code will look like this:...
child: ElevatedButton(
style: ButtonStyle(
backgroundColor: MaterialStateProperty.all(
Theme.of(context).colorScheme.primary),
),
onPressed: () {
if (_formKey.currentState!.validate()) {
showDialog(
context: context,
builder: (context) {
return AlertDialog(
title: const Text('Mood successfully saved'),
content: SingleChildScrollView(
child: Column(
crossAxisAlignment: CrossAxisAlignment.start,
children: [
Text('Mood: $_mood'),
// TODO: Display other values
],
),
),
actions: [
TextButton(
child: const Text('OK'),
onPressed: () {
Navigator.pop(context);
_formKey.currentState!.reset();
},
),
],
);
},
);
}
},
child: const Text(
"Save",
style: TextStyle(color: Colors.white),
),
),
... -
Please try running the program and use the form you created, then see the result. Don't forget to add routing to the drawer first to be able to access the form you created.
Tutorial: Adding Navigation to the Button
At this point, we have successfully created a drawer that can navigate to other pages within the app and a form page. In the previous tutorial, we also created three button widgets that can perform certain actions when pressed. Now, we will add navigation features to these buttons so that when pressed, the user is presented with another page.
Ensure that you follow the tutorial carefully. Pay attention to any TODO comments that you need to complete in the code.
-
In the
MoodItemwidget within themenu.dartfile that was created in the previous tutorial, make it so that the code in theonTapattribute ofInkWellcan navigate to another route (add the following code below theScaffoldMessengercode that shows the snackbar)....
// Touch-responsive area
onTap: () {
// Show SnackBar when clicked
ScaffoldMessenger.of(context)
..hideCurrentSnackBar()
..showSnackBar(SnackBar(
content: Text("You pressed the ${item.name} button!")));
// Navigate to the appropriate route (depending on the button type)
if (item.name == "Add Mood") {
// TODO: Use Navigator.push to navigate to a MaterialPageRoute that includes MoodEntryFormPage.
}
},
...Note that we are using
Navigator.push()on this button so that the user can press the Back button to return to the menu page. Additionally, if we useNavigator.pop(), we can code the program to return to the menu page. -
Try running your program, use the buttons that have been made functional, and see what happens. Compare it with what happens when navigating through the drawer (of course, after completing all the
TODOs in the drawer). `
Tutorial: File Refactoring
After creating the moodentry_form.dart page, our pages are getting more and more. Therefore, let's move the previously created pages into one screens folder to make it easier for us in the future.
-
Before starting, make sure you have Flutter installed in the IDE or text editor you are using.
-
Create a new file named
mood_card.dartin the widgets directory. -
Move the contents of the
ItemHomepageandItemCardwidgets frommenu.darttowidgets/mood_card.dart. -
Be sure to import the
moodentry_form.dartpage inmood_card.dartand import themood_card.dartpage inmenu.dart.infoYou can remove the
moodentry_form.dartimport line previously inmain.dartas it is no longer needed. -
Create a new folder named
screensin thelibdirectory. -
Move the
menu.dartandmoodentry_form.dartfiles into thescreensfolder.warningMake sure to perform file movements through an IDE or text editor that has the Flutter extension or plugin, rather than a regular file manager (like File Explorer or Finder). This allows the IDE or text editor to automatically handle refactoring.
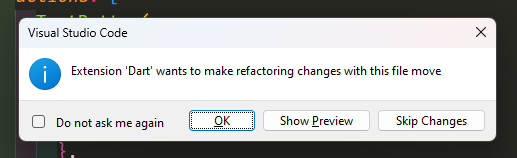
If a warning like the one above appears, please press OK.
Once the file refactoring is complete, the structure of the lib directory should look like this:

Closing
Congratulations! You have completed Tutorial 7! Hopefully, this tutorial helps you understand navigation, forms, input, and layouts better. 😄
-
Review and fully understand the code you have written above. Remember to complete all the TODOs in the code!
-
Perform
add,commit, andpushto update your GitHub repository.git add .
git commit -m "<commit_message>"
git push -u origin <main_branch>- Replace
<commit_message>as desired. Example:git commit -m "completed tutorial 7". - Replace
<main_branch>with the name of your main branch. Example:git push -u origin mainorgit push -u origin master.
- Replace
Additional References
Contributors
- Muhammad Daffa'I Rafi Prasetyo
- Sabrina Atha Shania
- Martin Marcelino Tarigan
- Resanda Dezca Asyam
- Vincent Suryakim (EN Translation)
Credits
This tutorial was developed based on PBP Even 2024 written by the 2024 Platform-Based Programming Teaching Team. All tutorials and instructions included in this repository are designed so that students who are taking Platform-Based Programming courses can complete the tutorials during lab sessions.