Tutorial 1: Introduction to Django Application and Model-View-Template in Django
Platform-Based Programming (CSGE602022) — Organized by the Faculty of Computer Science Universitas Indonesia, Odd Semester 2025/2026
Last updated: September 2 2025, 08:00 PM (WIB)
Learning Objectives
After completing this tutorial, students are expected to be able to:
- Understand the concept of MVT on a Django application
- Understand the flow Django uses to display a HTML page
- Understand routing configurations on
urls.py - Understand the relationship between models, views and templates in Django
- Understand the process of creating unit tests on the Django framework
Introduction to the concept of MVT (Model-View-Template)
In the world of web development, there are several architectural patterns that help developers in designing and developing applications. Examples include MVC (Model-View-Controller), MVT (Model-View-Template), and many more. In this course, we will focus on Django's architectural pattern, MVT.
What is MVT?
As you might have guessed, MVT comprises three components: the Model, the View, and the Template. In short:
- The Model component handles data and business logic
- The Template component contains the interface displayed to the user
- The View component acts as a bridge between the data (Model) and the interface (Template)
What is a Model?
The Model is responsible for managing data on the application. Django has Object Relational Mapping (ORM) built-in, allowing us to use Python syntax instead of raw SQL, which is what traditional databases typically use.
Here is an example of a Model:
class News(models.Model):
    title = models.CharField(max_length=255)
    content = models.TextField()
    date_added = models.DateField(auto_now_add=True)
What is a View?
The View component contains the logic handling what will be shown to the user. First, the View component receives a request from the user. Next, it retrieves data from the Model. Finally, it sends this data to the Template to be displayed to the user.
Here is an example of a View:
def show_main(request):
    news_list = News.objects.all()
    return render(request, "main.html", {"news_list": news_list})
What is a Template?
Template consists of HTML files that determine how the application is displayed.
Here is an example of a Template:
<h1>News List</h1>
<ul>
  {% for news in news_list %}
    <li>{{ news.title }} - {{ news.date_added }}</li>
  {% endfor %}
</ul>
MVT Flow
- The user accesses the desired URL with their browser.
- Django will map the requested URL to a View via
urls.py. - The View retrieves and processes data from the Model (if necessary).
- The View then sends the result to the Template to be displayed to the user.
Here's the short version: Request → urls → View → Model → View → Template → Response
Benefits of MVT
There are many benefits of the MVT architecture, such as:
- Separation of Concerns MVT provides clear separation between application logic, interface, and data, allowing developers to manage each component easily.
- Structured Code With MVT, applications are more modular, easier to test, and scalable.
- Reusability Templates and Views can be reused in other parts of the application.
Pre-Tutorial Notes
Before starting this tutorial, make sure you have completed Tutorial 0 with the following results:
-
Local directory structure for football-news:
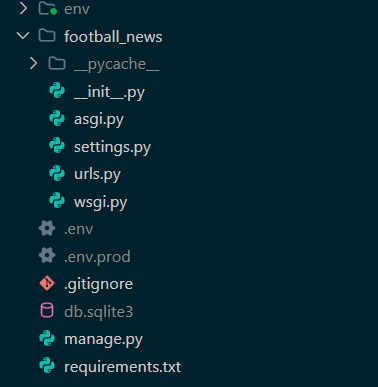
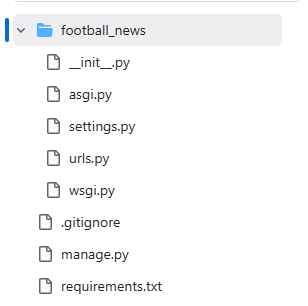
-
GitHub repository directory structure for football-news:
If you accidentally pushed sensitive files like .env, .env.prod, db.sqlite3, or the env/ folder, remove them from Git using:
git rm --cached .env .env.prod db.sqlite3
git rm -r --cached env/
Note: The above commands remove sensitive files from Git tracking going forward.
Check if .gitignore already contains these sensitive files:
cat .gitignore
If not present, add to .gitignore:
.env*
db.sqlite3
env/
Then create a clean up commit:
git add .
git commit -m "cleanup"
Finally, push all changes to GitHub and PWS:
git push origin master
git push pws master
This way, we can minimize security risks from credentials exposed in public repositories.
Tutorial: Creating a Django Application and Configuring the Model
In this tutorial, the concepts of applications and projects in Django will be explained.
What are Projects and Applications in Django?
-
A Project is an entire web project in Django. Projects contain multiple applications that work together to create a complete website or web application.
-
An Application is a modular unit that does a specific task in a Django project. Each application can have its own models, views, templates, and URLs. Applications allow you to break down functionalities into separate and manageable components that can be handled independently.
Before starting, remember that the root directory is the outer directory (football-news), while the project directory is the directory inside the root directory (football_news).
Step 1: Preparation
-
Open the
football-newsroot directory.- Before starting, make sure you are on the
football-newsroot directory that you made in Tutorial 0. - The development of your Django project will be done in this directory 😎.
- Before starting, make sure you are on the
-
Open your terminal or command prompt and make sure that you are on the
football-newsroot directory.
- Use the
cd [directory]command to switch between folders/directories. This command is very important to remember since being able to use the terminal proficiently will be very helpful, not only in this course but in future courses as well.
-
Activate the virtual environment created in the last tutorial by running the following command. (Please take note of the operating system that you are using).
-
Windows:
env\Scripts\activate -
Unix (Linux & Mac OS):
source env/bin/activate
-
- For Windows users, if you receive an error saying "The execution of scripts is disabled on this system...", try the following:
- Open PowerShell as an administrator and run the following command:
Set-ExecutionPolicy Unrestricted -Force - Pick option
Aand pressEnter.
- Open PowerShell as an administrator and run the following command:
- For Unix (Linux & macOS) users, if you receive an error saying "... Permission Denied", try the following:
- Run this command:
chmod +x env/bin/activate
- Run this command:
Step 2: Creating the main Application Inside the football-news Project
You will create a new application called main inside the football-news project.
-
Run the following command to create a new application with the name main.
python manage.py startapp mainAfter running the command above, a new directory with the name
mainwill be created. Themaindirectory will contain the starting structure for your Django application.
If you are still confused about terms such as root directory, project directory, and application directory, that's okay! You will get used to it as time goes by. Keep going!
-
Register the
mainapplication on the project.-
Open the
settings.pyfile inside thefootball_newsproject directory. -
Add
'main'to the bottom of the list of applications. You can find this in theINSTALLED_APPSvariable as shown below.INSTALLED_APPS = [
...,
'main'
]
-
By following these steps, you have successfully registered the main application to your football news project.
Tutorial: Implementing Basic Templates
Here, you will create a template in the templates directory within main. This template is used to display data from your football news program.
Right now, the football news application won't display any data. This will be implemented in Tutorial 2. Look forward to it!
Step 1: Creating and Filling the main.html File
Let's get acquainted with HTML first. HTML (Hypertext Markup Language) is a markup language used on web pages to interpret and write text, images, and other media visually and audibly.
Hint: You will learn more about HTML in Tutorial 4.
-
Create a new directory named
templatesinside themainapplication directory. -
Inside the
templatesdirectory, create a new file namedmain.htmland fill themain.htmlfile with the following code. Change the name and class according to your personal information!<h1>Football News</h1>
<h4>NPM: </h4>
<p>2406123456</p> <!-- Use your NPM here -->
<h4>Name: </h4>
<p>Pak Bepe</p> <!-- Use your name here -->
<h4>Class: </h4>
<p>PBP A</p> <!-- Use your class here --> -
Open the HTML file in a web browser.
- Before connecting it to the application, try opening the
main.htmlfile in your web browser. - Note that at this stage we are only checking the basic HTML display; the web page itself is not connected to Django yet.
- Here's an example of what you should see.
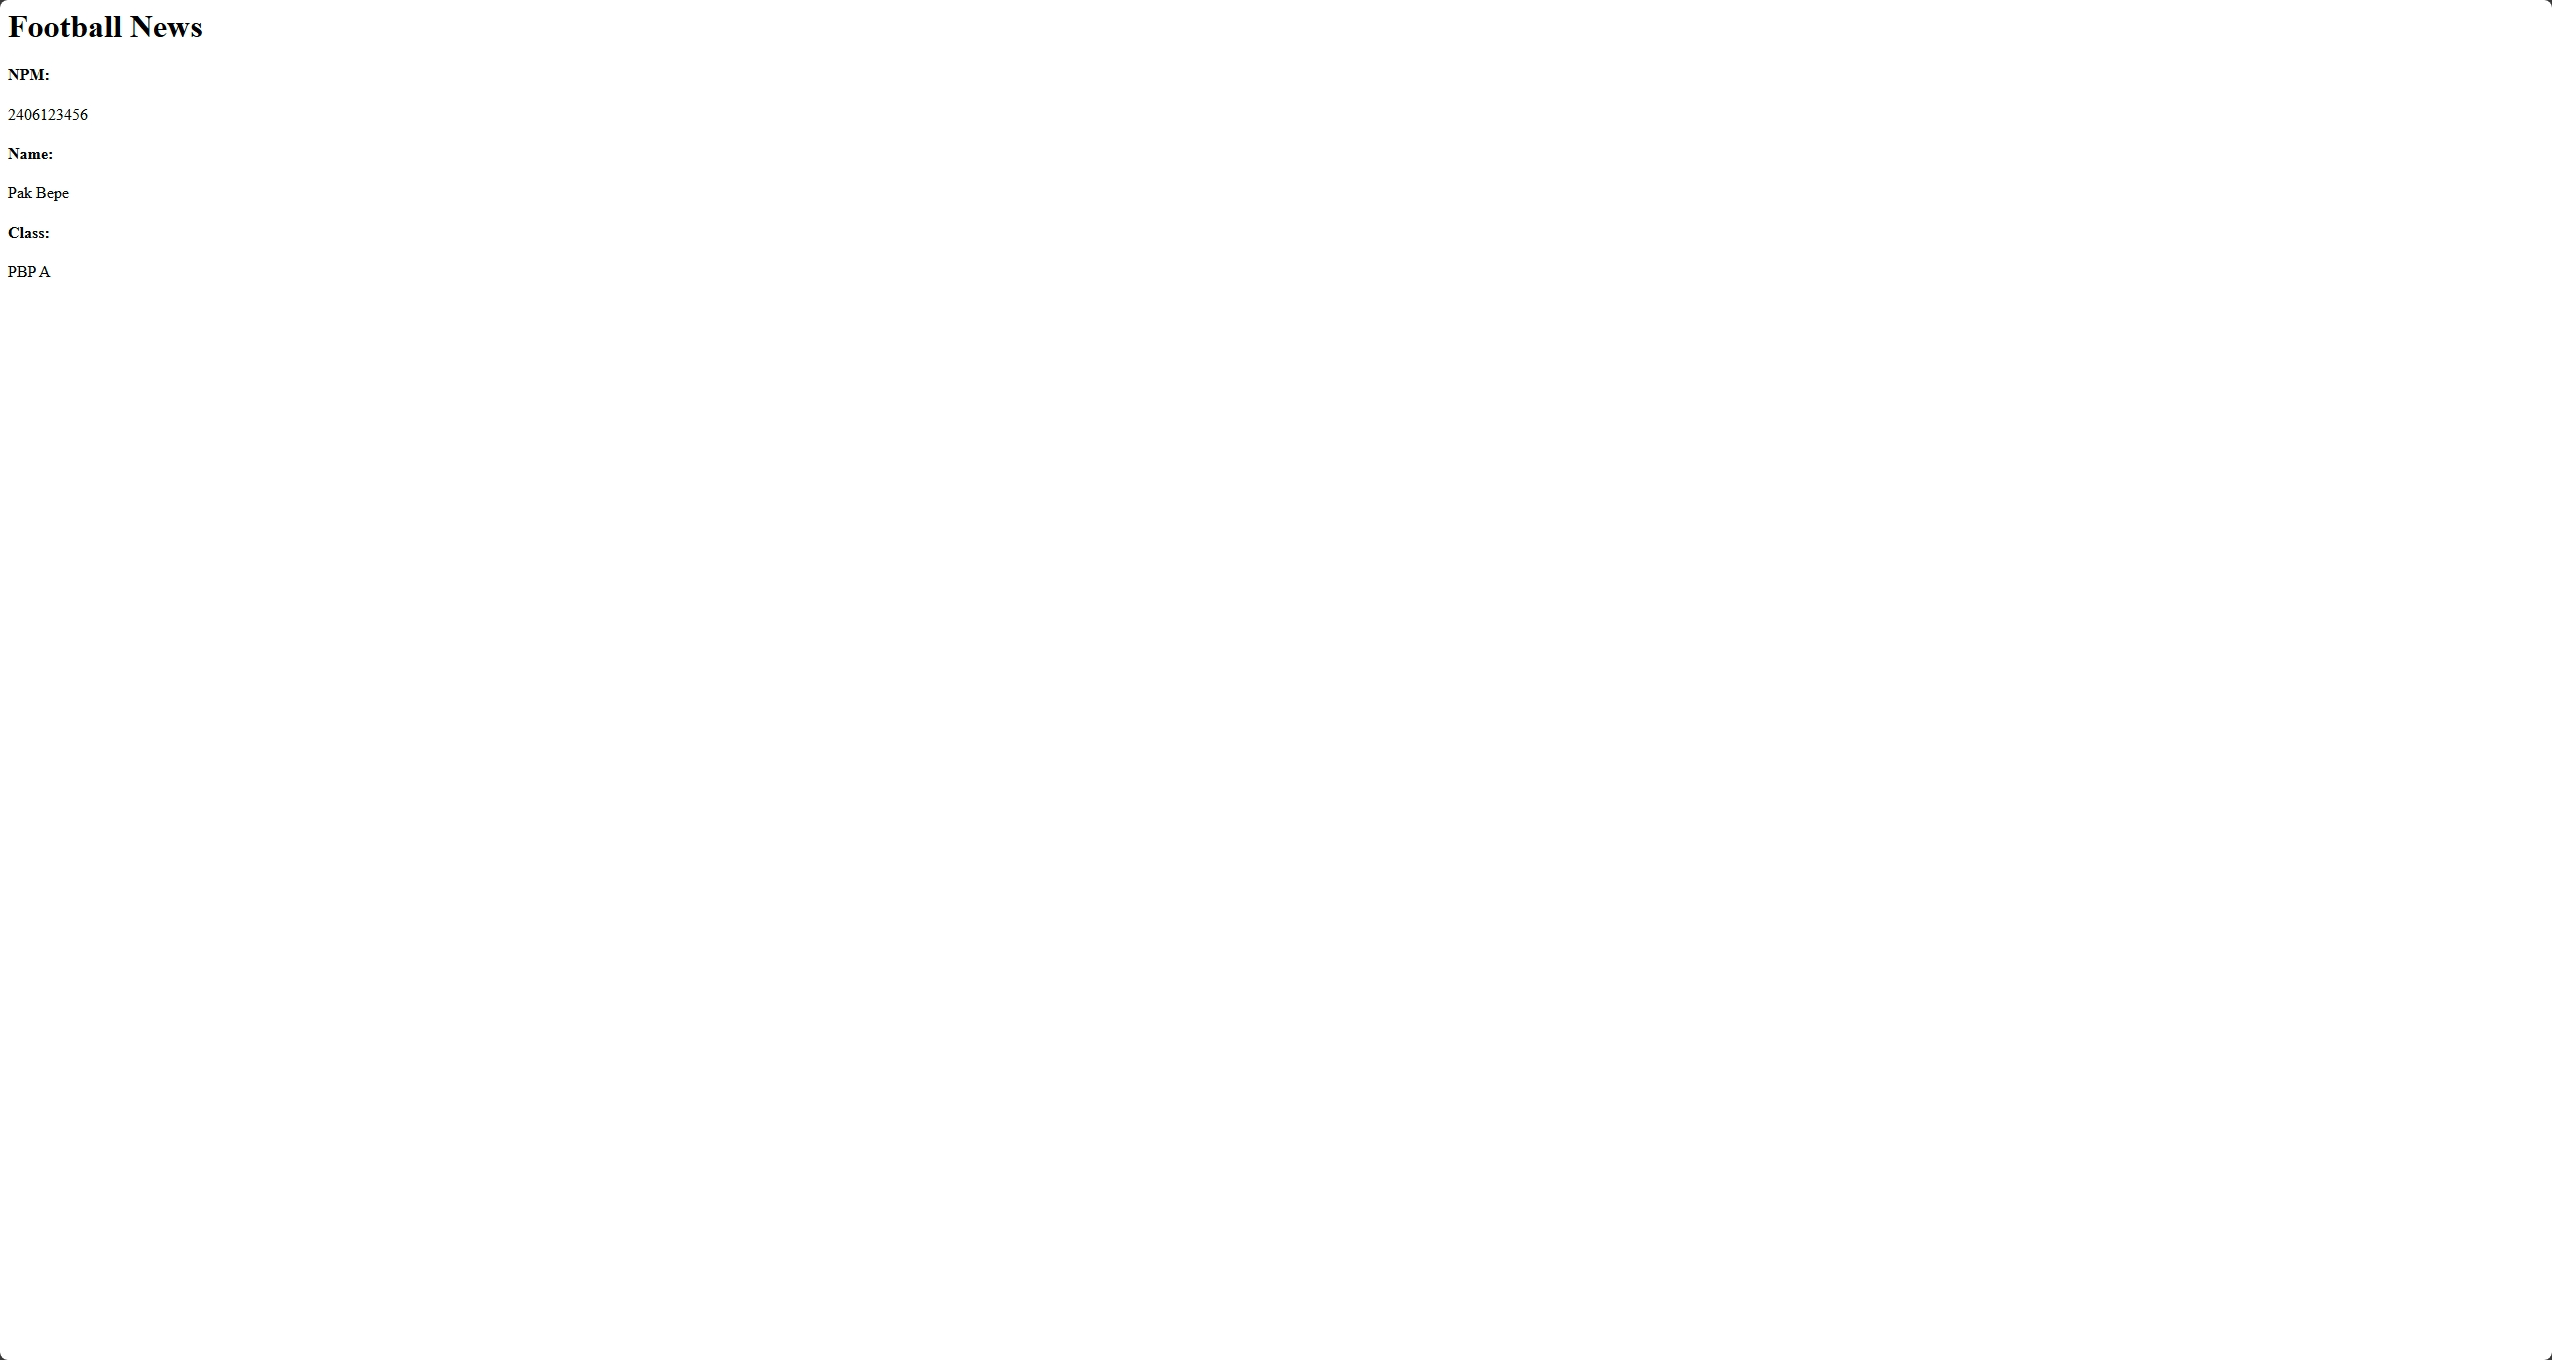
- Before connecting it to the application, try opening the
Tutorial: Implementing Basic Models
Step 1: Modifying the models.py File in the main Application
Here, you will modify the models.py file located in the main application directory to define a new model.
-
Open the
models.pyfile in themainapplication directory. -
Fill the
models.pyfile with the following code.import uuid
from django.db import models
class News(models.Model):
CATEGORY_CHOICES = [
('transfer', 'Transfer'),
('update', 'Update'),
('exclusive', 'Exclusive'),
('match', 'Match'),
('rumor', 'Rumor'),
('analysis', 'Analysis'),
]
id = models.UUIDField(primary_key=True, default=uuid.uuid4, editable=False)
title = models.CharField(max_length=255)
content = models.TextField()
category = models.CharField(max_length=20, choices=CATEGORY_CHOICES, default='update')
thumbnail = models.URLField(blank=True, null=True)
news_views = models.PositiveIntegerField(default=0)
created_at = models.DateTimeField(auto_now_add=True)
is_featured = models.BooleanField(default=False)
def __str__(self):
return self.title
@property
def is_news_hot(self):
return self.news_views > 20
def increment_views(self):
self.news_views += 1
self.save()
Code Explanation:
models.Modelis the base class used to define models in Django.Newsis the name of the model we're defining.CATEGORY_CHOICESis a tuple that defines available news category options.idis a field of typeUUIDFieldused as primary key with automatically generated values usinguuid.uuid4.titleis a field of typeCharFieldfor news title, with maximum length of 255 characters.contentis a field of typeTextFieldfor news content that can hold long text.categoryis a field of typeCharFieldwith limited choices according toCATEGORY_CHOICES, with default value 'update'.thumbnailis a field of typeURLFieldfor storing news thumbnail image URL (optional).news_viewsis a field of typePositiveIntegerFieldthat stores the number of news views, with default value 0.created_atis a field of typeDateTimeFieldthat automatically contains the date and time when data is created.is_featuredis a field of typeBooleanFieldto mark whether this news is displayed as featured news.- The
__str__method is used to return a string representation of the object (in this case, the news title). - The
@propertydecorator is used to create read-only attributes whose values are calculated from other attributes. In this case,is_news_hotwill beTrueif the news views are more than 20. - The
increment_views()method is used to increase the news views by 1 and save the changes to the database.
infoYou will learn more about "derived attributes" in the Database course. In the meantime, if you would like to know more about the
@propertydecorator, you can read Python's documentation on the property class.
Step 2: Creating and Applying Model Migrations
What are model migrations?
- Model migrations are Django's way of tracking changes to your database models.
- These migrations are instructions to change the database table structure according to the changes in the model defined in your latest code.
How do we perform model migrations?
-
Run the following command to create model migrations.
python manage.py makemigrationsinfomakemigrationscreates migration files containing model changes that have not yet been applied to the database. -
Run the following command to apply migrations to the local database.
python manage.py migrateinfomigrateapplies the model changes listed in the migration files to the database.
Every time you make changes to the model, such as adding or changing attributes, you MUST perform migrations to apply these changes.
Tutorial: Connecting the View and Template
Here, you will connect the View component with the Template component using Django.
Step 1: Integrating MVT Components
We will import the necessary modules and create the show_main view function.
-
Open the
views.pyfile located in themainapplication file. -
If not already present, add the following import lines at the very top of the file.
from django.shortcuts import renderCode Explanation:
from django.shortcuts import renderis used to import the render function from thedjango.shortcutsmodule.- The render function will be used to render HTML files along with the data given to it.
-
Add the
show_mainfunction below the imports:def show_main(request):
context = {
'npm' : '240123456',
'name': 'Haru Urara',
'class': 'PBP A'
}
return render(request, "main.html", context)Code Explanation:
-
The code snippet above declares the
show_mainfunction, which accepts arequestparameter. This function will handle HTTP requests and return the appropriate view. -
contextis a dictionary containing data to be sent to the view. Currently, there are three pieces of data included, namely:npm: Your NPM.name: Your name.class: Your class.
-
return render(request, "main.html", context)is used to render themain.htmlview using therenderfunction. Therenderfunction takes three arguments:request: This is an HTTP request object sent by the user.main.html: This is the name of the template file that will be used to render the view.context: This is the dictionary containing data that will be passed to the view for dynamic rendering.
-
Step 2: Template Modification
Here, you will modify the main.html template to display data that has been retrieved from the model.
-
Open the
main.htmlfile that was previously created in thetemplatesdirectory in themaindirectory. -
Change the name and class to the necessary Django code to display the data.
...
<h5>NPM: </h5>
<p>{{ npm }}</p>
<h5>Name: </h5>
<p>{{ name }}</p>
<h5>Class: </h5>
<p>{{ class }}</p>
...
Code Explanation:
The Django syntax
{{ npm }},{{ name }}, and{{ class }}, usually called template variables, is used to display the values of variables that have been defined in thecontextvariable.
Tutorial: Configuring URL Routing
After creating a template and configuring it in our view, we will now learn about routing so that our main application can be accessed by a browser client.
What is Routing in Django?
Routing is the process of mapping a URL (endpoint) to a view function or class-based view that we've defined. When a client accesses a URL, Django will attempt to match this URL with patterns defined in the urls.py file. If it finds a match, Django will execute the corresponding view and return a response to the client.
Note: A class-based view is an alternative method you can use to create views; instead of using functions, it uses classes to help better organize your code.
Let's try implementing some simple routing by mapping http://localhost:8000/ to the show_main function you have made!
Step 1: Configuring the URL Routing for the main application
- Create a
urls.pyfile in themaindirectory. - Paste the following code inside
urls.py:
from django.urls import path
from main.views import show_main

app_name = 'main'

urlpatterns = [
    path('', show_main, name='show_main'),
]
Code Explanation:
- The
urls.pyfile contains routing configurations for themainapplication. - We import the
pathfunction from thedjango.urlsmodule to define URL patterns. - We import the
show_mainfunction frommain.viewsto be called when a URL matches the defined pattern. app_name = 'main'is used to give a unique namespace to URLs in an application, making them easily distinguishable when there are many applications and endpoints in our Django project.urlpatternsis a list containingURLPatternobjects returned by thepath()function.- In this example, there is only one route
''(root), which will call theshow_mainview. - The optional argument
name='show_main'allows us to easily reverse URLs using a path's name, not its hardcoded string. - You can learn more about reversing URLs here.
Step 2: Configuring the Project's URL Routing
Next, we will complete the routing by configuring the urls.py file at the project level so that our project can map requests to routes in the main application.
- Open the
urls.pyfile inside thefootball_newsproject directory, not the one inside themaindirectory. - Import the
includefunction fromdjango.urls.
...
from django.urls import path, include
...
- Add the following URL route in the
urlpatternsvariable to direct requests to themainview.
urlpatterns = [
    ...
    path('', include('main.urls')),
    ...
]
Code Explanation
- The
urls.pyfile at the project level is responsible for managing URL routes for the whole project. - The
includefunction is used to import URL route patterns from other applications (in this case, themainapplication) into the project-levelurls.pyfile. - The URL path
''will be forwarded to the routes defined inurls.pyinside themainapplication. The path URL is deliberately set to the empty string so the main page can be accessed directly.
As an example, if the URL path was instead configured as path('main_application/', ...) on the example above, then you would need to access http://localhost:8000/main_application/ to view the main page. Setting the URL path to '' allows you to access the main page directly with http://localhost:8000/.
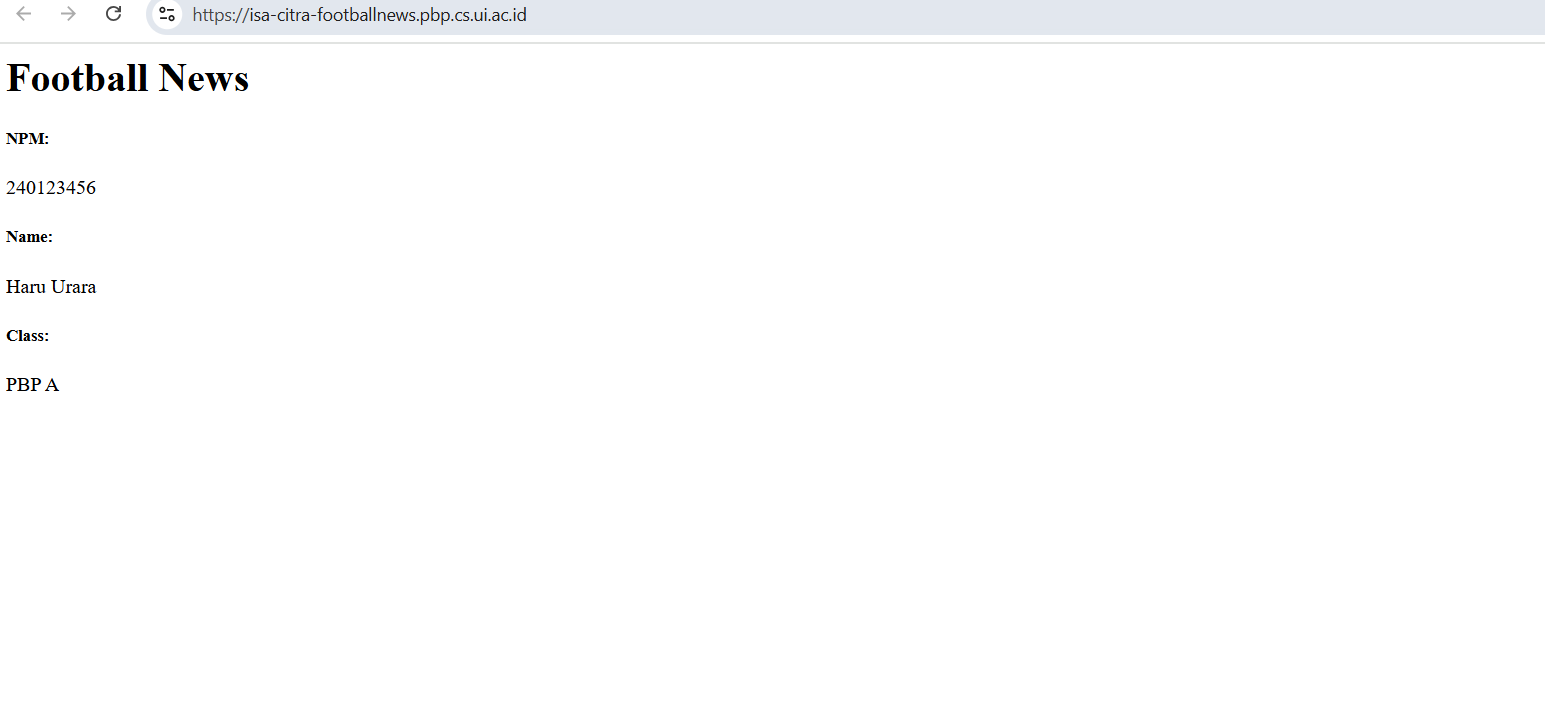
- Run the Django project with the command
python manage.py runserver. - Open http://localhost:8000/ in your web browser to view the page you have created.
How Does Routing Work?
To get a better idea on how routing works, take a look at the following diagram illustrating the difference between urls.py at the project level and urls.py at the application level.
Diagram Explanation
- Client Request → A request made by a browser/HTTP client.
- Project-level
urls.py→ All requests first make their way tourls.pyat the project level.- If the requested URL matches the pattern associated with
include('main.urls'), the request will be forwarded to the application-levelurls.py. - If it doesn't match, Django returns
404 Not Found.
- If the requested URL matches the pattern associated with
- Application-level
urls.py→ The request will be processed according to the patterns defined in the application (main/urls.py). - View → If a match is found, the corresponding function/class-based view will be executed.
What is the Difference Between urls.py in a Project and urls.py in Applications?
- The
urls.pyfile in applications sets up specific URL routes for the features within that app. - The
urls.pyfile in a project directs URL routes for the whole project and can import URL routes from theurls.pyfiles of applications, allowing the apps in a Django project to be modular and separate.
With the above steps, you have successfully implemented a basic view in the main app and connected it with the project's URL route. Make sure you understand each step and the information provided to enable the view in your Django project.
Tutorial: Introduction to Django Unit Testing
Unit testing can be used to check if the code you have written works as intended. It is also helpful when you make changes to the code. By using tests, you can verify whether the changes made cause any unwanted behavior in the application.
Step 1: Creating Unit Tests
- Create the
tests.pyfile in themainapp directory. - Write the following code in
tests.py:
from django.test import TestCase, Client
from .models import News

class MainTest(TestCase):
    def test_main_url_is_exist(self):
        response = Client().get('')
        self.assertEqual(response.status_code, 200)

    def test_main_using_main_template(self):
        response = Client().get('')
        self.assertTemplateUsed(response, 'main.html')

    def test_nonexistent_page(self):
        response = Client().get('/burhan_always_exists/')
        self.assertEqual(response.status_code, 404)

    def test_news_creation(self):
        news = News.objects.create(
          title="BURHAN FC WINS",
          content="BURHAN FC 1-0 PANDA BC",
          category="match",
          news_views=1001,
          is_featured=True
        )
        self.assertTrue(news.is_news_hot)
        self.assertEqual(news.category, "match")
        self.assertTrue(news.is_featured)

    def test_news_default_values(self):
        news = News.objects.create(
          title="Test News",
          content="Test content"
        )
        self.assertEqual(news.category, "update")
        self.assertEqual(news.news_views, 0)
        self.assertFalse(news.is_featured)
        self.assertFalse(news.is_news_hot)

    def test_increment_views(self):
        news = News.objects.create(
          title="Test News",
          content="Test content"
        )
        initial_views = news.news_views
        news.increment_views()
        self.assertEqual(news.news_views, initial_views + 1)

    def test_is_news_hot_threshold(self):
        # Test news with exactly 20 views (should not be hot)
        news_20 = News.objects.create(
          title="News with 20 views",
          content="Test content",
          news_views=20
        )
        self.assertFalse(news_20.is_news_hot)

        # Test news with 21 views (should be hot)
        news_21 = News.objects.create(
          title="News with 21 views",
          content="Test content",
          news_views=21
        )
        self.assertTrue(news_21.is_news_hot)
Code Explanation
- The
Clientclass imported fromdjango.testis used to simulate a client for unit testing purposes. - The
test_main_url_is_existfunction checks whether the server gives a 200 (OK) response when the client accesses the endpoint (main page). - The
test_main_using_main_templatefunction checks whether the main page returns status code 200 and is rendered using themain.htmltemplate. - The
test_nonexistent_pagefunction tests that if the client accesses a URL that doesn't exist (e.g., /burhan_always_exists/), the Django application will return a 404 (Not Found) status code. - The
test_news_creationfunction tests creating a new News object with specific attributes (title, content, category, news_views, and is_featured). After the object is created, it checks the is_news_hot property, category, and is_featured. - The
test_news_default_valuesfunction tests the default values of the News model when only required fields (title and content) are filled, ensuring default category is "update", news_views is 0, is_featured is False, and is_news_hot is False. - The
test_increment_viewsfunction tests the functionality of the increment_views() method that increases views by 1. - The
test_is_news_hot_thresholdfunction tests the threshold of the is_news_hot property, ensuring news with 20 views is not considered hot, while news with 21 views is considered hot.
Step 2: Running the Unit Tests
There are 2 ways to run tests:
-
Run all the tests in every application's
test.pyfile.python manage.py test(Make sure to run the command at the project root directory asmanage.pyis a project-level file). -
Run the tests for a specific application only.
python manage.py test <application_name>
If the tests run successfully, you will see the following information:
Found 7 test(s).
Creating test database for alias 'default'...
System check identified no issues (0 silenced).
..
----------------------------------------------------------------------
Ran 7 tests in 0.016s

OK
Destroying test database for alias 'default'...
Push to Repository
After completing this tutorial, save all changes to GitHub and PWS:
git add .
git commit -m "Complete tutorial 1: Django MVT implementation"
git push origin master
git push pws master
Tutorial Final Results
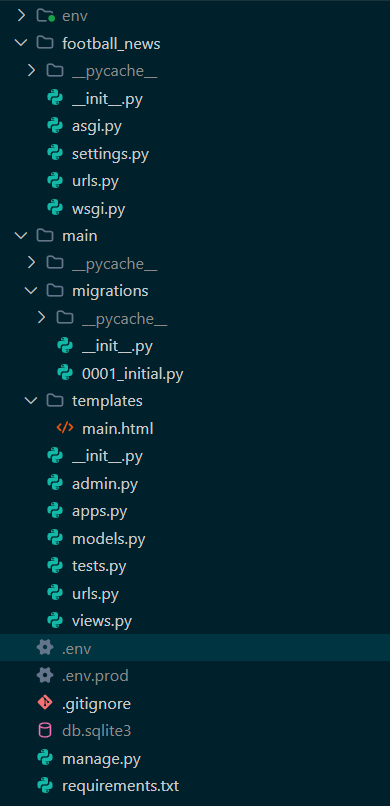
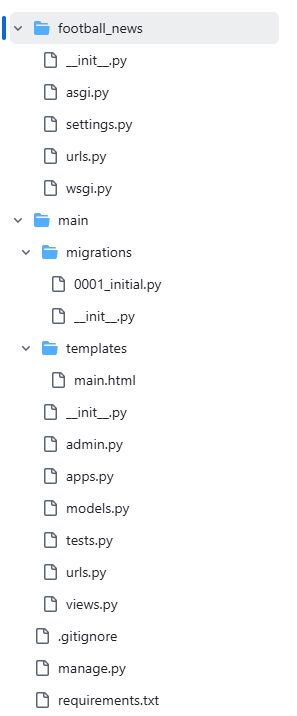
Make sure your project structure matches the following images:
-
Local directory structure
-
GitHub repository structure
-
Deployed website on PWS
Final Words
Congratulations! You have completed this tutorial on the basics of Django, MVT, and unit testing!
Word of advice, make sure you understand every line of code you type. Don't just copy-paste without understanding it first. If you run into any problems, don't hesitate to ask the teaching assistants or your friends. Keep up the spirit in taking PBP classes for the rest of the semester, and don't forget to enjoy every process. Good luck!
Additional References
Contributors
- Valentino Kim Fernando (SOY)
- Clarence Grady (GRD)
- Malvin Scafi (UMA)
- Danniel (DAN)
- Joshua Montolalu (UMI) (English Translator)
Credits
This tutorial was developed based on PBP Odd 2025 and PBP Even 2024 written by the 2025 Platform-Based Programming Teaching Team. All tutorials and instructions included in this repository are designed so that students who are taking the Platform-Based Programming course can complete the tutorials during lab sessions.