Tutorial 5: JavaScript dan AJAX
Platform-Based Programming (CSGE602022) — Organized by the Faculty of Computer Science Universitas Indonesia, Odd Semester 2025/2026
Learning Objectives
After completing this tutorial, students are expected to be able to:
- Understand the usage of JavaScript in the context of front-end development
- Understand the basics of JavaScript
- Implement AJAX and Fetch API safely
JavaScript
Introduction to JavaScript
JavaScript is a cross-platform, high-level, multi-paradigm programming language. The multi-paradigm feature of JavaScript allows it to support object-oriented programming, imperative programming, and functional programming. JavaScript itself is an implementation of ECMAScript, which servers as the core of the JavaScript language. Other implementations of ECMAScript that are similar to JavaScript are JScript (Microsoft) and ActionScript (Adobe).
JavaScript, together with HTML and CSS, serve as the three main technologies used in web development. The benefit of using JavaScript in web development is that it allows us to dynamically manipulate webpages and it increases interaction between web pages and users. That is why most modern websites are using JavaScript on their webpages to give the best experience to the user. Some things we can do with JavaScript include displaying information based on the time, recognizing the type of device used, validating forms or data, creating cookies (not literal cookies, but HTTP cookies), changing the CSS of an element dynamically, and much more.
In general, JavaScript is used on the client-side of a webpage (client-side JavaScript), but there are some types of JavaScript that are used on the server-side of a webpage (server-side JavaScript) like node.js. The term "client-side" means the JavaScript code will be executed on the user's system, not on the website's server. This means that the JavaScript code complexity will not affect the server's performance, but the user's system performance; the more complex the JavaScript code, the more memory the browser will use.
In the PBD course, we will only focus on the client-side JavaScript.
JavaScript Execution Stages by the Browser
Take a look at the diagram below to understand how JavaScript is executed by the browser.

After the browser downloads the HTML webpage, the browser will look for the <script></script> tag and check if it contains embedded JavaScript or external JavaScript. If the script tag refers to an external JavaScript code, the browser will download that file first.
Writing JavaScript
JavaScript can be written as embedded JavaScript or external JavaScript. JavaScript code can be defined or written as embedded code in an HTML file or as a separate file. If written outside HTML, the file extension used to save JavaScript files is .js. Below are some examples on importing JavaScript code.
JavaScript can be placed in the head or body of an HTML file. Note that JavaScript code must be placed between the <script> and </script> tags. You can place more than one script tag containing JavaScript code in an HTML file.
Embedded JavaScript in HTML
<script type="text/JavaScript">
    alert("Hello World!");
</script>
External JavaScript in HTML
<script type="text/JavaScript" src="js/script.js"></script>
alert("Hello World!");
The <script> tag is not needed in the external JavaScript file.
Separating JavaScript code in an external file can provide several benefits, namely: the code can be used in other HTML files, the JavaScript and HTML do not conflict so developers can be more focused when developing the application, and the page loading speed can be improved. .js files are usually cached by the browser, so if we open the page again and there are no changes to the .js file, the browser will not request the file from the server. Instead, it will use the cached file stored previously.
JavaScript Execution
After the JavaScript code has been loaded, the browser will immediately start executing it. If the code is not event-triggered, then it will be executed immediately. If the code is event-triggered, then it will only be executed if the defined event is triggered.
// immediately executed
alert("Hello World");

// immediately executed
var obj = document.getElementById("object");
// immediately executed, adds the onclick event handler to the "obj" element
obj.onclick = function () {
    // is only executed if the "obj" element is clicked
    alert("You just clicked the object!");
};
JavaScript Syntax
Variables
Defining variables in JavaScript is fairly straightforward. Here is an example.
var example = 0; // var example is an integer
var example = "example"; // var example is a string
var example = true; // var example is a boolean
JavaScript can hold many types of data; from strings, integers, even objects. Unlike Java where data types are defined with head variables (for example, if you wanted to create a variable with the int data type, the syntax would be int x = 9), JavaScript is a loosely typed dynamic language, meaning that you do not need to specify the data type in the head variable; JavaScript will automatically determine the data type based on existing standards (as shown in the example above).
There are several rules in choosing identifiers or variable names in JavaScript. The first character must be an alphabetical character, an underscore (_), or a dollar sign ($). In addition, JavaScript identifiers are case-sensitive.
String Concatenation
In JavaScript, we can concatenate strings with other strings, just like in Java.
var str1 = "PBP" + " " + "Fun";
var str2 = "PBP";
var str3 = "Fun";
var str4 = str2 + " " + str3;
var str5 = "Fun";
var str6 = `PBP ${str5}`;  // Produces the same output as "PBP" + " " + str5
JavaScript Scopes
Local Variables
Local variables are variables defined inside functions; as such, they can only be accessed by code inside the function.
// code outside thisFunction() cannot access the courseName variable
function thisFunction() {
    var courseName = "PBP";
    // code inside the function can access the courseName variable
}
Global Variables
Global variables are variables defined outside functions and can be accessed by other JavaScript code in the same file.
var courseName = "PBP";
function thisFunction() {
    // code inside the function can access the courseName variable
}
Auto Global Variables
Values assigned to variables that have not been declared automatically become global variables, even if the variable is within a function.
thisFunction(); // thisFunction() must be called first
console.log(courseName); // Print "PBP" in the JavaScript console
function thisFunction() {
    courseName = "PBP";
}
Accessing Global Variables from HTML
You can access variables that are in JavaScript files in HTML files that load the JavaScript file.
...
<input type="text" onclick="this.value=courseName" />
...
...
var courseName = "PBP";
...
Functions and Events
A function is a group of code that can be called anywhere in the code program (similar to a method in Java). This reduces redundancy of code (reduces code that may be repeated). Besides that, functions in JavaScript are useful to dynamically invoke elements. Functions can be called by other functions or triggered by an event (which will be explained below). Below is an example of an index.html file.
...
<input type="button" value="magicButton" id="magicButton" onclick="hooray();" />
...
Here is the code in javascript.js.
...
function hooray() {
    alert("Yahoo!");
}
...
If magicButton is pressed, the onclick function will run the hooray() function in javascript.js, which will display an alert containing the message we defined.
The onclick code is an example of a JavaScript event. Events are how JavaScript makes websites dynamic. What onclick does is indicate what JavaScript will do if the element is pressed. Events are usually associated with functions that serve as commands for JavaScript to execute. Besides onclick, we can use events like onchange, onmouseover, onmouseout, and many more. You can read about them here.
JavaScript DOM
HTML DOM
The HTML DOM (Document Object Model) is a standard on how to modify, retrieve, and delete HTML elements. The HTML DOM can be accessed through JavaScript or other programming languages. The details can be found here.
Here is an example of its implementation.
...
<div>
    <p onclick="myFunction()" id="demo">Example of HTML DOM</p>
</div>
...
...
function myFunction() {
    document.getElementById("demo").innerHTML = "YOU CLICKED ME!";
}
...
CSS DOM
Just like the HTML DOM, the CSS DOM can dynamically modify CSS through JavaScript. The details can be found here.
Here is an example of its implementation.
...
<p id="blueText" onclick="changeColor()">Click me v2</p>
...
...
function changeColor(){
    document.getElementById("blueText").style.color="blue";
}
...
AJAX
Introduction to AJAX
AJAX is an abbreviation of Asynchronous JavaScript And XML.
AJAX is not a programming language, but a technology that integrates the browser (which requests data from the web server) with JavaScript and the HTML DOM (which displays data). AJAX can use XML to send data, but it can also use text or JSON to send data. AJAX allows a web page to fetch data asynchronously by sending data to the server in the background. This means we can update parts of a page without having to refresh the entire page.
Here is a diagram of how AJAX works.
- An event occurs on the web page (for example, the submit data button is pressed)
- An
XMLHttpRequestobject is created by JavaScript - The
XMLHttpRequestobject sends the request to the server - The server processes the request
- The server returns a response to the web page
- The response is read by JavaScript
- The next action will be triggered by JavaScript according to the steps defined in the function (for example, update the data on the page)
XMLHttpRequest was previously the standard way to make AJAX requests in JavaScript. However, XMLHttpRequest has some drawbacks, including cumbersome handling when working with promises and callbacks and limited support for modern code patterns.
Therefore, fetch() was introduced as a new API for making HTTP requests with a simpler syntax and direct support for promises. This allows developers to write code that is easier to read, easier to manage, and better aligned with modern asynchronous paradigms like async/await. fetch() is also more flexible in handling other data formats such as JSON, and provides a better API for handling errors and HTTP responses. A more detailed explanation of the differences between fetch and XMLHttpRequest can be found here.
In this course, you will be performing AJAX on a web browser using the fetch() function provided by JavaScript. An overview on the use of fetch() for making AJAX calls can be seen here.
Fetch API
The Fetch API is a new API that was introduced in ECMAScript 2020 as a new standard for making requests with Promise. The Fetch API provides an interface for retrieving resources (including across the network). It is a more flexible and powerful replacement of XMLHttpRequest. The Fetch API is generally used to implement AJAX more easily than with XMLHttpRequest. Additionally, the Fetch API supports more HTTP methods and headers compared to traditional AJAX.
The fetch() function has the following parameters:
url: The URL of the resource that will be requestedmethod: The HTTP method that will be usedheaders: The HTTP headers that will be sentbody: The content of the request
The fetch() function returns an Response object. The Response object has the following properties:
status: Thestatuscode of the responseheaders: The HTTP headers of the responsebody: The content of the response
You can learn more about the Fetch API here.
Async dan Await Functions
Before learning how to use the fetch() function, it's a good idea to first learn about the async and await functions which allow us to implement AJAX without the need to use an external library, such as jQuery.
The async and await functions are new functions introduced in ECMAScript 2017. The async function is used to indicate that a function may return its result asynchronously, while the await function is used to wait for the result of an async function.
You can learn more about the async and await functions here.
Using the Fetch API
The Fetch API provides a JavaScript interface to access and manipulate parts of the protocol, such as requests and responses. The API also provides the fetch() global method that provides an easy and reliable way to fetch data asynchronously across the entire network.
Unlike XMLHttpRequest, which is based on callbacks, Fetch API is based on Promise and provides an alternative that is easier and more reliable to use in service workers. The API also integrates advanced HTTP concepts such as CORS and other extensions to HTTP.
Here is an example of using the Fetch API with the async and await functions to perform AJAX.
async function fetchData() {
    const response = await fetch("https://jokes-bapack2-api.yuana.id/v1/text/random");
    const data = await response.json();
    return data;
}

const joke = await fetchData();
console.log(joke);
The code above uses AJAX to request data from the "modern dad jokes" API asynchronously. The AJAX request will store the result in the joke variable.
You can learn more about the Fetch API at this link.
Pre-Tutorial Notes
Before you start, and to help you follow Tutorial 5 well, we expect the following results from Tutorial 4:
-
The
football-newsdirectory structure locally is as follows.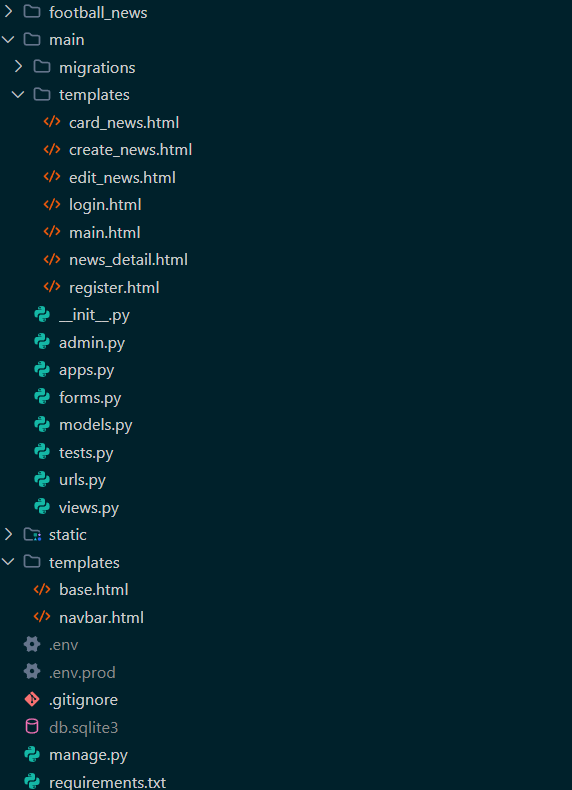
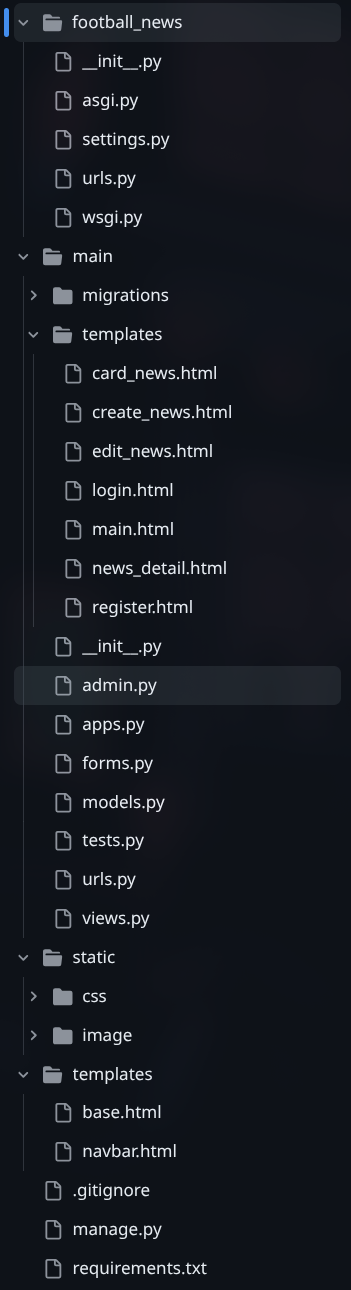
-
The football-news repository structure on GitHub is as follows.
Tutorial: Implementing a Toast Notification
First, let's implement a toast notification component.
A toast is a user interface (UI) element designed to display a short message or notification in a non-instrusive way. In this tutorial, we will implement a reusable toast component that we can use to give visual feedback, for instance, when a news article is successfully created.
Step 1: Constructing the Main Toast Component
Open the templates folder in your root project directory. Next, create a new file inside the folder named toast.html and add the following code:
{% load static %}
<div
    class="fixed bottom-8 right-8 p-4 px-8 rounded-xl shadow-xl z-50 opacity-0 transition-all duration-300 translate-y-64 flex items-center gap-4"
    id="toast-component"
>
    <span id="toast-icon" class="text-2xl"></span>
    <div>
        <h3 class="font-bold" id="toast-title">
            This is a Sample Title
        </h3>
        <p class="text-gray-700 text-sm line-clamp-3" id="toast-message">
            This is a Sample Message
        </p>
    </div>
</div>
<script src="{% static 'js/toast.js' %}"></script>
The HTML code above defines the visual structure and initial placement of the toast component. CSS properties such as fixed, bottom-8, and right-8 place the notification statically on the bottom right corner of the screen. The opacity-0 and translate-y-64 classes are used to hide the notification in its initial state, create an animation effect making it pop up, and finally disappear. The <script> tag at the end of the code will load the JavaScript logic used to control the behavior of the notification.
Step 2: Implementing the JavaScript Logic for the Toast
To implement the toast's main functionality, create a file named toast.js inside the static/js folder. Then, add the following code:
function showToast(title, message, type = 'normal', duration = 3000) {
    const toastComponent = document.getElementById('toast-component');
    const toastTitle = document.getElementById('toast-title');
    const toastMessage = document.getElementById('toast-message');

    if (!toastComponent) return;

    // Remove all type classes first
    toastComponent.classList.remove(
        'bg-red-50', 'border-red-500', 'text-red-600',
        'bg-green-50', 'border-green-500', 'text-green-600',
        'bg-white', 'border-gray-300', 'text-gray-800'
    );

    // Set type styles and icon
    if (type === 'success') {
        toastComponent.classList.add('bg-green-50', 'border-green-500', 'text-green-600');
        toastComponent.style.border = '1px solid #22c55e';
    } else if (type === 'error') {
        toastComponent.classList.add('bg-red-50', 'border-red-500', 'text-red-600');
        toastComponent.style.border = '1px solid #ef4444';
    } else {
        toastComponent.classList.add('bg-white', 'border-gray-300', 'text-gray-800');
        toastComponent.style.border = '1px solid #d1d5db';
    }

    toastTitle.textContent = title;
    toastMessage.textContent = message;

    toastComponent.classList.remove('opacity-0', 'translate-y-64');
    toastComponent.classList.add('opacity-100', 'translate-y-0');

    setTimeout(() => {
        toastComponent.classList.remove('opacity-100', 'translate-y-0');
        toastComponent.classList.add('opacity-0', 'translate-y-64');
    }, duration);
}
showToast Function Explanation:
The showToast function is the core of the toast component. This function takes four parameters:
title: The title of the notification to be displayed.message: The main message to be displayed.type: The type of notification ('success','error', or'normal'). This parameter determines the color scheme and notification icon.duration: The duration the notification will be visible on screen (in milliseconds).
The logic inside the function dynamically modifies CSS classes and contents of HTML elements based on the given parameters. This function handles:
- Element Selection: Accesses the toast's HTML elements by their ID.
- Class Deletion: Deletes the previous type's classes to ensure the notification is styled properly.
- Style Application: Applies the appropriate CSS classes and changes the border color and icon based on the
typeparameter. - Content Updates: Updates the title and notification message.
- Animation Display: Removes the classes that hide the toast (
opacity-0,translate-y-64) and adds classes to display it (opacity-100,translate-y-0), creating a sliding effect from below. - Animation Removal: Uses
setTimeoutto automatically hide the toast after a set duration, returning the CSS properties to its initial state.
Step 3: Integrating the Toast Component into the Base Template
After completing the toast component, the next step is to insert it into the base.html file so that the showToast function can be accessed from all pages that inherit (extend) the base template. Make sure your base.html file includes the follwing line of code in the <body> element:
...
<body>
    {% block content %}

    {% endblock %}

    {% include 'toast.html' %}
</body>
...
Step 4: Testing the Toast Functionality
To check if the toast notification is working properly, add the following HTML code to any page that extends base.html:
<button
  onclick="showToast('Sample Title', 'This is a sample message for the toast notification.')"
>
  Click to Show Toast
</button>
When the button is clicked, a toast notification will appear on the screen. Here is what it should look like:

Tutorial: Displaying Football News Data on the Main Page with AJAX
We will be displaying the Football News data using a different method from the previous tutorials. This time, we will need the help of JavaScript in our HTML file. But first, let's modify our views first.
Step 1: Edit the show_json Function
First, add the JsonResponse import at the top of the main/views.py file:
from django.http import HttpResponseRedirect, JsonResponse
Then, edit the show_json function:
def show_json(request):
    news_list = News.objects.all()
    data = [
        {
            'id': str(news.id),
            'title': news.title,
            'content': news.content,
            'category': news.category,
            'thumbnail': news.thumbnail,
            'news_views': news.news_views,
            'created_at': news.created_at.isoformat() if news.created_at else None,
            'is_featured': news.is_featured,
            'user_id': news.user_id,
        }
        for news in news_list
    ]

    return JsonResponse(data, safe=False)
Code Explanation:
Here we use list comprehension to add all the News objects into a list. JsonResponse(data, safe=False) sends the data in JSON format to the client. The safe=False parameter is used because the data being sent is a list, not a dictionary.
Step 2: Update the main.html Template to Use AJAX
Update the contents of the main/templates/main.html file with the following code:
{% extends 'base.html' %}
{% load static %}

{% block meta %}
<title>Football News</title>
{% endblock meta %}

{% block content %}
{% include 'navbar.html' %}
<div class="bg-gray-50 w-full pt-16 min-h-screen">
  <div class="max-w-7xl mx-auto px-4 sm:px-6 lg:px-8 py-8">
    <!-- Header Section -->
    <div class="mb-8">
      <h1 class="text-3xl font-bold text-gray-900 mb-2">Latest Football News</h1>
      <p class="text-gray-600">Stay updated with the latest football stories and analysis</p>
    </div>

    <!-- Filter Section -->
    <div class="flex flex-col sm:flex-row sm:items-center sm:justify-between mb-8 bg-white rounded-lg border border-gray-200 p-4">
      <div class="flex space-x-3 mb-4 sm:mb-0">
        <a id="filter-all" class="bg-green-600 text-white px-4 py-2 rounded-md font-medium transition-colors hover:bg-green-700">
          All News
        </a>
        <a id="filter-my" class="bg-white text-gray-700 border border-gray-300 px-4 py-2 rounded-md font-medium transition-colors hover:bg-green-600 hover:text-white">
          My News
        </a>
      </div>
      {% if user.is_authenticated %}
        <div class="text-sm text-gray-500">Last login: {{ last_login }}</div>
      {% endif %}
    </div>

    <!-- Loading State -->
    <div id="loading" class="bg-white rounded-lg border border-gray-200 p-12 text-center hidden">
      <svg class="animate-spin h-8 w-8 text-green-600 inline-block" xmlns="http://www.w3.org/2000/svg" fill="none" viewBox="0 0 24 24">
        <circle class="opacity-25" cx="12" cy="12" r="10" stroke="currentColor" stroke-width="4"></circle>
        <path class="opacity-75" fill="currentColor" d="M4 12a8 8 0 018-8v4a4 4 0 00-4 4H4z"></path>
      </svg>
      <p class="text-gray-600 mt-3">Loading news...</p>
    </div>

    <!-- Error State -->
    <div id="error" class="hidden"></div>

    <!-- News Grid -->
    <div id="grid" class="hidden"></div>

    <!-- Empty State -->
    <div id="empty" class="bg-white rounded-lg border border-gray-200 p-12 text-center hidden">
      <div class="w-32 h-32 mx-auto mb-4">
        <img src="{% static 'image/no-news.png' %}" alt="No news available" class="w-full h-full object-contain">
      </div>
      <h3 class="text-lg font-medium text-gray-900 mb-2">No news found</h3>
      <p class="text-gray-500 mb-6">Be the first to share football news with the community.</p>
      <a href="{% url 'main:create_news' %}" class="inline-flex items-center px-4 py-2 bg-green-600 text-white rounded-md hover:bg-green-700 transition-colors">
        Create News
      </a>
    </div>
  </div>
</div>

{% endblock content %}
Code Explanation:
The template has been modified to support AJAX functionality. Each container has a specific ID (loading, error, grid, empty) and initially has the hidden class to keep them hidden when the page is first loaded. JavaScript will then show or hide the appropriate containers based on the page's state: it will show the loading container when retrieving data, the error container when there's an error, the empty container when there's no data, or the grid container to display the news list.
Step 3: Add Inline JavaScript to main.html
Next, we need to add some JavaScript code in the HTML template. Add some script tags before the {% endblock content %} tag in main/templates/main.html and place the following code inside:
....
<script>
// Configuration
const NEWS_API_ENDPOINT = "{% url 'main:show_json' %}";
const CURRENT_USER_ID = "{{ user.id|default_if_none:'' }}";

// DOM Elements
const loadingSpinner = document.getElementById('loading');
const errorMessage = document.getElementById('error');
const emptyStateDisplay = document.getElementById('empty');
const newsGridContainer = document.getElementById('grid');
const showAllNewsButton = document.getElementById('filter-all');
const showMyNewsButton = document.getElementById('filter-my');

// State Variables
let activeFilter = 'all';
let allNewsData = [];

// Update filter button appearance
function updateFilterButtonsAppearance() {
  if (!showAllNewsButton || !showMyNewsButton) return;

  if (activeFilter === 'all') {
    showAllNewsButton.className = 'bg-green-600 text-white px-4 py-2 rounded-md font-medium transition-colors hover:bg-green-700';
    showMyNewsButton.className = 'bg-white text-gray-700 border border-gray-300 px-4 py-2 rounded-md font-medium transition-colors hover:bg-green-600 hover:text-white';
  } else {
    showMyNewsButton.className = 'bg-green-600 text-white px-4 py-2 rounded-md font-medium transition-colors hover:bg-green-700';
    showAllNewsButton.className = 'bg-white text-gray-700 border border-gray-300 px-4 py-2 rounded-md font-medium transition-colors hover:bg-green-600 hover:text-white';
  }
}

// Show/hide page sections
function displayPageSection({ showLoading = false, showError = false, showEmpty = false, showGrid = false }) {
  loadingSpinner.classList.toggle('hidden', !showLoading);
  errorMessage.classList.toggle('hidden', !showError);
  emptyStateDisplay.classList.toggle('hidden', !showEmpty);
  newsGridContainer.classList.toggle('hidden', !showGrid);

  // Add grid classes when showing grid
  if (showGrid) {
    newsGridContainer.className = 'grid grid-cols-1 md:grid-cols-2 lg:grid-cols-3 gap-6';
  }
}

// Get readable category name
function getReadableCategoryName(categoryCode) {
  const categoryMapping = {
    transfer: 'Transfer',
    update: 'Update',
    exclusive: 'Exclusive',
    match: 'Match',
    rumor: 'Rumor',
    analysis: 'Analysis',
  };
  return categoryMapping[categoryCode] || categoryCode;
}

// Create news card element
function buildNewsCardElement(newsItem) {
  const articleElement = document.createElement('article');
  articleElement.className = 'bg-white rounded-lg border border-gray-200 hover:shadow-lg transition-shadow duration-300 overflow-hidden flex flex-col h-full';

  const detailLink = `{% url 'main:show_news' '00000000-0000-0000-0000-000000000000' %}`.replace('00000000-0000-0000-0000-000000000000', newsItem.id);
  const editLink = `{% url 'main:edit_news' '00000000-0000-0000-0000-000000000000' %}`.replace('00000000-0000-0000-0000-000000000000', newsItem.id);
  const deleteLink = `{% url 'main:delete_news' '00000000-0000-0000-0000-000000000000' %}`.replace('00000000-0000-0000-0000-000000000000', newsItem.id);

  const formattedDate = new Date(newsItem.created_at).toLocaleDateString('en-US', {
    year: 'numeric',
    month: 'short',
    day: 'numeric'
  });

  const categoryLabel = getReadableCategoryName(newsItem.category);
  const isFeatured = newsItem.is_featured;
  const isHot = newsItem.news_views > 20;

  const thumbnailHtml = newsItem.thumbnail
    ? `<img src='${newsItem.thumbnail}' alt='${newsItem.title}' class='w-full h-full object-cover'>`
    : `<div class='w-full h-full bg-gradient-to-br from-gray-100 to-gray-200 flex items-center justify-center'></div>`;

  const featuredBadge = isFeatured
    ? `<span class='inline-flex items-center px-2 py-1 rounded text-xs font-medium bg-yellow-100 text-yellow-800'>Featured</span>`
    : '';
  const hotBadge = isHot
    ? `<span class='inline-flex items-center px-2 py-1 rounded text-xs font-medium bg-red-100 text-red-800'>Hot</span>`
    : '';

  const editDeleteButtons = CURRENT_USER_ID && Number(CURRENT_USER_ID) === Number(newsItem.user_id)
    ? `<div class='flex space-x-2'>
        <a href='${editLink}' class='text-gray-600 hover:text-gray-700 text-sm transition-colors'>Edit</a>
        <a href='${deleteLink}' class='text-red-600 hover:text-red-700 text-sm transition-colors' onclick='return confirm("Are you sure you want to delete this article?")'>Delete</a>
      </div>`
    : '';

  const completeCardHtml = `
    <div class="aspect-[16/9] relative overflow-hidden">
      ${thumbnailHtml}
      <div class="absolute top-3 left-3">
        <span class="inline-flex items-center px-2.5 py-0.5 rounded-md text-xs font-medium bg-green-600 text-white">${categoryLabel}</span>
      </div>
      <div class="absolute top-3 right-3 flex space-x-2">
        ${featuredBadge}
        ${hotBadge}
      </div>
    </div>
    <div class="p-5 flex flex-col flex-1">
      <div class="flex items-center text-sm text-gray-500 mb-3">
        <time>${formattedDate}</time>
        <span class="mx-2">•</span>
        <span>${newsItem.news_views} views</span>
      </div>
      <h3 class="text-lg font-semibold text-gray-900 mb-3 line-clamp-2 leading-tight">
        <a href="${detailLink}" class="hover:text-green-600 transition-colors">${newsItem.title}</a>
      </h3>
      <p class="text-gray-600 text-sm leading-relaxed line-clamp-3 mb-4">${newsItem.content}</p>
      <div class="pt-4 border-t border-gray-100 flex items-center justify-between">
        <a href="${detailLink}" class="text-green-600 hover:text-green-700 font-medium text-sm transition-colors">Read more</a>
        ${editDeleteButtons}
      </div>
    </div>
  `;

  articleElement.innerHTML = completeCardHtml;
  return articleElement;
}

// Render all news cards
function renderAllNewsCards(newsItems) {
  newsGridContainer.innerHTML = '';
  newsItems.forEach(newsItem => {
    const cardElement = buildNewsCardElement(newsItem);
    newsGridContainer.appendChild(cardElement);
  });
}

// Filter and display news
function filterAndDisplayNews() {
  updateFilterButtonsAppearance();

  const filteredNews = activeFilter === 'all'
    ? allNewsData
    : allNewsData.filter(news => Number(news.user_id) === Number(CURRENT_USER_ID));

  if (filteredNews.length === 0) {
    displayPageSection({ showEmpty: true });
  } else {
    renderAllNewsCards(filteredNews);
    displayPageSection({ showGrid: true });
  }
}

// Fetch news data from server
async function fetchNewsFromServer() {
  try {
    displayPageSection({ showLoading: true });

    const response = await fetch(NEWS_API_ENDPOINT, {
      headers: { 'Accept': 'application/json' },
    });

    if (!response.ok) {
      throw new Error('Failed to fetch news data from server');
    }

    const newsData = await response.json();
    allNewsData = newsData || [];

    filterAndDisplayNews();
  } catch (error) {
    console.error('Error loading news:', error);
    displayPageSection({ showError: true });
  }
}

// Event handlers
function handleShowAllNewsClick() {
  activeFilter = 'all';
  filterAndDisplayNews();
}

function handleShowMyNewsClick() {
  activeFilter = 'my';
  filterAndDisplayNews();
}

// Initialize page
function initializeNewsPage() {
  showAllNewsButton.addEventListener('click', handleShowAllNewsClick);
  showMyNewsButton.addEventListener('click', handleShowMyNewsClick);

  fetchNewsFromServer();
}

// Start application
initializeNewsPage();
</script>
...
JavaScript Code Explanation:
This JavaScript code contains the logic to implement AJAX on the news page. It starts by configuring NEWS_API_ENDPOINT to retrieve JSON data from the server and CURRENT_USER_ID to filter news data for "My News".
The "DOM Elements" section contains references to HTML elements that we will be manipulating, like the loading spinner, error message, and grid container. The updateFilterButtonsAppearance() function changes the appearance of the filter buttons based on the current active filter, while displayPageSection() controls which sections are displayed.
The buildNewsCardElement() function creates a card HTML element for a news article using string templates. renderAllNewsCards() removes all old cards and renders new cards — this is how we "refresh" the page without reloading.
With this implementation, the main page now uses AJAX to load new data dynamically without needing to refresh the page. Data will be loaded asynchronously when the page is first opened and when the user clicks the filter buttons.
Tutorial: Implementing AJAX on the News Details Page
We will update the news details page to use AJAX so we can load data dynamically without the need to refresh the page.
Step 1: Update the show_json_by_id Function
Make sure that the show_json_by_id function already exists in main/views.py. Now, update the function with the following code:
def show_json_by_id(request, news_id):
    try:
        news = News.objects.select_related('user').get(pk=news_id)
        data = {
            'id': str(news.id),
            'title': news.title,
            'content': news.content,
            'category': news.category,
            'thumbnail': news.thumbnail,
            'news_views': news.news_views,
            'created_at': news.created_at.isoformat() if news.created_at else None,
            'is_featured': news.is_featured,
            'user_id': news.user_id,
            'user_username': news.user.username if news.user_id else None,
        }
        return JsonResponse(data)
    except News.DoesNotExist:
        return JsonResponse({'detail': 'Not found'}, status=404)
Step 2: Update the news_detail.html template to Use AJAX
Update the main/templates/news_detail.html file with the following template that supports AJAX:
{% extends 'base.html' %}
{% load static %}

{% block meta %}
<title>News Detail - Football News</title>
{% endblock meta %}

{% block content %}
<div class="bg-gray-50 w-full min-h-screen">
    <div class="max-w-6xl mx-auto px-4 sm:px-6 lg:px-8 py-8">

        <!-- Back Navigation -->
        <div class="mb-6">
            <a href="{% url 'main:show_main' %}" class="text-gray-600 hover:text-gray-900 font-medium transition-colors">
                ← Back to News
            </a>
        </div>

        <!-- Loading State -->
        <div id="loading-state" class="bg-white rounded-lg border border-gray-200 p-12 text-center">
            <svg class="animate-spin h-8 w-8 text-green-600 inline-block" xmlns="http://www.w3.org/2000/svg" fill="none" viewBox="0 0 24 24">
                <circle class="opacity-25" cx="12" cy="12" r="10" stroke="currentColor" stroke-width="4"></circle>
                <path class="opacity-75" fill="currentColor" d="M4 12a8 8 0 018-8v4a4 4 0 00-4 4H4z"></path>
            </svg>
            <p class="text-gray-600 mt-3">Loading news detail...</p>
        </div>

        <!-- Error State -->
        <div id="error-state" class="bg-white rounded-lg border border-gray-200 p-12 text-center hidden">
            <div class="w-16 h-16 mx-auto mb-4">
                <div class="text-red-500 text-5xl">⚠️</div>
            </div>
            <h3 class="text-lg font-medium text-gray-900 mb-2">Failed to load news</h3>
            <p class="text-gray-500">Please try again later.</p>
        </div>

        <!-- Article Content -->
        <article id="article-content" class="bg-white rounded-lg border border-gray-200 overflow-hidden hidden">

            <!-- Header -->
            <div class="p-6 sm:p-8">
                <div id="badges-container" class="flex flex-wrap items-center gap-2 mb-4">
                    <!-- Dynamic badges will be inserted here -->
                </div>

                <h1 id="article-title" class="text-3xl sm:text-4xl font-bold text-gray-900 leading-tight mb-4">
                    <!-- Title will be inserted here -->
                </h1>

                <div class="flex flex-wrap items-center text-sm text-gray-500 gap-4">
                    <time id="article-date">
                        <!-- Date will be inserted here -->
                    </time>
                    <span id="article-views">
                        <!-- Views will be inserted here -->
                    </span>
                </div>
            </div>

            <!-- Featured Image -->
            <div id="featured-image-container" class="px-6 sm:px-8 hidden">
                <img id="featured-image"
                     src=""
                     alt=""
                     class="w-full h-64 sm:h-80 lg:h-96 object-cover rounded-lg">
            </div>

            <!-- Content -->
            <div class="p-6 sm:p-8">
                <div class="prose prose-lg max-w-none">
                    <div id="article-content-text" class="text-gray-700 leading-relaxed whitespace-pre-line text-base sm:text-lg">
                        <!-- Content will be inserted here -->
                    </div>
                </div>
            </div>

            <!-- Author Info -->
            <div class="border-t border-gray-200 p-6 sm:p-8 bg-gray-50">
                <div class="flex items-center justify-between">
                    <div>
                        <div class="font-medium text-gray-900">
                            <p id="article-author">Author: Loading...</p>
                        </div>
                        <p class="text-sm text-gray-500">Author</p>
                    </div>
                </div>
            </div>
        </article>
    </div>
</div>
{% endblock content %}
Template Explanation:
This template has been modified from the regular news_detail.html into an AJAX version. The main difference is that all the news content (title, content, images, etc.) is no longer filled directly from Django context; instead, we use empty placeholders with IDs. JavaScript will then fill those placeholders with the data retrieved via AJAX from the show_json_by_id endpoint.
Step 3: Add JavaScript for AJAX
Add the following JavaScript code before the {% endblock content %} tag in the main/templates/news_detail.html file:
...
<script>
// Configuration
const NEWS_ID = "{{ news.id }}";
const NEWS_DETAIL_ENDPOINT = `{% url 'main:show_json_by_id' '00000000-0000-0000-0000-000000000000' %}`.replace('00000000-0000-0000-0000-000000000000', NEWS_ID);

// DOM Elements
const loadingState = document.getElementById('loading-state');
const errorState = document.getElementById('error-state');
const articleContent = document.getElementById('article-content');
const badgesContainer = document.getElementById('badges-container');
const articleTitle = document.getElementById('article-title');
const articleDate = document.getElementById('article-date');
const articleViews = document.getElementById('article-views');
const featuredImageContainer = document.getElementById('featured-image-container');
const featuredImage = document.getElementById('featured-image');
const articleContentText = document.getElementById('article-content-text');
const articleAuthor = document.getElementById('article-author');

// Show/hide page sections
function showState(state) {
    loadingState.classList.toggle('hidden', state !== 'loading');
    errorState.classList.toggle('hidden', state !== 'error');
    articleContent.classList.toggle('hidden', state !== 'ready');
}

// Get readable category name
function getCategoryLabel(categoryCode) {
    const categoryMapping = {
        transfer: 'Transfer',
        update: 'Update',
        exclusive: 'Exclusive',
        match: 'Match',
        rumor: 'Rumor',
        analysis: 'Analysis',
    };
    return categoryMapping[categoryCode] || categoryCode;
}

// Render article content
function renderArticle(news) {
    // Set title
    articleTitle.textContent = news.title;
    document.title = `${news.title} - Football News`;

    // Set badges
    badgesContainer.innerHTML = '';

    // Category badge
    const categoryBadge = document.createElement('span');
    categoryBadge.className = 'inline-flex items-center px-3 py-1 rounded-md text-xs font-medium bg-green-600 text-white';
    categoryBadge.textContent = getCategoryLabel(news.category);
    badgesContainer.appendChild(categoryBadge);

    // Featured badge
    if (news.is_featured) {
        const featuredBadge = document.createElement('span');
        featuredBadge.className = 'inline-flex items-center px-3 py-1 rounded-md text-xs font-medium bg-yellow-100 text-yellow-800';
        featuredBadge.textContent = 'Featured';
        badgesContainer.appendChild(featuredBadge);
    }

    // Hot badge
    if (news.news_views > 20) {
        const hotBadge = document.createElement('span');
        hotBadge.className = 'inline-flex items-center px-3 py-1 rounded-md text-xs font-medium bg-red-100 text-red-800';
        hotBadge.textContent = 'Hot';
        badgesContainer.appendChild(hotBadge);
    }

    // Set date and views
    const formattedDate = new Date(news.created_at).toLocaleDateString('en-US', {
        year: 'numeric',
        month: 'long',
        day: 'numeric',
        hour: '2-digit',
        minute: '2-digit'
    });
    articleDate.textContent = formattedDate;
    articleViews.textContent = `${news.news_views} views`;

    // Set featured image
    if (news.thumbnail) {
        featuredImage.src = news.thumbnail;
        featuredImage.alt = news.title;
        featuredImageContainer.classList.remove('hidden');
    } else {
        featuredImageContainer.classList.add('hidden');
    }

    // Set content
    articleContentText.textContent = news.content;

    // Set author
    const authorName = news.user_username || 'Anonymous';
    articleAuthor.textContent = `Author: ${authorName}`;
}

// Fetch news detail
async function loadNewsDetail() {
    try {
        showState('loading');

        const response = await fetch(NEWS_DETAIL_ENDPOINT, {
            headers: { 'Accept': 'application/json' },
        });

        if (!response.ok) {
            throw new Error('Failed to fetch news detail');
        }

        const newsData = await response.json();
        renderArticle(newsData);
        showState('ready');
    } catch (error) {
        console.error('Error loading news detail:', error);
        showState('error');
    }
}

// Initialize page
loadNewsDetail();
</script>
...
Code Explanation: This template uses AJAX to load news details dynamically. It has three main states: a loading state (which displays a spinner), an error state (if it fails to load the data), and a ready state (which displays the news content).
JavaScript will retrieve news details from the show_json_by_id endpoint and render content dynamically without refreshing the page. The renderArticle() function serves to fill the HTML elements with the data it receives from the server, including badges, images, content, and author information.
Tutorial: Creating a Modal Form to Add News
A modal is a UI component that can be used to show a form or additional content without having to navigate to another page. In this tutorial, we will create a modal containing a form to add a new news article using AJAX.
Why use a Modal?
- Better User Experience: Users do not have to open a new page to fill the form
- More Focus on Content: Modals help users focus on the form without distractions from other elements
- Efficiency: Saves time since the browser does not have to load a new page
- Interactive: Gives a more dynamic and modern experience for the user
Step 1: Creating the Modal's HTML Structure
Create a new file named modal.html in the templates folder located in the root directory and add the following HTML modal stucture:
templates/modal.html
<!-- Modal -->
<div id="crudModal" class="hidden fixed inset-0 z-50 w-full flex items-center justify-center bg-gray-800 bg-opacity-50">
  <div id="crudModalContent" class="bg-white rounded-lg shadow-lg w-5/6 sm:w-3/5 md:w-1/2 lg:w-2/5 xl:w-1/3 max-h-screen overflow-y-auto">
    <!-- Modal header -->
    <div class="flex items-center justify-between p-4 border-b">
      <div>
        <h3 class="text-xl font-semibold text-gray-900">
          Create New News
        </h3>
        <p class="text-sm text-gray-600 mt-1">Share your football news and stories with the community</p>
      </div>
      <button type="button" class="text-gray-400 bg-transparent hover:bg-gray-200 hover:text-gray-900 rounded-lg text-sm p-1.5 ml-auto inline-flex items-center" onclick="hideModal()">
        <svg aria-hidden="true" class="w-5 h-5" fill="currentColor" viewBox="0 0 20 20" xmlns="http://www.w3.org/2000/svg">
          <path fill-rule="evenodd" d="M4.293 4.293a1 1 0 011.414 0L10 8.586l4.293-4.293a1 1 0 111.414 1.414L11.414 10l4.293 4.293a1 1 0 01-1.414 1.414L10 11.414l-4.293 4.293a1 1 0 01-1.414-1.414L8.586 10 4.293 5.707a1 1 0 010-1.414z" clip-rule="evenodd"></path>
        </svg>
        <span class="sr-only">Close modal</span>
      </button>
    </div>
    <!-- Modal body -->
    <div class="px-6 py-4 space-y-6 form-style">
      <form id="newsForm">
        <div class="mb-4">
          <label for="title" class="block text-sm font-medium text-gray-700">Title</label>
          <input type="text" id="title" name="title" class="mt-1 block w-full border border-gray-300 rounded-md px-3 py-2" placeholder="Enter news title" required>
        </div>
        <div class="mb-4">
          <label for="content" class="block text-sm font-medium text-gray-700">Content</label>
          <textarea id="content" name="content" rows="3" class="mt-1 block w-full border border-gray-300 rounded-md px-3 py-2" placeholder="Enter news content" required></textarea>
        </div>
        <div class="mb-4">
          <label for="category" class="block text-sm font-medium text-gray-700">Category</label>
          <select id="category" name="category" class="mt-1 block w-full border border-gray-300 rounded-md px-3 py-2" required>
            <option value="">Choose a category</option>
            <option value="transfer">Transfer</option>
            <option value="update">Update</option>
            <option value="exclusive">Exclusive</option>
            <option value="match">Match</option>
            <option value="rumor">Rumor</option>
            <option value="analysis">Analysis</option>
          </select>
        </div>
        <div class="mb-4">
          <label for="thumbnail" class="block text-sm font-medium text-gray-700">Thumbnail URL</label>
          <input type="url" id="thumbnail" name="thumbnail" class="mt-1 block w-full border border-gray-300 rounded-md px-3 py-2" placeholder="https://example.com/image.jpg">
        </div>
        <div class="mb-4">
          <div class="flex items-center">
            <input id="is_featured" name="is_featured" type="checkbox" class="w-4 h-4 text-blue-600 bg-gray-100 border-gray-300 rounded">
            <label for="is_featured" class="ml-2 text-sm font-medium text-gray-900">Featured News</label>
          </div>
        </div>
      </form>
    </div>
    <!-- Modal footer -->
    <div class="flex flex-col sm:flex-row gap-4 p-6 border-t border-gray-200 rounded-b">
      <button type="button" id="cancelButton" class="order-2 sm:order-1 px-6 py-3 border border-gray-300 text-gray-700 rounded-md font-medium hover:bg-gray-50 transition-colors text-center" onclick="hideModal()">Cancel</button>
      <button type="submit" id="submitNews" form="newsForm" class="order-1 sm:order-2 flex-1 bg-green-600 text-white px-6 py-3 rounded-md font-medium hover:bg-green-700 transition-colors">Publish News</button>
    </div>
  </div>
</div>
Modal Structure Explanation:
- Modal overlay:
bg-gray-800 bg-opacity-50gives the modal a dark, semi-transparent background - Modal container: Makes the modal responsive by giving it a different size at each breakpoint
- Modal header: Contains the title and close button
- Modal body: Contains the form and all its necessary fields
- Modal footer: Contains the Cancel and Submit buttons
Step 2: Adding JavaScript Functions to Show and Hide the Modal
Since we are using vanilla Tailwind CSS, there are no built-in modal classes. Therefore, in order for our modal to work, we need to add the following functions.
Add the following JavaScipt code in the modal.html file we made previously:
templates/modal.html
...
<script>
  function showModal() {
      const modal = document.getElementById('crudModal');
      const modalContent = document.getElementById('crudModalContent');

      modal.classList.remove('hidden');
      setTimeout(() => {
        modalContent.classList.remove('opacity-0', 'scale-95');
        modalContent.classList.add('opacity-100', 'scale-100');
      }, 50);
  }

  function hideModal() {
      const modal = document.getElementById('crudModal');
      const modalContent = document.getElementById('crudModalContent');

      modalContent.classList.remove('opacity-100', 'scale-100');
      modalContent.classList.add('opacity-0', 'scale-95');

      setTimeout(() => {
        modal.classList.add('hidden');
      }, 150);
  }
</script>
Code explanation:
showModal(): This function displays the modal with a fade-in and scale-up animationhideModal(): This function hides the modal with a fade-out and scale-down animationsetTimeout(): This function sets a delay for a smooth transition effect- Event listeners are added for the Cancel and Close buttons to close the modal
Step 3: Adding a Button to Open the Modal
Add a button to open the modal right under the header section in the main/templates/main.html file:
main/templates/main.html
...
 <!-- Header Section -->
    <div class="mb-8">
      <h1 class="text-3xl font-bold text-gray-900 mb-2">Latest Football News</h1>
      <p class="text-gray-600">Stay updated with the latest football stories and analysis</p>
    </div>
  <!-- Button to open modal -->
    <button onclick="showModal()" class="inline-flex items-center px-4 py-2 bg-white text-green-600 font-semibold outline outline-2 outline-green-600 outline-offset-[-2px] rounded-md hover:bg-green-600 hover:text-white transition-colors mb-4">
      Create News by AJAX
    </button>
...
Step 4: Adding the Modal in base.html
To ensure the modal can be opened from any page that extends base.html, including main.html, modify the base.html file to include modal.html as follows:
...
<body>
{% block content %}
{% endblock %}
{% include 'toast.html' %}
{% include 'modal.html' %}
</body>
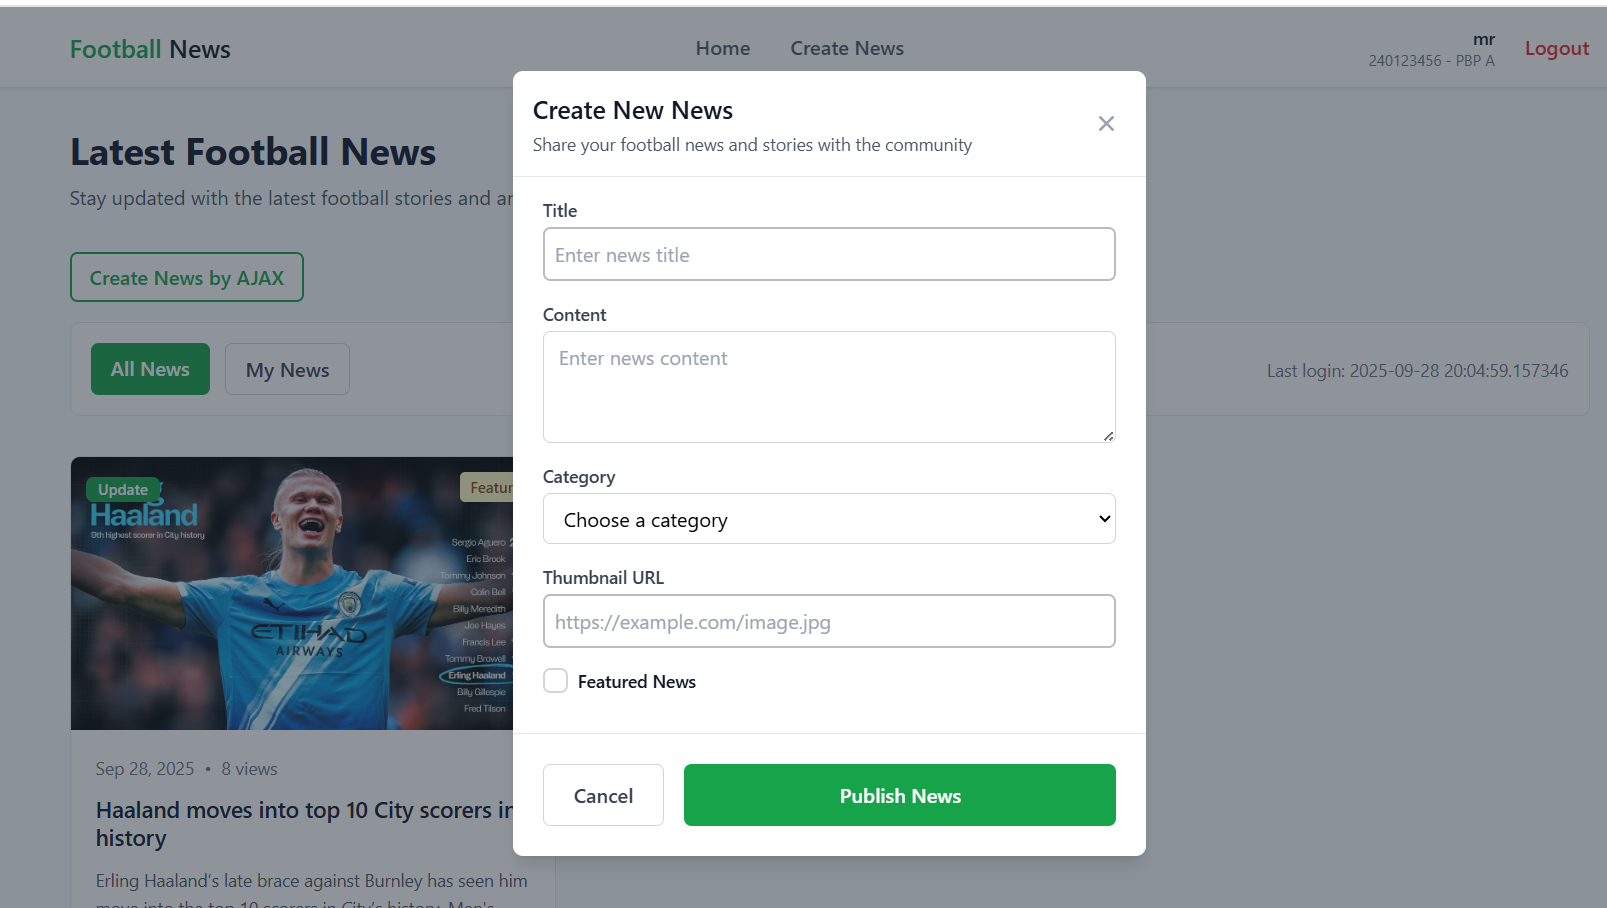
...
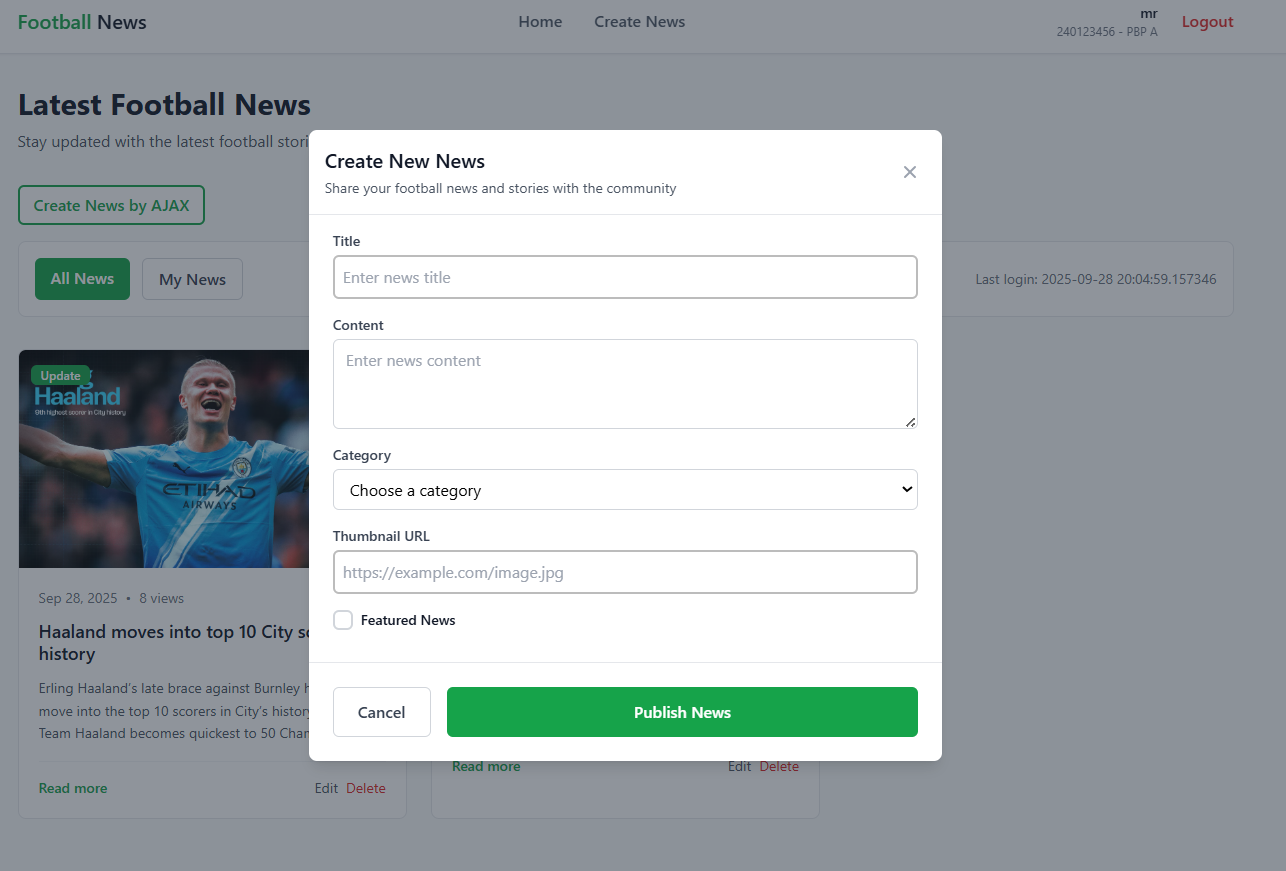
Here is what our modal should look like after successfully integrating it into the main page:
Tutorial: Adding News Data with AJAX
We will now implement adding news data using AJAX. Using the modal we've made, users will be able to add new news articles without having to navigate to a separate form page or having to reload the page after submitting.
Step 1: Creating a View to Handle AJAX Requests
Open the main/views.py file and add the following imports and view function:
main/views.py
from django.views.decorators.csrf import csrf_exempt
from django.views.decorators.http import require_POST

...

@csrf_exempt
@require_POST
def add_news_entry_ajax(request):
    title = request.POST.get("title")
    content = request.POST.get("content")
    category = request.POST.get("category")
    thumbnail = request.POST.get("thumbnail")
    is_featured = request.POST.get("is_featured") == 'on'  # checkbox handling
    user = request.user

    new_news = News(
        title=title,
        content=content,
        category=category,
        thumbnail=thumbnail,
        is_featured=is_featured,
        user=user
    )
    new_news.save()

    return HttpResponse(b"CREATED", status=201)
Code explanation:
@csrf_exempt: Deactivates CSRF protection for AJAX requests@require_POST: Ensures that only HTTP POST requests are accepted== 'on': Special handling for checkbox inputs (returns 'on' if it is checked)- Returns an HTTP response with status 201 (Created)
Step 2: Adding a URL Pattern
Open the main/urls.py file and add the following import and URL pattern:
main/urls.py
from main.views import add_news_entry_ajax

urlpatterns = [
    ...
    path('create-news-ajax', add_news_entry_ajax, name='add_news_entry_ajax'),
]
Step 3: Adding a JavaScript Function for AJAX
Add the following JavaScript function in the templates/modal.html file:
templates/modal.html
<script>
...
 async function addNewsEntry() {
    await fetch("{% url 'main:add_news_entry_ajax' %}", {
      method: "POST",
      body: new FormData(document.querySelector('#newsForm')),
    })

    document.getElementById("newsForm").reset();
    hideModal();

    // Show toast notification
    showToast('News added successfully!', '', 'success');

    // Dispatch custom event to notify main.html about new data
    document.dispatchEvent(new CustomEvent('newsAdded'));

    return false;
  }
...
</script>
Function explanation:
Fungsi addNewsEntry() mengirim data form melalui AJAX ke server, kemudian menampilkan toast notification dan mengirim custom event newsAdded yang akan didengar oleh halaman main untuk melakukan refresh data secara dinamis tanpa reload halaman.
The addNewsEntry() function sends the form data to the server using AJAX. It then displays a toast notification and dispatches a custom event called newsAdded, which listeners on the main page will receive, triggering it to refresh the data dynamically without reloading the page.
Full structure of templates/modal.html:
<!-- modal HTML section and other content -->
...

<script>
  function showModal() {
    // ...  showModal code
  }

  function hideModal() {
    // ...  hideModal code
  }

  async function addNewsEntry() {
    await fetch("{% url 'main:add_news_entry_ajax' %}", {
      method: "POST",
      body: new FormData(document.querySelector('#newsForm')),
    })

    document.getElementById("newsForm").reset();
    hideModal();

    showToast('News added successfully!', '', 'success');


    document.dispatchEvent(new CustomEvent('newsAdded'));

    return false;
  }
</script>
Step 4: Adding an Event Listener for newsAdded in main.html
To enable the main page to detect when new news is added through the modal, add an event listener in the script in main/templates/main.html:
main/templates/main.html
<script>
...

// Add event listener to detect new news
document.addEventListener('newsAdded', function() {
    // Refresh data without page reload
    fetchNewsFromServer();
});
</script>
Explanation:
- The event listener will listen for the custom event
newsAddedsent from the modal - When it receives the event, it will immediately call
fetchNewsFromServer()to refresh the news data
With this, the data will be updated in real-time without having to reload the page.
Step 5: Adding a Event Listener to the Form
Add an event listener to handle form submissions in the templates/modal.html file, inside the <script> code block:
templates/modal.html
<script>
...
document.getElementById("newsForm").addEventListener("submit", function(e) {
    e.preventDefault();
    addNewsEntry();
})
...
</script>
Explanation:
e.preventDefault()prevents the form from performing a default submit (which reloads the page)addNewsEntry()is called to send data via AJAX
Tutorial: Protecting the Application from Cross Site Scripting (XSS)
What is Cross-Site Scripting (XSS)?
Imagine our application had a comments feature. Ideally, if a user submitted a comment containing text, other users would see the text exactly how it was sent.
However, if we do not validate user input, we could be leaving our application vulnerable to XSS attacks. A bad actor could submit JavaScript code instead of plain text. Here is an example:
<script>alert('This website is vulnerable!');</script>
If the application does not sanitize this input, the browser will misinterpret it as a command to be executed, not as plain text. As a result, the submitted code will be run and an alert dialog will show up on screen.
This is the essence of an XSS security vulnerability: insecure input from one user being executed on another user's browser.
Trying an XSS Attack
To see this security vulnerability in practice, let's try a simple attack.
-
Open the homepage and click the Create News (AJAX) button to bring up the modal. In the Title field, add the following payload. The other fields can be filled with anything you'd like.
<img src=x onerror="alert('Bad News!');"/> -
Click the 'Publish News' button to send the data. If the application is vulnerable and the data was successfuly saved, you will get an alert with the message 'Bad News!', as seen below.
Adding strip_tags to "Clean" New Data
From the experiment above, we can see that our application is storing malicious user input as-is. Clearly this is not safe. To patch this security vulnerability, we will sanitize the data on the back-end side before storing it in the database. Django provides the strip_tags function which helps to remove all HTML tags from text.
-
Open the
views.pyandforms.pyfiles and add the following import.main/views.py, main/forms.pyfrom django.utils.html import strip_tags -
In the
add_news_entry_ajaxfunction inviews.py, use thestrip_tagsfunction for thetitleandcontentdata before they are stored in theNewsobject.main/views.py...
@csrf_exempt
@require_POST
def add_news_entry_ajax(request):
title = strip_tags(request.POST.get("title")) # strip HTML tags!
content = strip_tags(request.POST.get("content")) # strip HTML tags!
...Code Explanation:
- The
strip_tagsfunction will remove all HTML tags that are present in thetitleandcontentdata sent by the user through thePOSTrequest, so that the data that is stored in the database is "clean". For example,data = "<b>Very</b> <button>Important</button> <span>News</span>",strip_tags(data)will returnVery Important News. - Other data fields such as
category,thumbnail, andis_featureddo not need to be cleaned withstrip_tagsbecause their data types already provide strong protection. Thecategoryfield is limited to the values inchoices,thumbnailis validated byURLFieldto ensure it is a URL, andis_featuredonly accepts boolean values from checkboxes. This prevents users from submitting malicious HTML code though the above fields.
- The
-
In the
NewsFormclass informs.py, add the following two methods.main/forms.py...
class NewsForm(ModelForm):
class Meta:
...
def clean_title(self):
title = self.cleaned_data["title"]
return strip_tags(title)
def clean_content(self):
content = self.cleaned_data["content"]
return strip_tags(content)
...Code Explanation:
- The
clean_titleandclean_contentmethods will be automatically called whenform.is_valid()is called, so by adding these two methods, you have ensured that all data sent throughNewsForm(such as the ones on thecreate_newsandedit_newspage) are "clean" from malicious HTML tags before being stored.
- The
-
After adding
strip_tags, remove the data you just added and try to add it again. The results you obtain will differ based on how you tried to add it:- If you used the
Create Newsbutton (regular form webpage): You will get an error on the form that says thetitlefield cannot be empty, as seen in the picture below. This happens becausestrip_tagsconverted your input into an empty string, thus causing the form validation to fail. - If you used the
Create News by AJAXbutton (modal): The news article will be successfully created and will appear on the main webpage, but your attack payload will appear as plain text without triggering any alerts.
Both these results demonstrate the same thing. Congratulations! You have successfully added protection against XSS! If you did not obtain either of these results, try and check if you have followed the above steps correctly.
- If you used the
Cleaning Data with DOMPurify
The strip_tags function that we just added will "clean up" all new data, but what about malicious data that may already be in our database? We can choose to clean them up manually, or we can employ a second layer of defense on the front-end side by using the DOMPurify JavaScript library.
It is important to note that DOMPurify will only work if the retrieved data is displayed as HTML on the application's front-end. If a user accesses the /json or /xml API, the data they receive will still be "dirty".
-
Open the
base.htmlfile and add script tags for DOMPurify in the<head>tag, along with other assets like CSS.templates/base.html{% load static %}
<!DOCTYPE html>
<html lang="en">
<head>
...
<script src="https://cdn.tailwindcss.com"></script>
<!-- Add DOMPurify here -->
<script src="https://cdn.jsdelivr.net/npm/dompurify@3.0.5/dist/purify.min.js"></script>
<link rel="stylesheet" href="{% static 'css/global.css' %}"/>
</head>
...
</html> -
Next, we will apply sanitization on the
main/templates/main.htmlpage. Look for thebuildNewsCardElementfunction and update it with the following code that usesDOMPurify.sanitize():main/templates/main.htmlfunction buildNewsCardElement(item) {
const article = document.createElement('article');
article.className = 'bg-white rounded-lg border border-gray-200 hover:shadow-lg transition-shadow duration-300 overflow-hidden flex flex-col h-full';
const linkDetail = `{% url 'main:show_news' '00000000-0000-0000-0000-000000000000' %}`.replace('00000000-0000-0000-0000-000000000000', item.id);
const linkEdit = `{% url 'main:edit_news' '00000000-0000-0000-0000-000000000000' %}`.replace('00000000-0000-0000-0000-000000000000', item.id);
const linkDelete = `{% url 'main:delete_news' '00000000-0000-0000-0000-000000000000' %}`.replace('00000000-0000-0000-0000-000000000000', item.id);
const title = DOMPurify.sanitize(item.title);
const content = DOMPurify.sanitize(item.content);
const category = DOMPurify.sanitize(item.category);
const thumbnail = DOMPurify.sanitize(item.thumbnail);
const createdAt = DOMPurify.sanitize(new Date(item.created_at).toLocaleDateString('en-US', {
year: 'numeric',
month: 'short',
day: 'numeric'
}));
const newsViews = DOMPurify.sanitize(item.news_views);
const isFeatured = item.is_featured;
const isHot = newsViews > 20;
const thumbnailHtml = DOMPurify.sanitize(
item.thumbnail ? `<img src='${thumbnail}' alt='${title}' class='w-full h-full object-cover'>` : `<div class='w-full h-full bg-gradient-to-br from-gray-100 to-gray-200 flex items-center justify-center'></div>`
);
const categoryLabel = DOMPurify.sanitize(getReadableCategoryName(category));
const featuredLabel = isFeatured ? DOMPurify.sanitize(`<span class='inline-flex items-center px-2 py-1 rounded text-xs font-medium bg-yellow-100 text-yellow-800'>Featured</span>`) : '';
const hotLabel = isHot ? DOMPurify.sanitize(`<span class='inline-flex items-center px-2 py-1 rounded text-xs font-medium bg-red-100 text-red-800'>Hot</span>`) : '';
const editDeleteHtml = CURRENT_USER_ID && Number(CURRENT_USER_ID) === Number(item.user_id)
? `<div class='flex space-x-2'>
<a href='${linkEdit}' class='text-gray-600 hover:text-gray-700 text-sm transition-colors'>Edit</a>
<a href='${linkDelete}' class='text-red-600 hover:text-red-700 text-sm transition-colors' onclick='return confirm("Are you sure you want to delete this article?")'>Delete</a>
</div>`
: '';
const cardHtml = `
<div class="aspect-[16/9] relative overflow-hidden">
${thumbnailHtml}
<div class="absolute top-3 left-3">
<span class="inline-flex items-center px-2.5 py-0.5 rounded-md text-xs font-medium bg-green-600 text-white">${categoryLabel}</span>
</div>
<div class="absolute top-3 right-3 flex space-x-2">
${featuredLabel}
${hotLabel}
</div>
</div>
<div class="p-5 flex flex-col flex-1">
<div class="flex items-center text-sm text-gray-500 mb-3">
<time>${createdAt}</time>
<span class="mx-2">•</span>
<span>${newsViews} views</span>
</div>
<h3 class="text-lg font-semibold text-gray-900 mb-3 line-clamp-2 leading-tight">
<a href="${linkDetail}" class="hover:text-green-600 transition-colors">${title}</a>
</h3>
<p class="text-gray-600 text-sm leading-relaxed line-clamp-3 mb-4">${content}</p>
<div class="pt-4 border-t border-gray-100 flex items-center justify-between">
<a href="${linkDetail}" class="text-green-600 hover:text-green-700 font-medium text-sm transition-colors">Read more</a>
${editDeleteHtml}
</div>
</div>
`;
article.innerHTML = cardHtml;
return article;
}Code Explanation:
- The
DOMPurify.sanitize()function will parse an HTML string and intelligently remove all elements or attributes that are potentially dangerous. This is used for thetitleandcontentfields which come directly from user input. For example,data = "<b>Safe</b> <img src=x onerror='alert(1)'>"will become<b>Safe</b> <img src="x">. The<b>tag is safe and therefore kept as-is, while the dangerousonerrorattribute is removed. - Notice that we do not only clean
titleandcontent. For maximum protection (defense-in-depth principle), all other variables that are going to be used in HTML likethumbnailHtml,categoryLabel, and evendetailUrlare also sanitized. This is good practice to ensure that no unexpected code is run, even if the data doesn't come directly from user input.
NOTE The main takeaway is to always sanitize and clean data that comes from external sources (such as APIs or databases) before putting them in
innerHTMLor other DOM structures. - The
-
Refresh the main page. If you previously still had "dirty" data that made alert dialogs pop up, they should no longer appear on your screen.
Conclusion
Congratulations! You have successfully finished Tutorial 5. 😄
After completing the tutorial above, we hope you have gained a better understanding of the use of AJAX and how to prevent XSS in the Django framework.
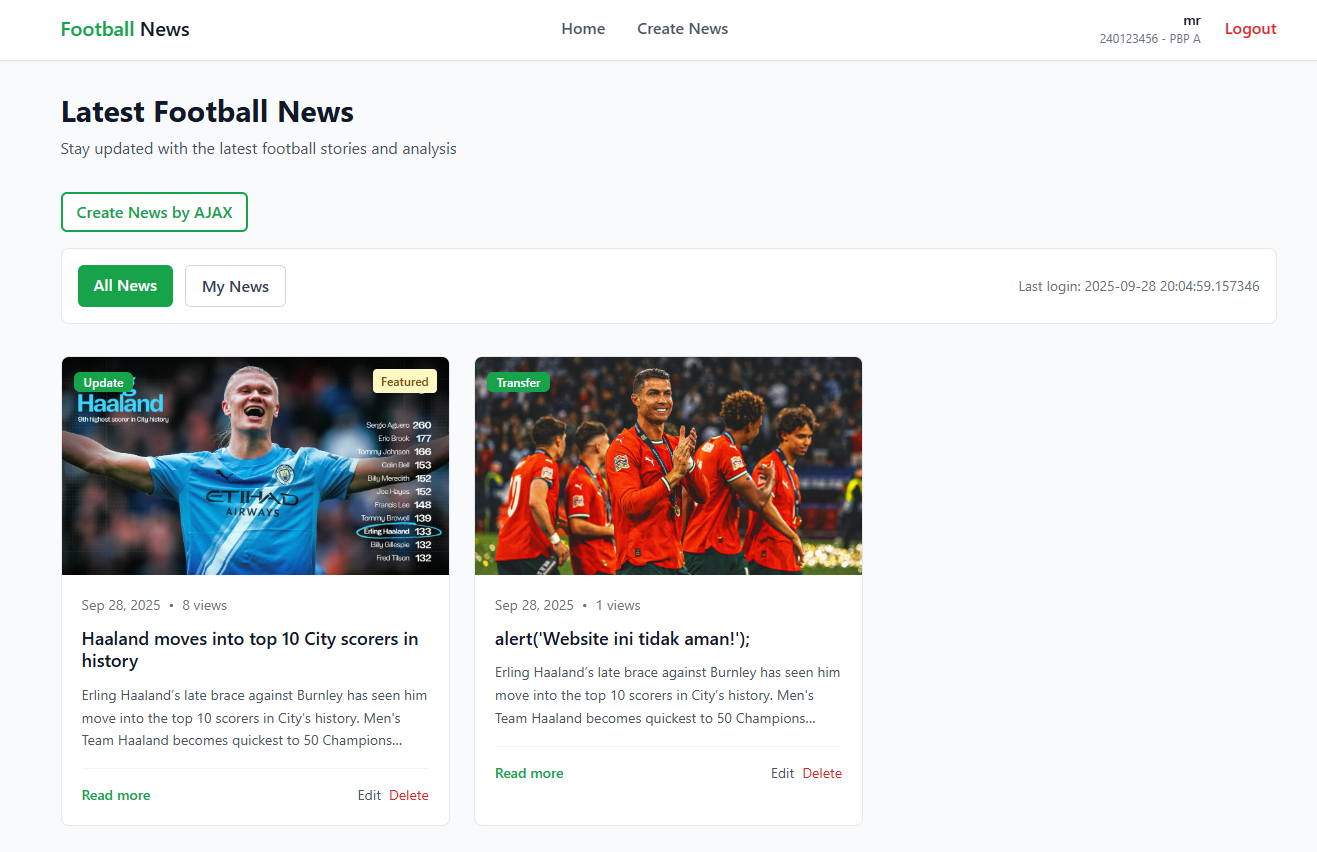
-
After completing this tutorial, your web page should look like this (the design itself should only serve as a reference. Feel free to alter it as you please)
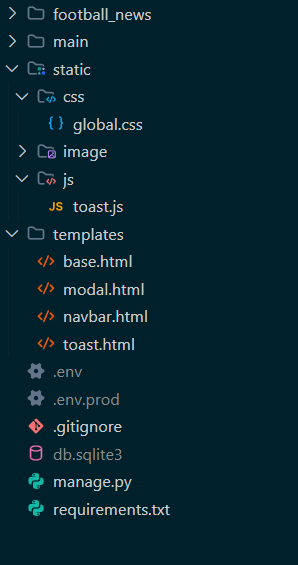
-
At the end of the of the tutorial, your local file structure should look like this.
-
Before continuing, make sure your local file structure is correct. Next, run
add,commit, andpushto update your GitHub repository. -
Run the following commands to
add,commit, andpushto GitHub and PWS.
git add .
git commit -m "<commit_message>"
git push origin master
git push pws master
- Replace
<commit_message>with your desired message. For example:git commit -m "Tutorial 5 completed".
Additional References
Contributors
- Andrew Devito Aryo
- Tristan Agra Yudhistira
- Joe Mathew Rusli
- Bertrand Gwynfory Iskandar
- Joshua Montolalu (English Translator)
Credits
This tutorial was developed based on PBP Odd 2025 and PBP Odd 2024 written by the 2025 and 2024 Platform-Based Programming Teaching Team. All tutorials and instructions included in this repository are designed so that students who are taking Platform-Based Programming courses can complete the tutorials during lab sessions.