Tutorial 6: Pengantar Flutter
Platform-Based Programming (CSGE602022) — Organized by the Faculty of Computer Science Universitas Indonesia, Odd Semester 2025/2026
Learning Objectives
After completing this tutorial, students are expected to be able to:
- Understand Flutter installation process.
- Understand and be able to use basic Flutter commands that are necessary to develop an application.
- Understand the basics of development and execution flow of Flutter applications.
- Understand the basic elements in Flutter.
Flutter
Introduction to Flutter
Flutter is an open source mobile application framework developed by Google in 2017. Framework is used to build applications for Android and iOS operating systems, as well as supporting the development of web, Windows, Linux, and MacOS based applications natively.
One of the main advantages of Flutter is its ability to produce applications for multiple platforms with a single codebase (cross-platform development). In addition, the Just-In-Time (JIT) feature allows developers to see changes made to the codebase directly without having to recompile from scratch.
Here are some other advantages that Flutter can provide as a framework that can be cross-platform:
- Fast and efficient performance: Flutter uses the Dart programming language and compiles into machine code. The host device understands the code, so it ensures fast and efficient performance.
- Fast, consistent, and scalable rendering: In contrast to specialized platform rendering tools, Flutter uses Skia, the open source graphics library developed by Google to render UI. This gives the user a consistent visual, regardless of the platform used to access the application.
- Developer-friendly tools: Google makes Flutter with ease of use in mind. With tools like hot reload, developers can see what changes to the code without losing status. Other tools like widget inspection make it easier to visualize and diagnose UI layout issues.
Flutter has two main components, the Flutter SDK and the framework UI.
- Flutter SDK (Software Development Kit) – is a collection of tools and software used to develop applications using Flutter. The SDK includes various components such as compiler, debugger, emulator, and a variety of libraries required to build Flutter applications.
- Framework UI – is a component used to render the user interface of the application. The framework provides various elements such as widgets, buttons, navigation, and other features that allow developers to create appealing and consistent user interfaces across different platforms.
System Requirements
Before starting the installation and development using Flutter, ensure that the device that will be used meets the minimum requirements. Here are the hardware and software requirements that are recommended to ensure that the development process can run smoothly.
Hardware Requirements (macOS)
| Requirement | Minimum | Recommended |
|---|---|---|
| CPU Cores | 4 | 8 |
| Memory in GB | 8 | 16 |
| Display Resolution | WXGA (1366 x 768) | FHD (1920 x 1080) |
Hardware Requirements (Windows)
| Requirement | Minimum | Recommended |
|---|---|---|
| CPU Cores | 4 | 8 |
| Memory in GB | 8 | 16 |
| Display Resolution | WXGA (1366 x 768) | FHD (1920 x 1080) |
Software Requirements (Windows & MacOS)
- Operating System:
- macOS 11 (Big Sur) or later.
- Windows 10 64-bit or later.
Tutorial: Installing Flutter
Windows
For a more detailed tutorial, you can access the link here.
1. Download the Flutter SDK here for Windows.
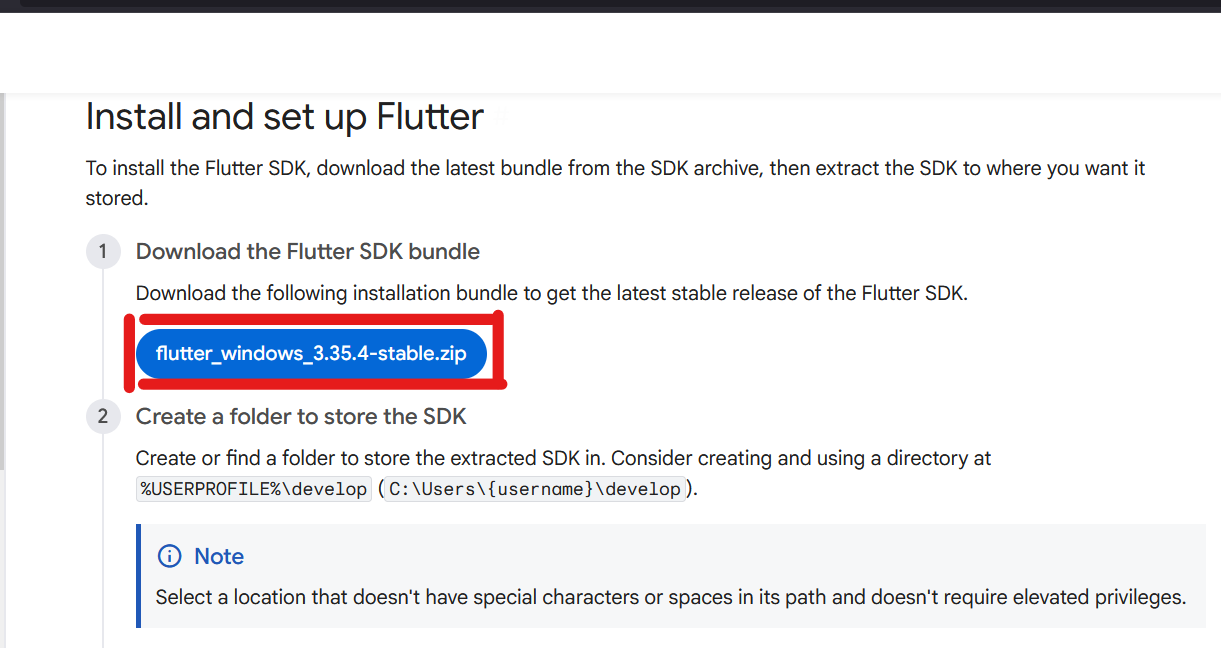
2. Move the zip folder to a permanent folder or destination and extract the downloaded zip folder.
It is recommended to create the folder in the following location:
%USERPROFILE%\dev\
Example:C:\Users\[username]\dev\flutter%LOCALAPPDATA%
Example:C:\Users\[username]\AppData\Local\flutter
Do not install Flutter in the directory or path that meets one or both of the following conditions:
- Contains special characters or spaces (make sure that
[username]does not contain spaces or special characters when placed anywhere else). - Requires administrator privileges (example:
C:\Program Files).
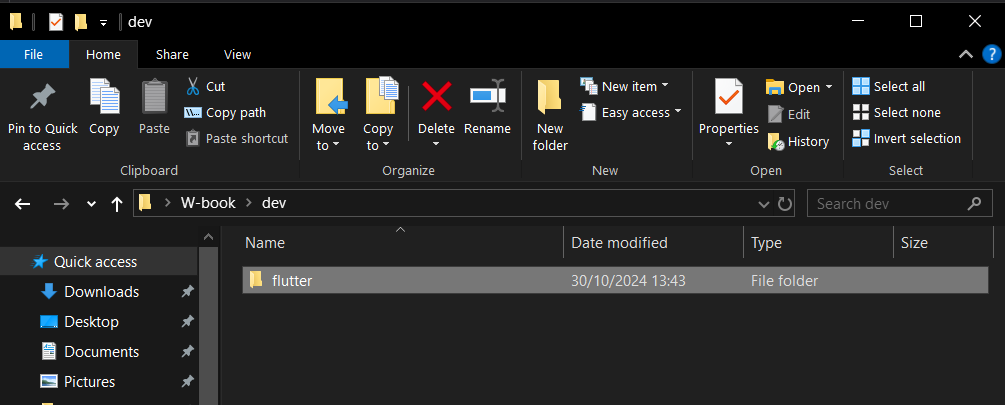
In this tutorial, we will be using the PATH C:\Users\[username]\dev\flutter
3. Add Flutter to the PATH variable
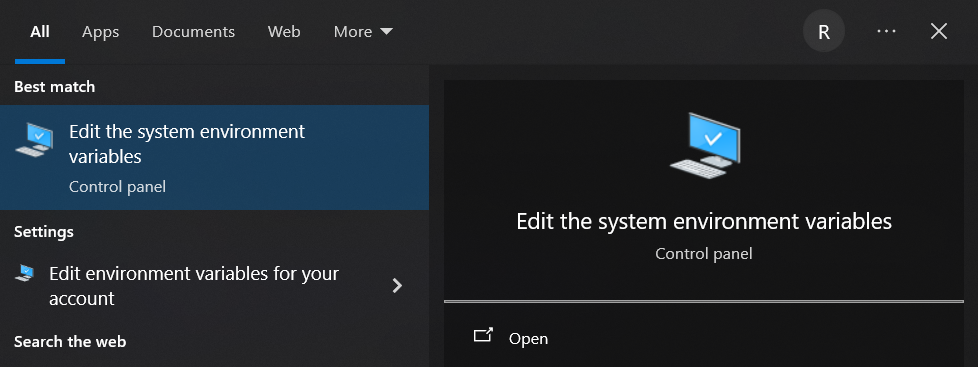
- In the System Properties window, click the Environment Variables... button.
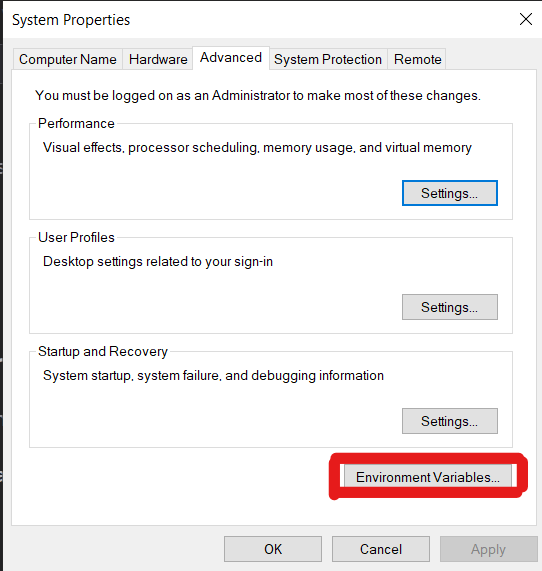
- On the User variables for [username], search for the Path variable dan double click to edit it.
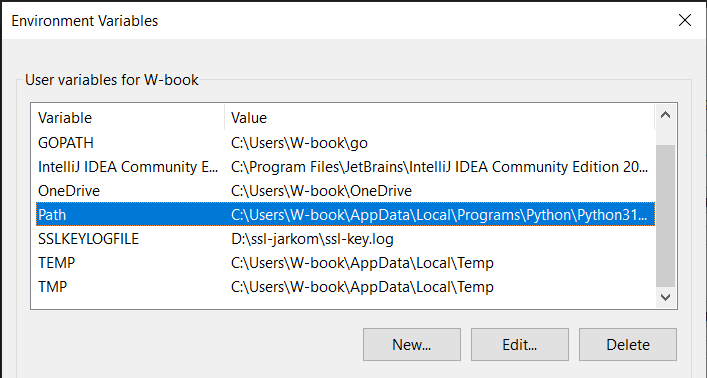
- In the folder that was extracted previously, csearch for the folder named bin. Copy the full path from the folder.
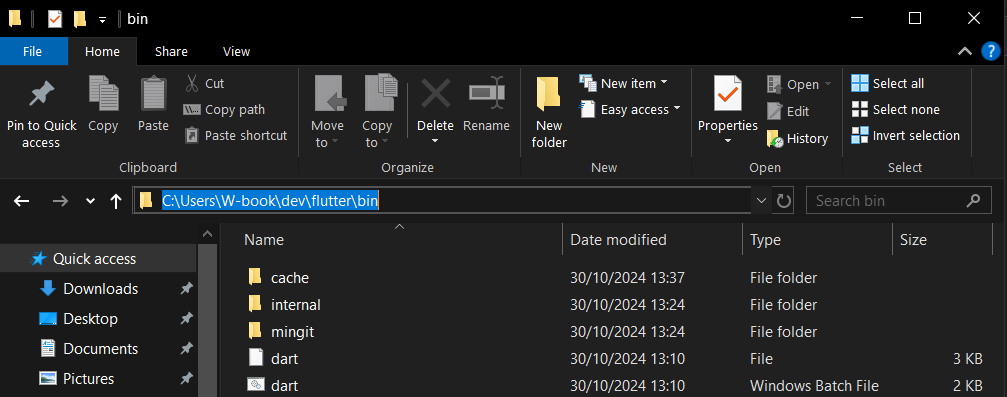
In the Edit Environment Variable window that was previously open, click New atau or double click on an empty line, then add the copied path.

-
After the path has been added, click OK to save the change, click OK on the System Properties window as well, then close all windows and reopen the terminal or PowerShell to apply the changes.
-
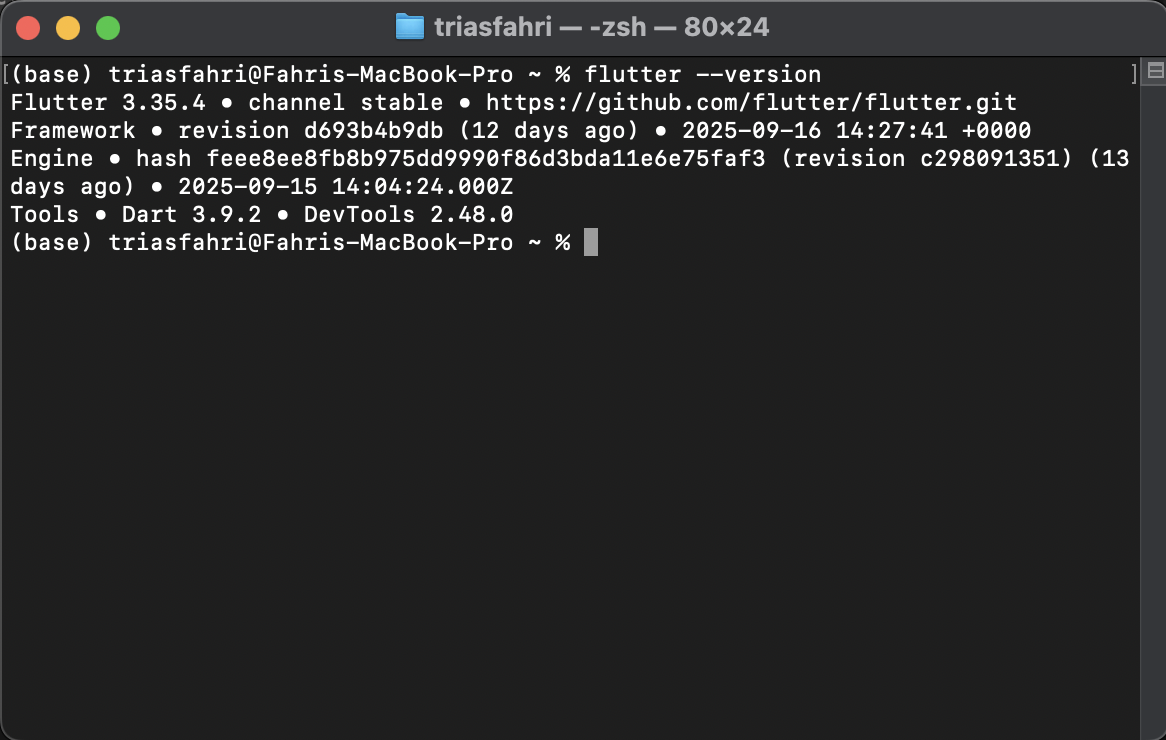
To ensure that Flutter has been added to the correct path, open the terminal or PowerShell and run the following command:
flutter --version

If Flutter has been installed correctly, you will see the Flutter version information that was installed.
C:\Users\Ridho>flutter --version
Flutter 3.24.3 • channel stable • https://github.com/flutter/flutter.git
Framework • revision 2663184aa7 (5 weeks ago) • 2024-09-11 16:27:48 -0500
Engine • revision 36335019a8
Tools • Dart 3.5.3 • DevTools 2.37.3
- Congratulations! 🐼 Installation of Flutter has been successfully completed and you can proceed with the Android Studio installation.
MacOS
For a more detailed tutorial, you can access the link here.
Open a terminal in the root directory, and not a folder directory.
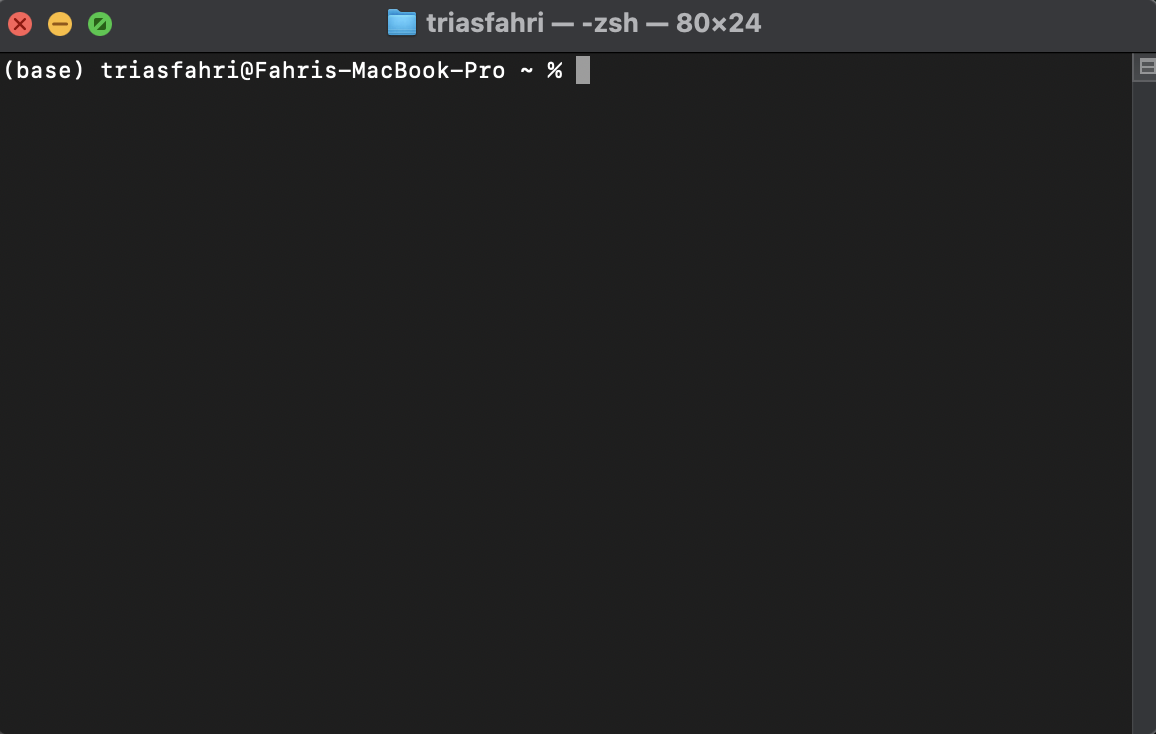
If you have not installed Homebrew on macOS, you can install it with the following command.
/bin/bash -c "$(curl -fsSL https://raw.githubusercontent.com/Homebrew/install/HEAD/install.sh)"
- Specifically for macOS users, you can install Flutter using the following command in the terminal.
brew install --cask flutter
- By default, the downloaded file
--caskthrough Homebrew will be saved in
/opt/homebrew/Caskroom untuk Apple Silicon
/usr/local/Caskroom untuk Mac Intel
- To ensure that Flutter has been installed correctly, you can run the following command in the terminal.
brew info --cask flutter
-
If Flutter has been installed correctly, information will appear similar to the one below.
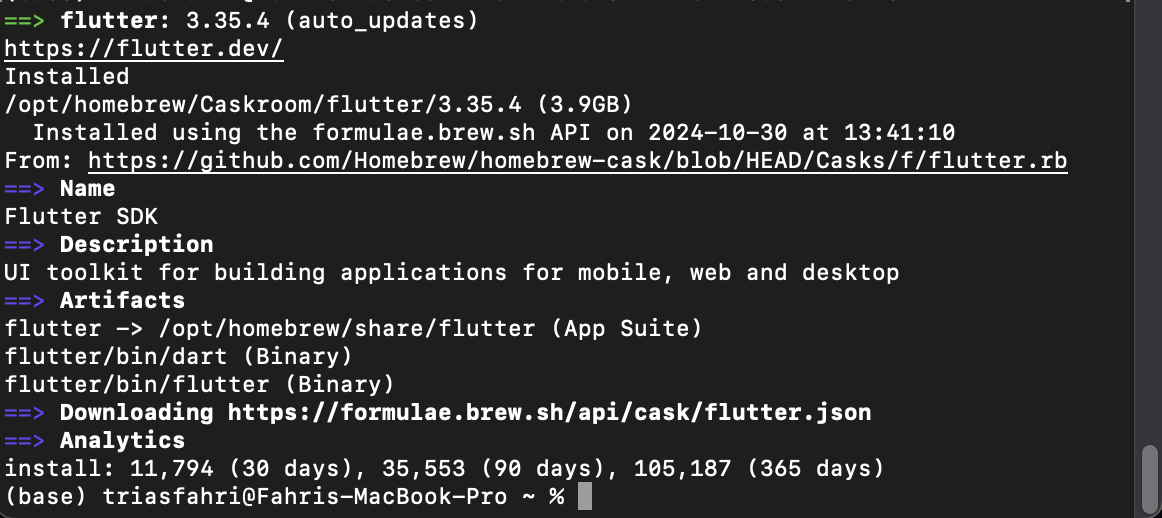
-
Congratulations! Installation of Flutter has been successfully completed. To check the version of Flutter, run the following command and proceed with the Android Studio installation.
flutter --version
Linux
Installation for Linux can be seen here
Tutorial: Installing Android Studio
- To start, download Android Studio from the official website here.
- After the download is complete, open the installer for Android Studio and run it to install Android Studio.
- After that, open Android Studio with the following steps to complete the installation:
- Click
Nexton the welcome page to start the installation process. Then, select theStandardoption in the Install Type section to automatically install all required components.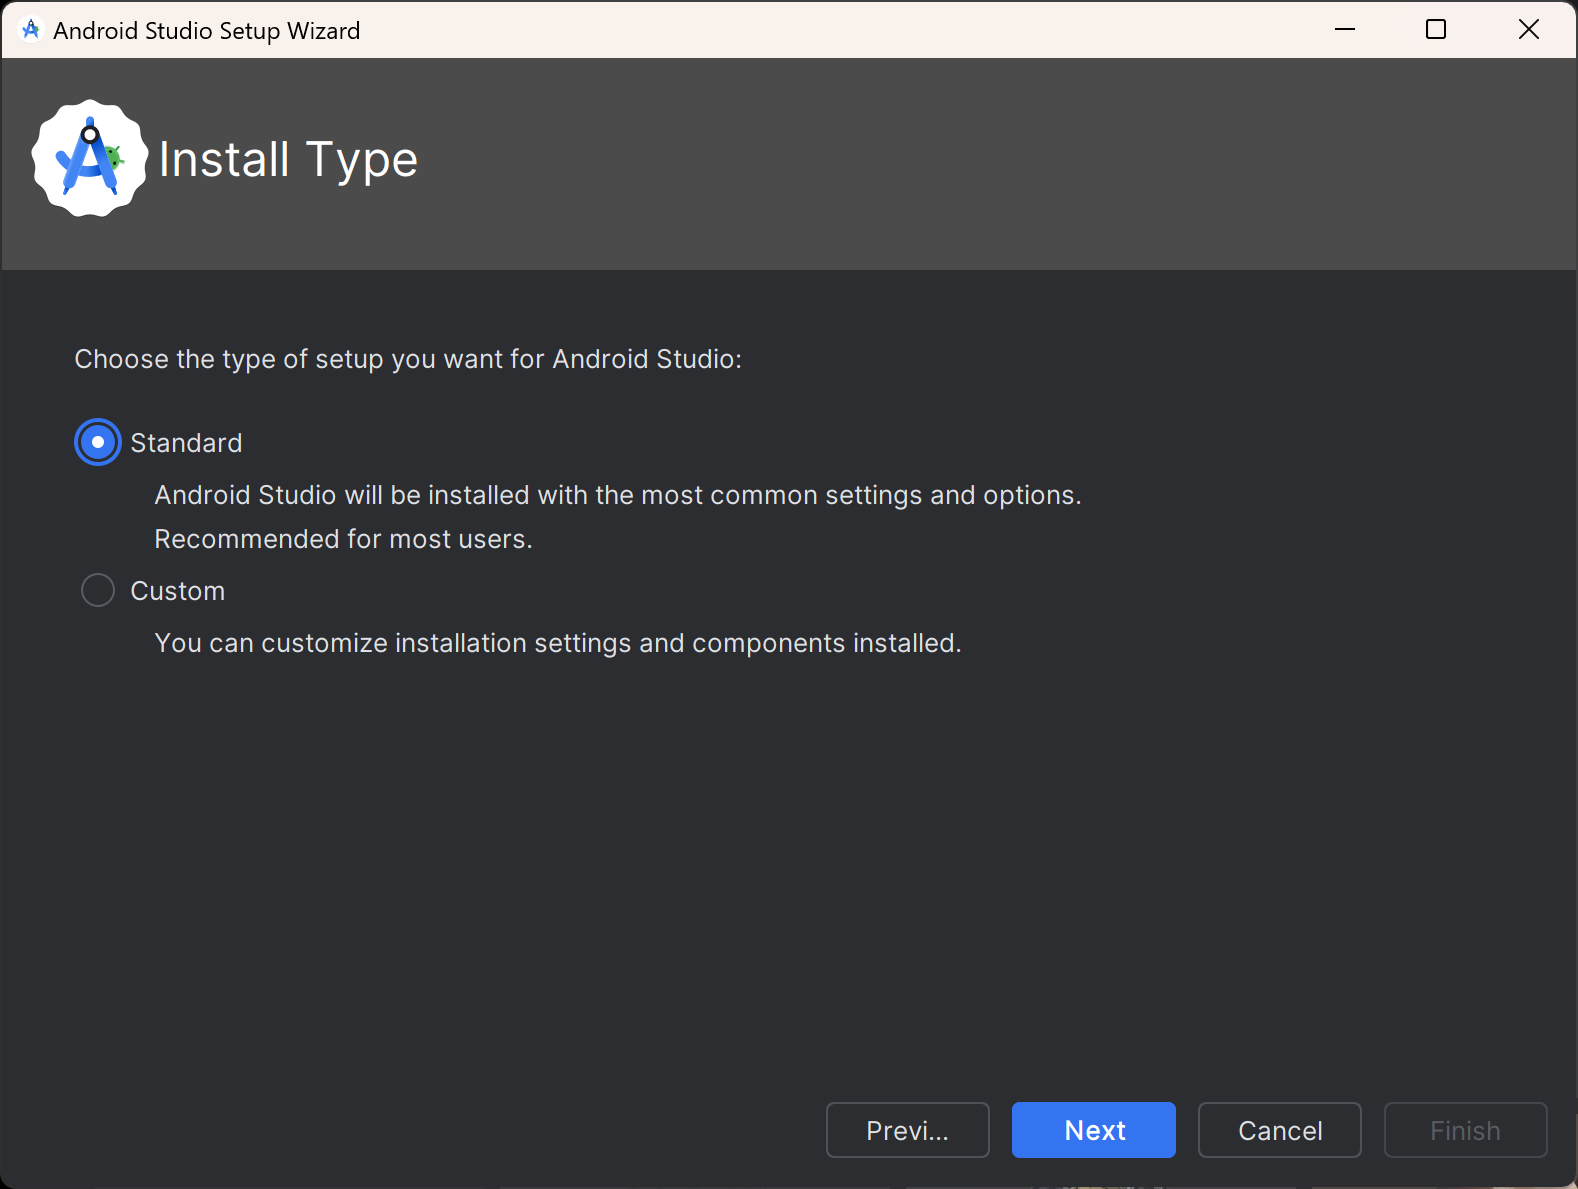
- Click the
Finishbutton to continue the installation process.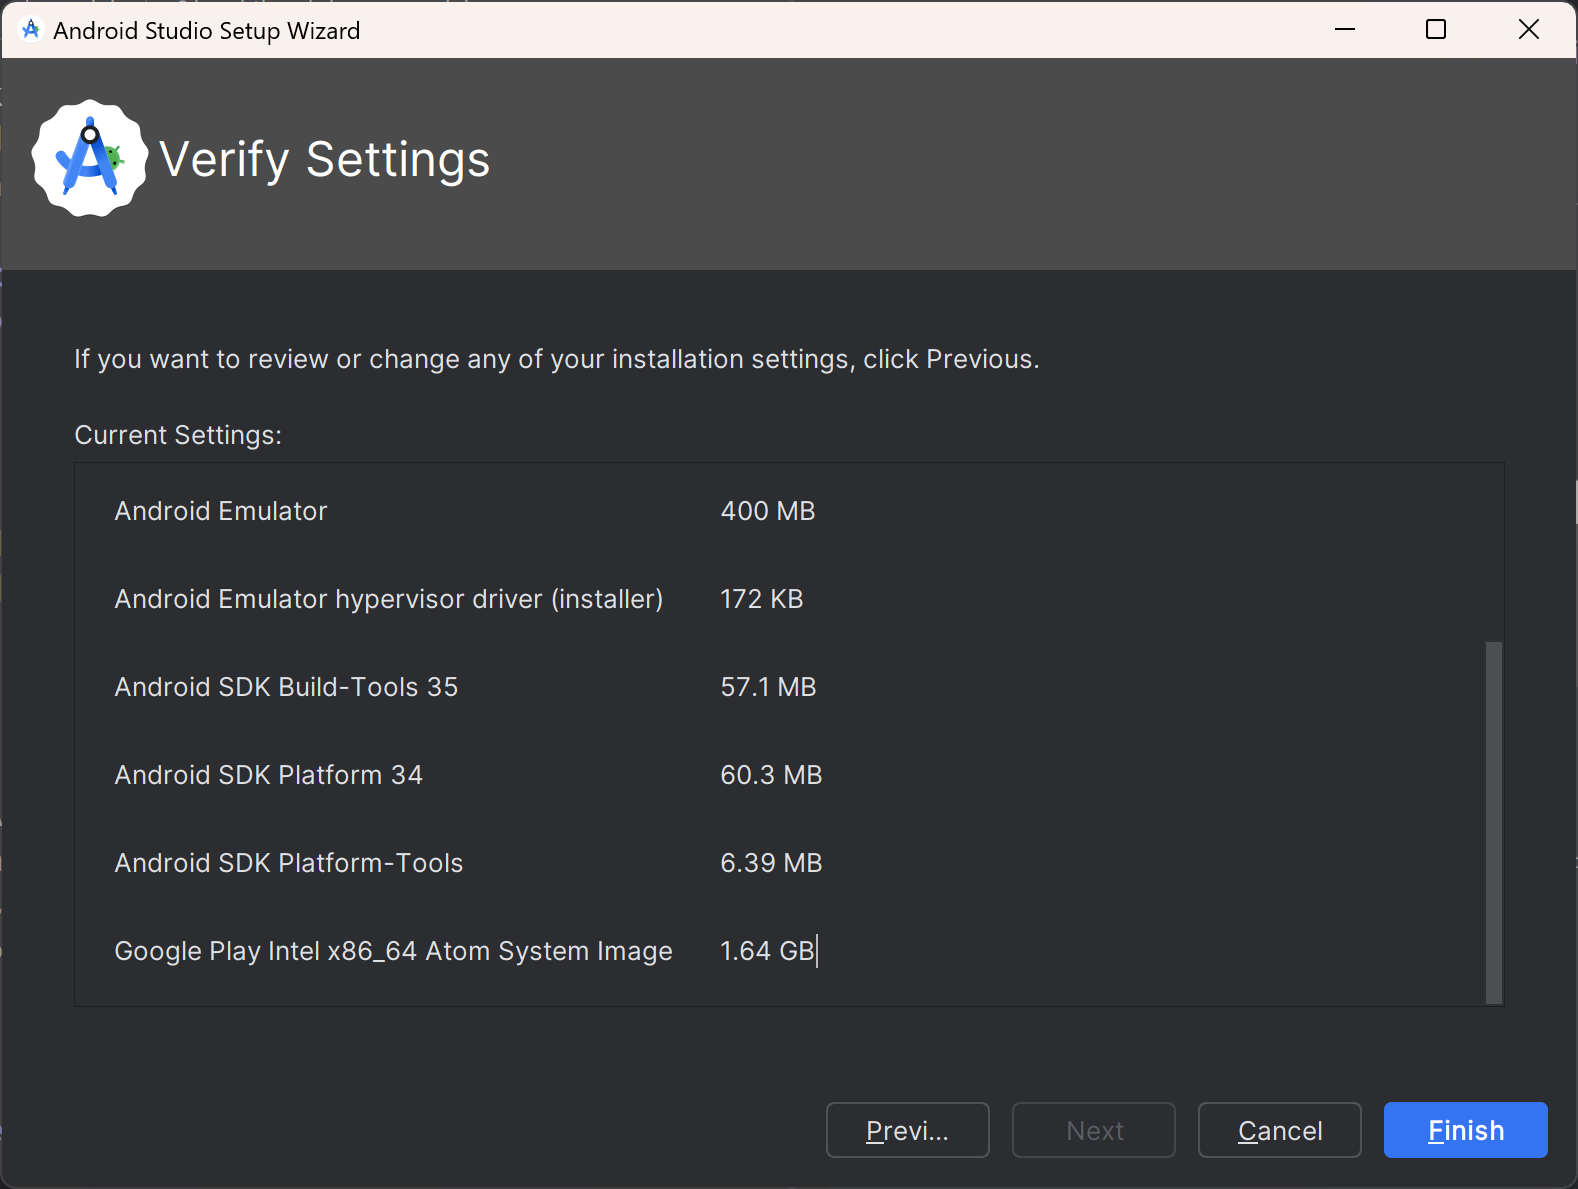
- On the installation page, you will see the License Agreement as shown below. Select
Acceptto accept all licenses, then clickFinishto continue the installation.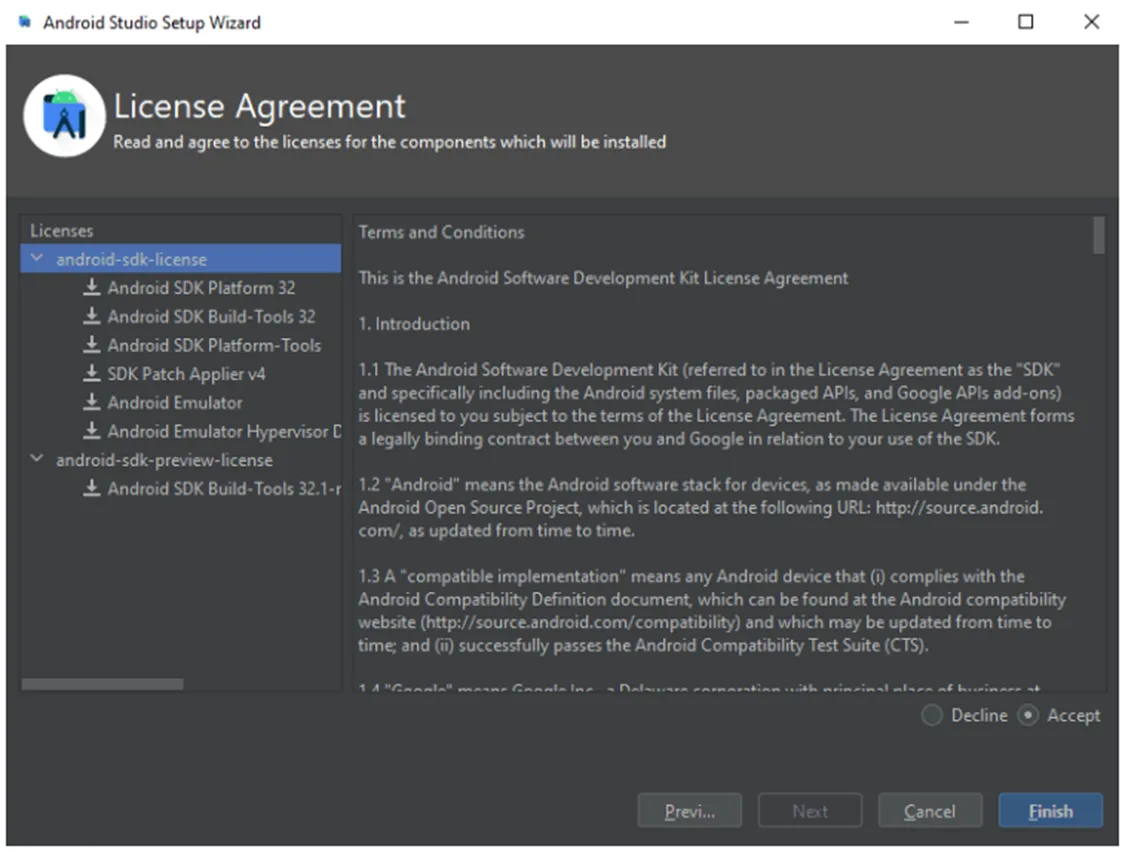
- After the installation is complete, ensure that the required SDK components are installed correctly. On the home page, select
More Actionsand then clickSDK Manager.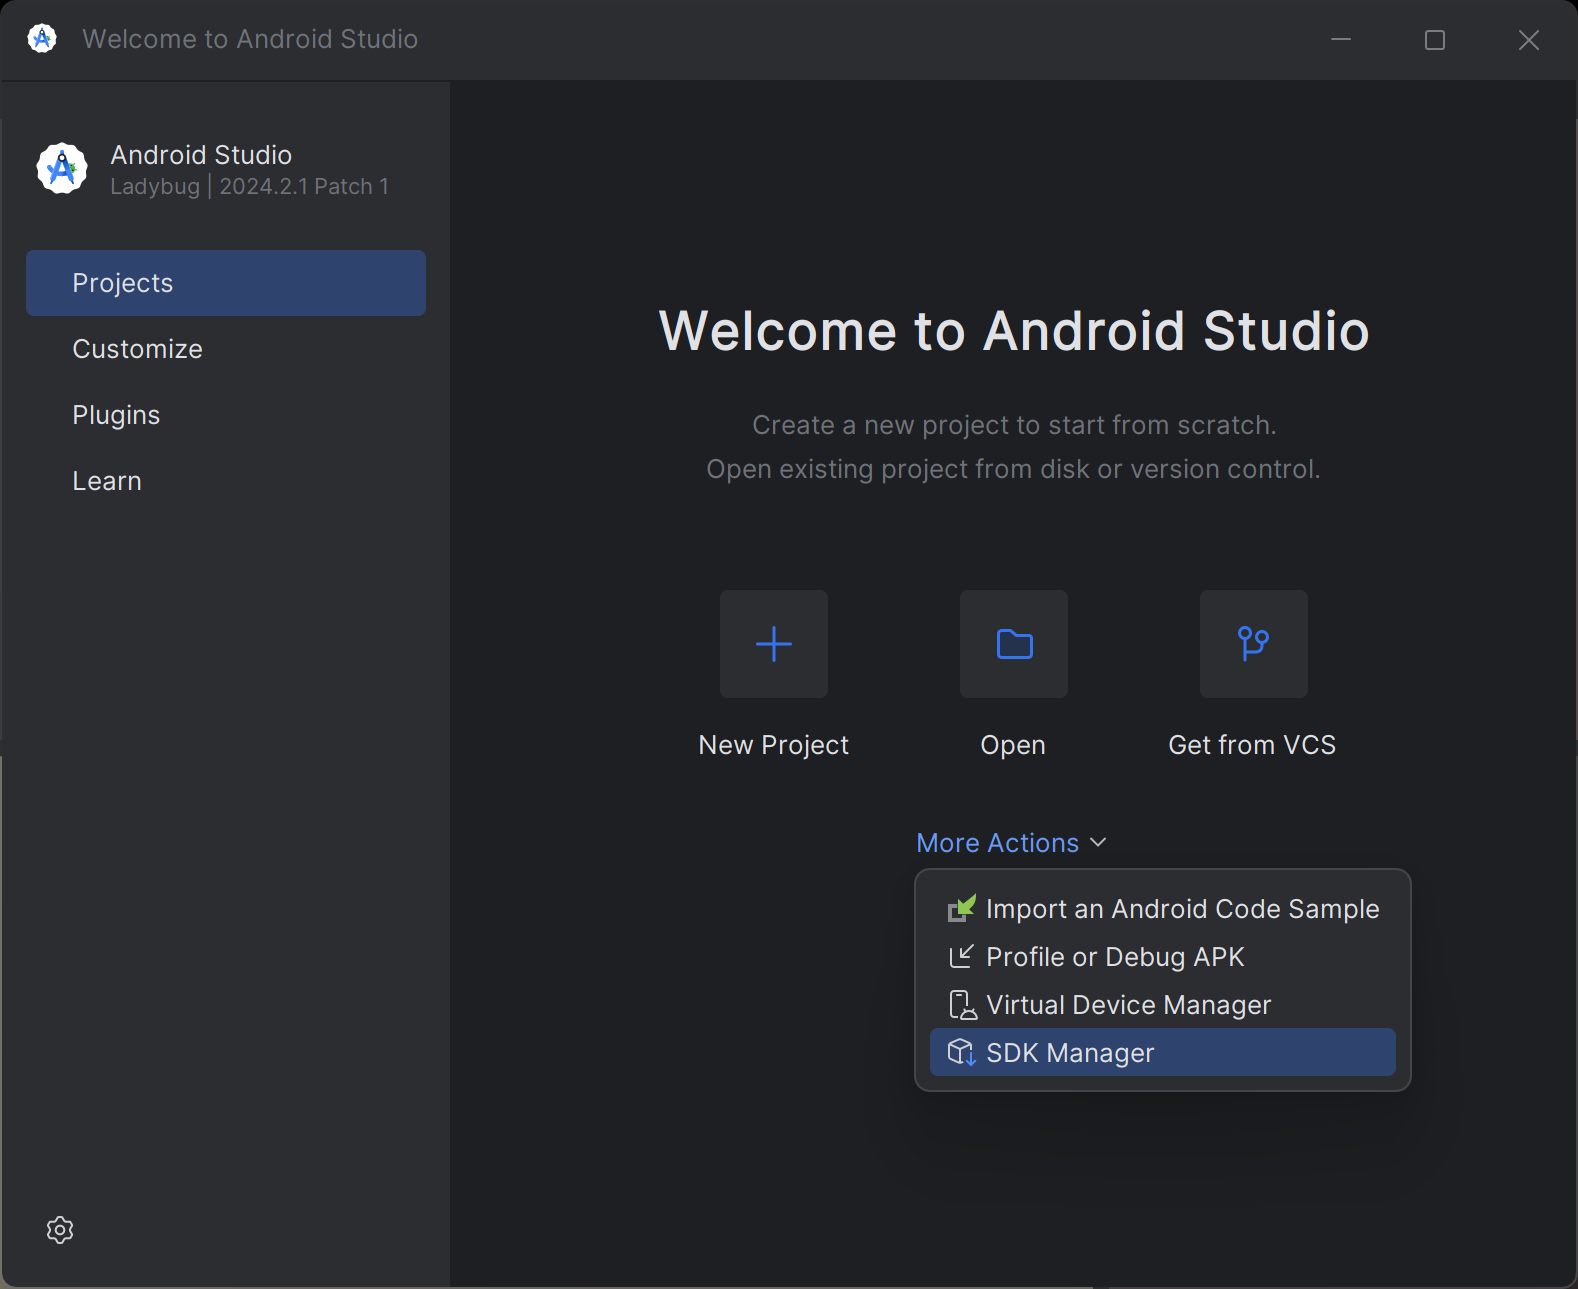
- Or, you can log in to the Settings > Languages & Frameworks > Android SDK menu to check and ensure that the required components are installed as shown below.
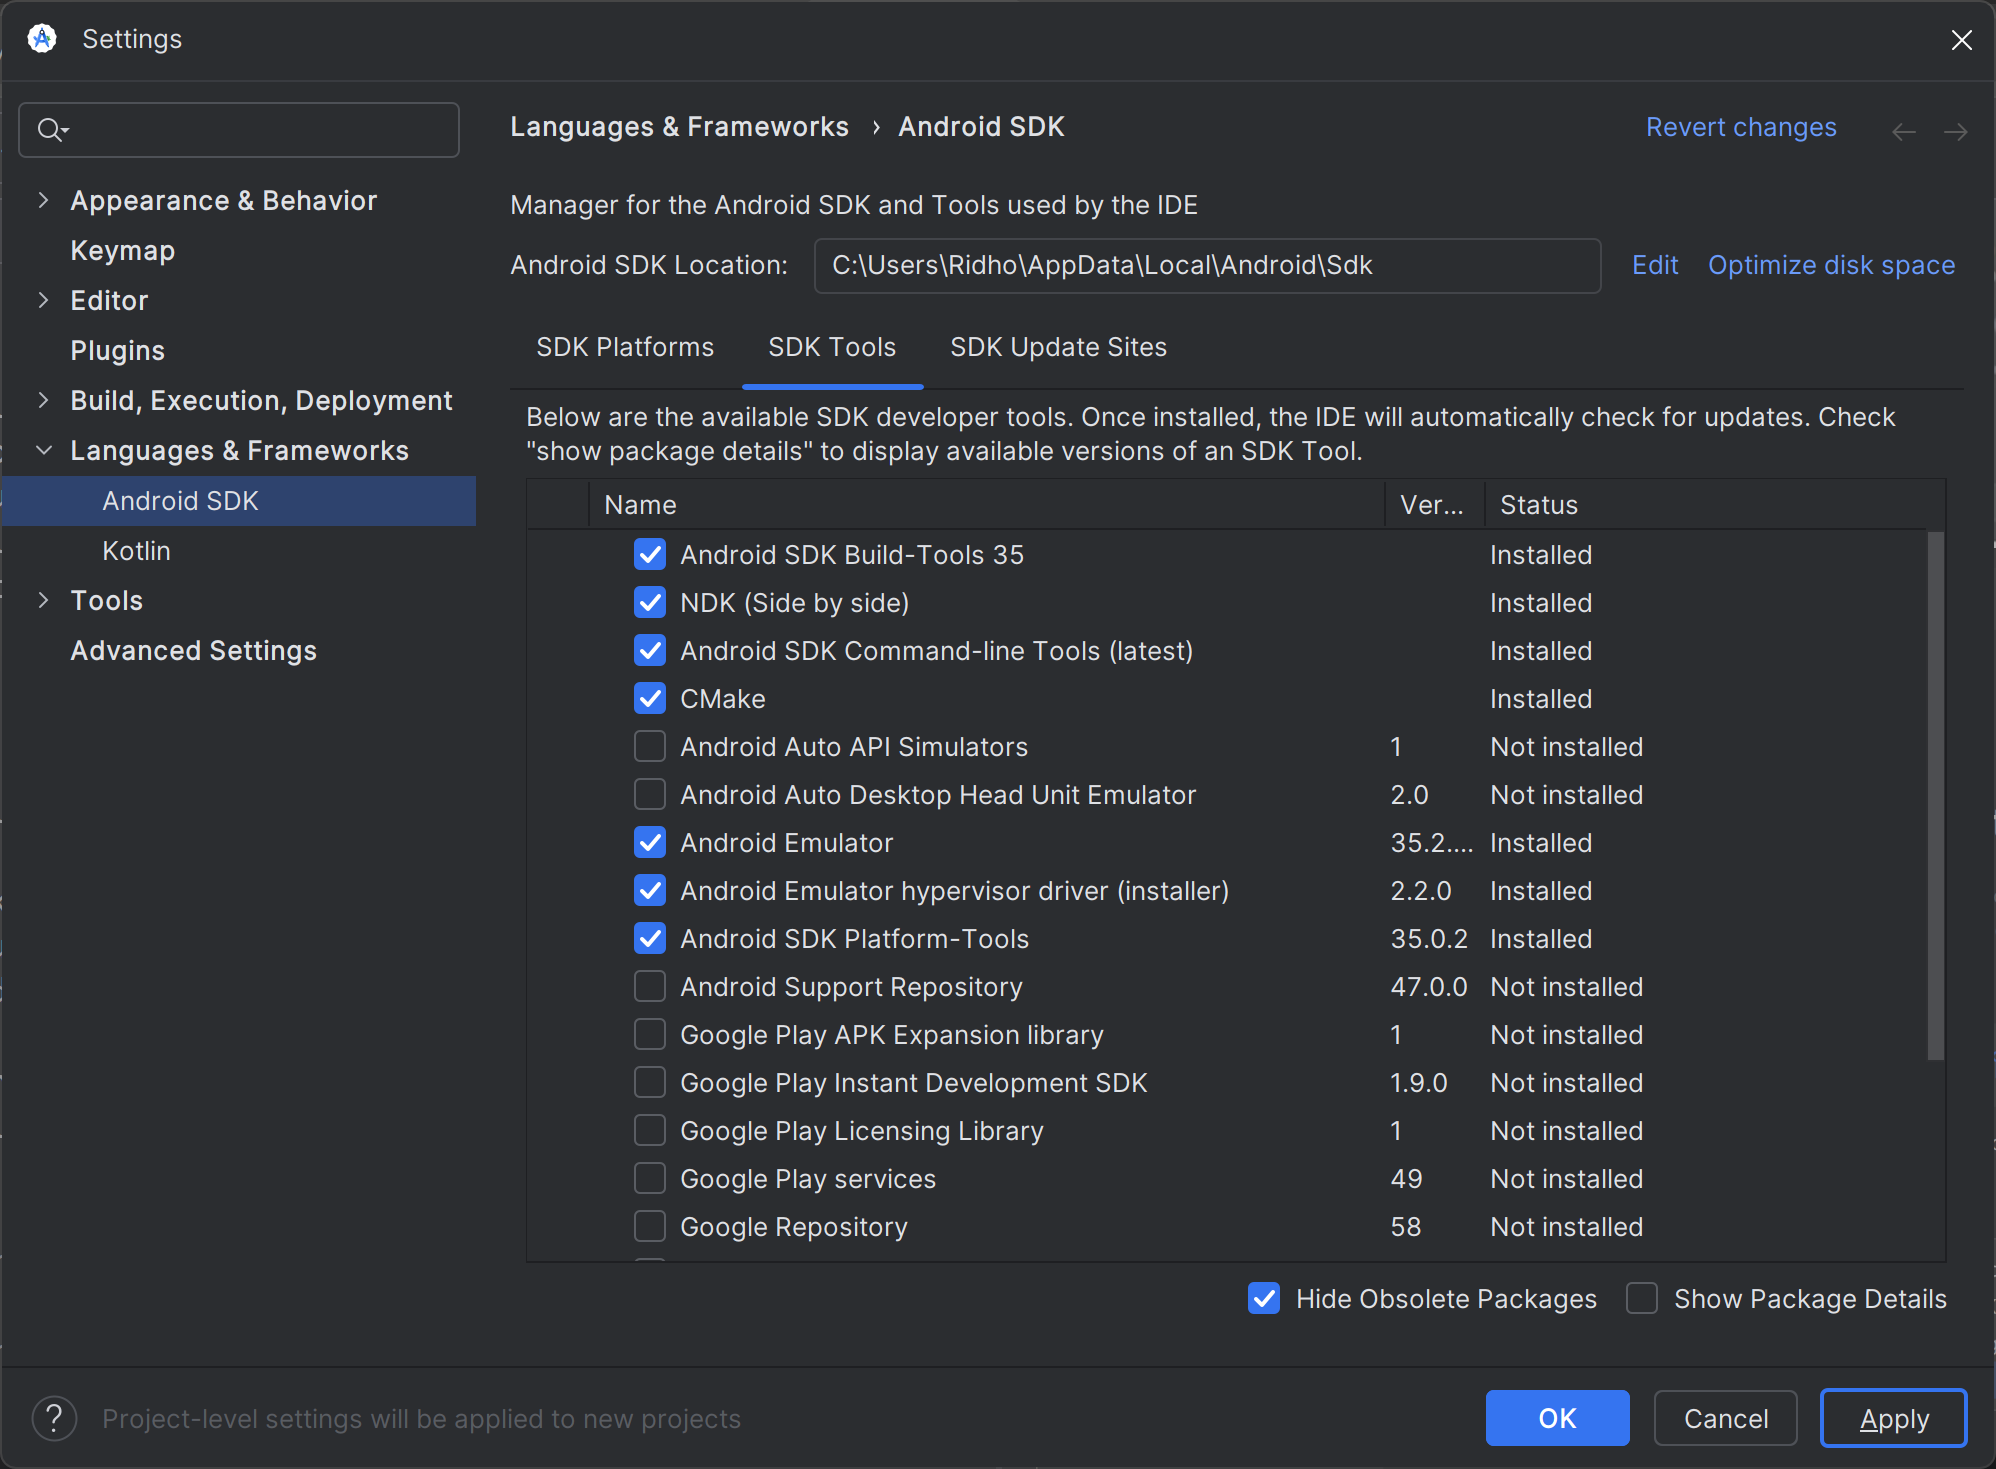
- Make sure that these components are selected (checked):
- Android SDK Command-line Tools
- Android SDK Build-Tools
- Android SDK Platform-Tools
- Android Emulator
- NDK (Side by Side)
- CMake
- Android Emulator hypervisor driver (installer)
- If the Status column shows Update available or Not installed for a specific component, select the component and click
Apply. - After the installation process is complete, click
OKto save the changes and close the window.
- Click
- After the Flutter installation is complete, we need to ensure that all required components have been installed and configured correctly. For this, Flutter provides the
flutter doctorcommand that helps check the installation status.-
Open the terminal or PowerShell, then run the
flutter doctorcommand. The result will show whether all the required components have been installed correctly. Example output:C:\Users\Ridho>flutter doctor
Doctor summary (to see all details, run flutter doctor -v):
[√] Flutter (Channel stable, 3.24.3, on Microsoft Windows [Version 10.0.22631.4317], locale en-ID)
[√] Windows Version (Installed version of Windows is version 10 or higher)
[!] Android toolchain - develop for Android devices (Android SDK version 32.1.0-rc1)
! Some Android licenses not accepted. To resolve this, run: flutter doctor --android-licenses
[√] Chrome - develop for the web
[X] Visual Studio - develop Windows apps
X Visual Studio not installed; this is necessary to develop Windows apps.
Download at https://visualstudio.microsoft.com/downloads/.
Please install the "Desktop development with C++" workload, including all of its default components
[√] Android Studio (version 2024.2)
[√] VS Code, 64-bit edition (version 1.93.1)
[√] Connected device (3 available)
[√] Network resources
! Doctor found issues in 2 categories. -
If
flutter doctorfinds an issue, such as in the Android toolchain with the message "Some Android licenses not accepted", you can resolve it by running theflutter doctor --android-licensescommand.C:\Users\Ridho>flutter doctor --android-licenses
5 of 7 SDK package licenses not accepted. 100% Computing updates...
Review licenses that have not been accepted (y/N)? y -
Follow the instructions displayed on the screen and type
yto accept the licenses that have not been accepted. After that, the issue related to the Android license will be resolved. Runflutter doctoragain.C:\Users\Ridho>flutter doctor
Doctor summary (to see all details, run flutter doctor -v):
[√] Flutter (Channel stable, 3.24.3, on Microsoft Windows [Version 10.0.22631.4317], locale en-ID)
[√] Windows Version (Installed version of Windows is version 10 or higher)
[√] Android toolchain - develop for Android devices (Android SDK version 34.0.0)
[√] Chrome - develop for the web
[X] Visual Studio - develop Windows apps
X Visual Studio not installed; this is necessary to develop Windows apps.
Download at https://visualstudio.microsoft.com/downloads/.
Please install the "Desktop development with C++" workload, including all of its default components
[√] Android Studio (version 2024.2)
[√] VS Code, 64-bit edition (version 1.93.1)
[√] Connected device (3 available)
[√] Network resources
! Doctor found issues in 1 category. -
You do not need to install Visual Studio because the focus of development is on mobile applications, so Visual Studio is not required. However, if you are planning to develop a Desktop Windows application in the future, you can install Visual Studio with the "Desktop development with C++" component through this [link] (https://visualstudio.microsoft.com/downloads/).
-
- Congratulations! 🐼 Installation of Flutter and Android Studio has been successfully completed! 🎉 You are ready to start developing Flutter applications.
IDE Usage
You can choose the IDE that you will use to develop Flutter applications. You are recommended to use Android Studio.
- Android Studio
- Visual Studio Code
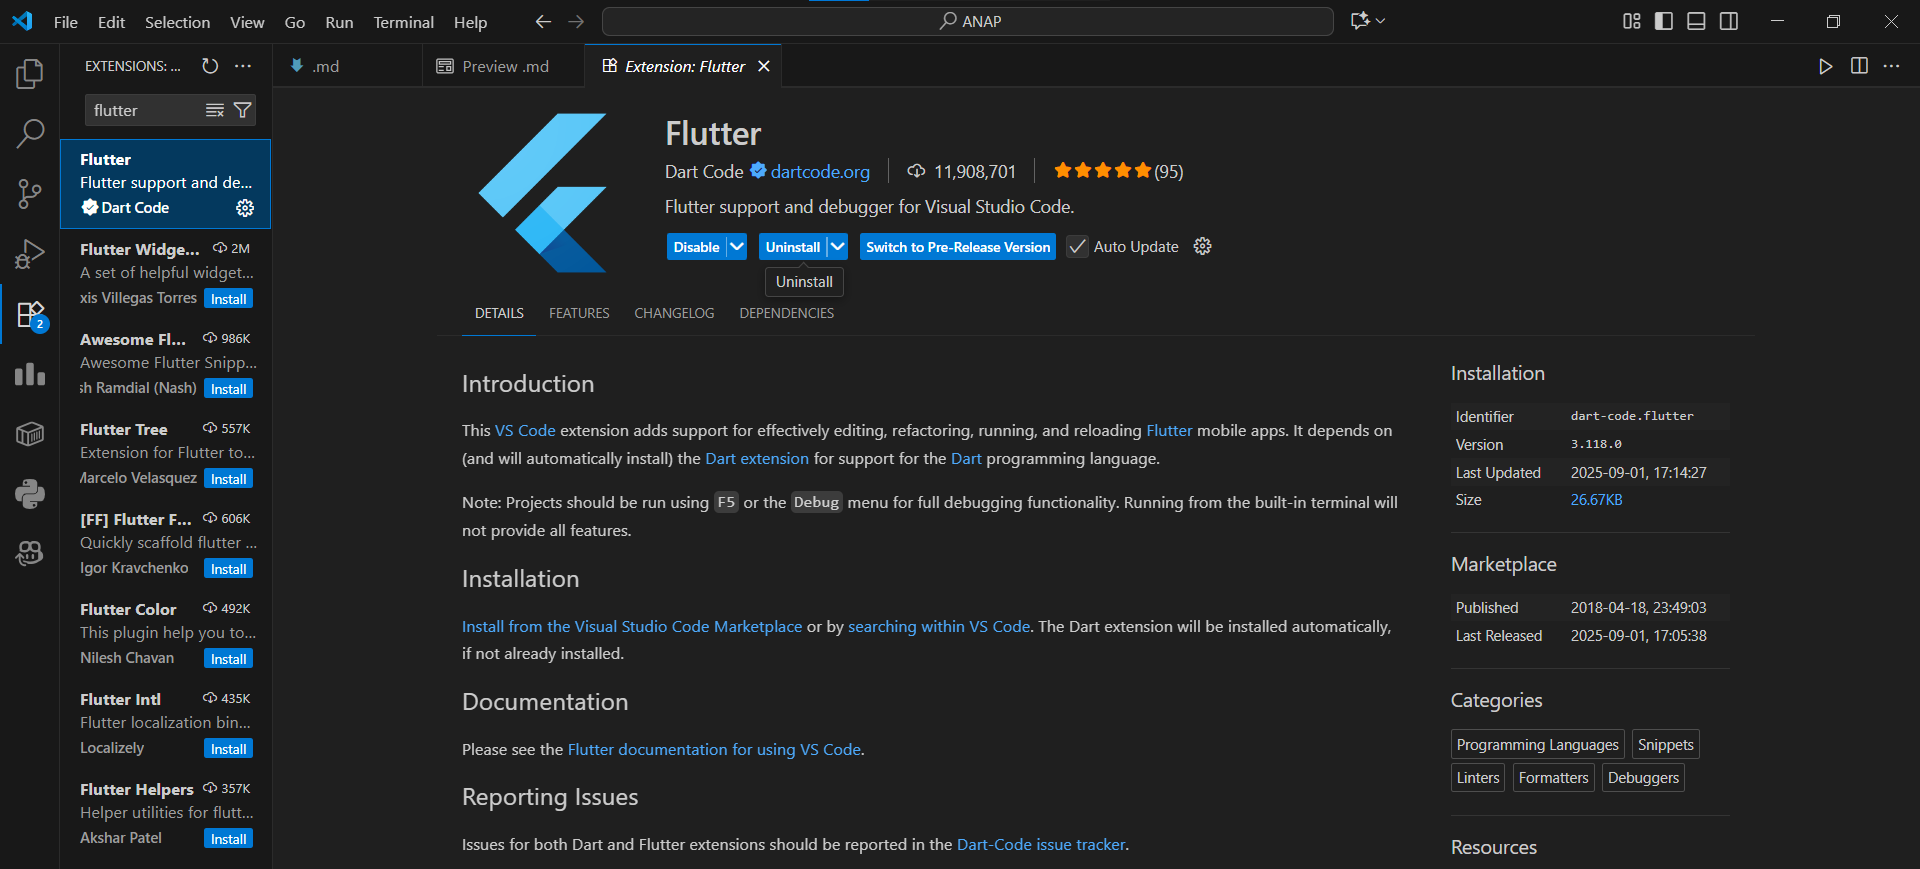
If you are using VS Code for developing using Flutter, you will need to install two extensions, Dart and Flutter:

Tutorial: Getting Started with Flutter
- Open the Terminal or Command Prompt.
- Create and enter the directory where you will be saving the Flutter project.
- Generate a new Flutter project in the terminal with the name
football_news, then enter the project directory.
flutter create <APP_NAME>
cd <APP_NAME>
- Run your project through the Terminal or Command Prompt.
flutter run
There are several options to run the Flutter application, but the easiest option is:
-
Using Google Chrome
- Run the following command to enable web support (only needs to be done once):
flutter config --enable-web- Then, in the project directory, run the project using the Google Chrome application with the following command:
flutter run -d chrome -
Using run debug (F5) in VS Code.
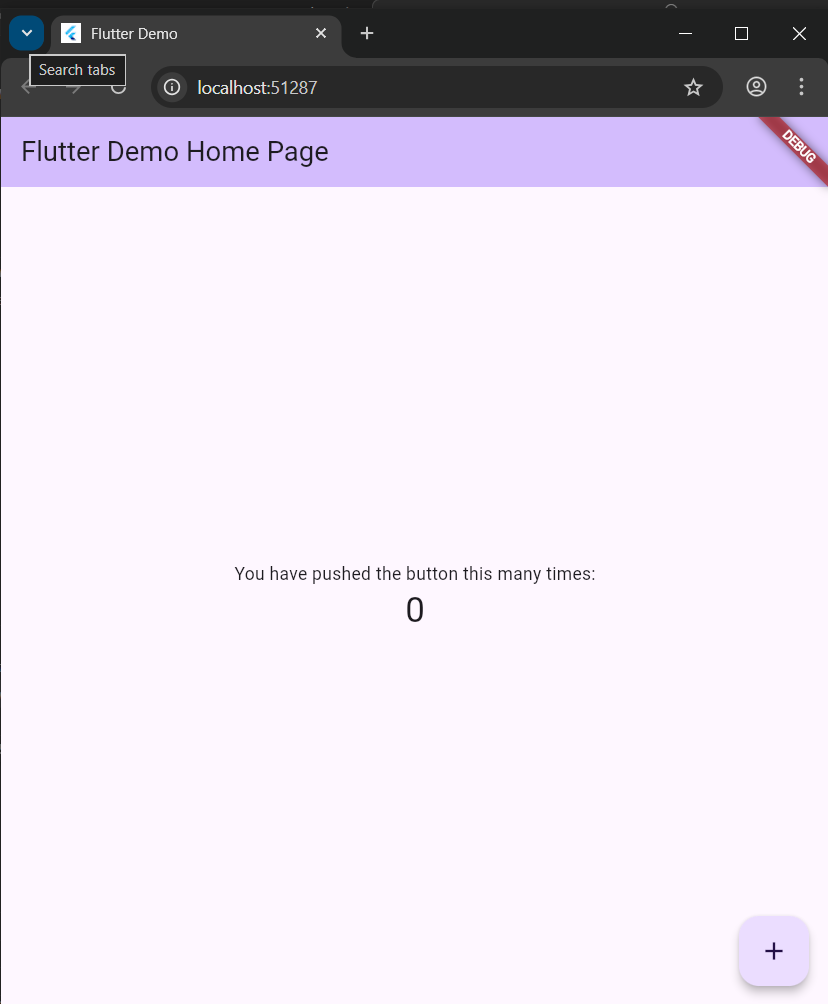
- Below is an image that captures what your screen should show.
- Perform
git initin the root folder and performadd-commit-pushthe project to a new GitHub repository. You can name the repositoryfootball-news-mobile.
Tutorial: Reorganizing the Project Structure
Before developing Flutter applications further, we will reorganize the project files first to make the project code easier to understand. This is a best practice in developing applications, such as clean architecture.
- Create a new file named
menu.dartin thefootball_news/lib. On the first line of the file, add the following code:
import 'package:flutter/material.dart';
- From the
main.dartfile, cut lines 39 to the end that contains the two classes below:
class MyHomePage ... {
  ...
}

class _MyHomePageState ... {
  ...
}
to the menu.dart that you just created.
- KYou will see that in the
main.dartfile,there will be an error on line 34, which contains the following code:
home: const MyHomePage(title: 'Flutter Demo Home Page'),
This happens because the main.dart file no longer understands the MyHomePage class because you have moved it to another file, menu.dart. To solve this issue, add the following code at the beginning of the file.
import 'package:football_news/menu.dart';
- Run the project using the Terminal or Command Prompt to ensure that the application still runs correctly.
Tutorial: Creating a Simple Widget in Flutter
In this tutorial, you will learn how to create a simple widget in Flutter. You will create the main page with mental_health_tracker as the header, followed by the user information on the top, and creating the card as the button for features such as "View News", "Add News", and "Logout". When the button is pressed, a notification will pop up on the bottom of the screen
Step 1: Changing the Application Theme Color
-
Open the
main.dartfile. -
Change the code in the
main.dartfile in the application theme that has the typeMaterialAppas shown below.
 colorScheme: ColorScheme.fromSwatch(primarySwatch: Colors.blue)
 .copyWith(secondary: Colors.blueAccent[400]),
You can also change the application theme as desired following the Colors documentation.
Step 2: Changing the Widget Page Menu to Stateless
note: '...' is syntax for wildcard that can mean anything depending on the context.
- In the
main.dartfile, removeconst MyHomePage(title: 'Flutter Demo Home Page')so it becomes:
MyHomePage(),
Do not forget to delete the const-keyword!
- In the
menu.dartfile, kyou will change the page widget from stateful to stateless with:
- Remove all contents from
class MyHomePage ...such asconst MyHomePage({super.key, required this.title});, variablefinal String title;, comments in the file, andState<MyHomePage> createState() => _MyHomePageState(); - Change
... extends StatefulWidgetto... extends StatelessWidgetin classMyHomePage. - Add
MyHomePage({super.key});as a constructor ofMyHomePage. - Remove the entirety of
class _MyHomePageState extends State<MyHomePage> - Add the build Widget so that the code looks like the following.
class MyHomePage extends StatelessWidget {
    MyHomePage({super.key});

    @override
    Widget build(BuildContext context) {
	return Scaffold(
	    ... // do not copy this!
	);
    }
}
Step 3 : Creating a Card with NPM, Name, and Class
It is important to note that each UI created by Flutter is called a widget and is built on the
Widget build()section.
- Before creating the card, you can declare three variables of type string containing the NPM, name, and class in the
MyHomePagein themenu.dartfile as shown below.
class MyHomePage extends StatelessWidget {
     MyHomePage({super.key}); //sudah ada pada code sebelumnya

    final String nama = "Haru Urara" // Name
    final String npm = "2406275678" // NPM
    final String kelas = "KKI" // Class
}
- After declaring the three variables, you can create a new class named
InfoCardin themenu.dartfile to create a simple card that will display the NPM, name, and class information.
... // (... nya jangan di copy !)
class InfoCard extends StatelessWidget {
// Kartu informasi yang menampilkan title dan content.
final String title; // Judul kartu.
final String content; // Isi kartu.
const InfoCard({super.key, required this.title, required this.content});
Widget build(BuildContext context) {
return Card(
// Membuat kotak kartu dengan bayangan dibawahnya.
elevation: 2.0,
child: Container(
// Mengatur ukuran dan jarak di dalam kartu.
width: MediaQuery.of(context).size.width / 3.5, // menyesuaikan dengan lebar device yang digunakan.
padding: const EdgeInsets.all(16.0),
// Menyusun title dan content secara vertikal.
child: Column(
children: [
Text(
title,
style: const TextStyle(fontWeight: FontWeight.bold),
),
const SizedBox(height: 8.0),
Text(content),
],
),
),
);
}
}
Step 4: Creating a Button Card with Icon
- Before creating a button for the card, you can create a new class named
ItemHomepagehat contains the attributes of the card that you will create (in this case, contains the name and icon). In themenu.dartfile, lput the code snippet given below outside of theMyHomePageandInfoCardclass.
...
class ItemHomepage {
 final String name;
 final IconData icon;

 ItemHomepage(this.name, this.icon);
}
...
- After that, you can create a list of
ItemHomepagethat contains the buttons you want to add to theMyHomePageclass.
class MyHomePage extends StatelessWidget {
 ...
 final List<ItemHomepage> items = [
    ItemHomepage("See Football News", Icons.newspaper),
    ItemHomepage("Add News", Icons.add),
    ItemHomepage("Logout", Icons.logout),
  ];
 ...
}
- When you have added the buttons you want, you can create the
ItemCardinsidemenu.dartto display your buttons. For now, the button that is pressed will only display the snackbar message "You have pressed the [button name] button" (design will not change until this step is done).
...
class ItemCard extends StatelessWidget {
// Menampilkan kartu dengan ikon dan nama.
final ItemHomepage item;
const ItemCard(this.item, {super.key});
Widget build(BuildContext context) {
return Material(
// Menentukan warna latar belakang dari tema aplikasi.
color: Theme.of(context).colorScheme.secondary,
// Membuat sudut kartu melengkung.
borderRadius: BorderRadius.circular(12),
child: InkWell(
// Aksi ketika kartu ditekan.
onTap: () {
// Menampilkan pesan SnackBar saat kartu ditekan.
ScaffoldMessenger.of(context)
..hideCurrentSnackBar()
..showSnackBar(
SnackBar(content: Text("Kamu telah menekan tombol ${item.name}!"))
);
},
// Container untuk menyimpan Icon dan Text
child: Container(
padding: const EdgeInsets.all(8),
child: Center(
child: Column(
// Menyusun ikon dan teks di tengah kartu.
mainAxisAlignment: MainAxisAlignment.center,
children: [
Icon(
item.icon,
color: Colors.white,
size: 30.0,
),
const Padding(padding: EdgeInsets.all(3)),
Text(
item.name,
textAlign: TextAlign.center,
style: const TextStyle(color: Colors.white),
),
],
),
),
),
),
);
}
}
...
InfoCard dan ItemCard are reusable components with type Card that will be called in Step 5 of MyHomePage section.
Step 5: Integrating InfoCard and ItemCard to Display on MyHomePage
Remember that all UI elements (Widget) in Flutter will be defined and built on the Widget build() section. To integrate and display all the cards you are enjoying on the HomePage, you can change the Widget build() section in the MyHomePage class.
...
class MyHomePage extends StatelessWidget {
...
Widget build(BuildContext context) {
// Scaffold menyediakan struktur dasar halaman dengan AppBar dan body.
return Scaffold(
// AppBar adalah bagian atas halaman yang menampilkan judul.
appBar: AppBar(
// Judul aplikasi "Football News" dengan teks putih dan tebal.
title: const Text(
'Football News',
style: TextStyle(
color: Colors.white,
fontWeight: FontWeight.bold,
),
),
// Warna latar belakang AppBar diambil dari skema warna tema aplikasi.
backgroundColor: Theme.of(context).colorScheme.primary,
),
// Body halaman dengan padding di sekelilingnya.
body: Padding(
padding: const EdgeInsets.all(16.0),
// Menyusun widget secara vertikal dalam sebuah kolom.
child: Column(
crossAxisAlignment: CrossAxisAlignment.center,
children: [
// Row untuk menampilkan 3 InfoCard secara horizontal.
Row(
mainAxisAlignment: MainAxisAlignment.spaceEvenly,
children: [
InfoCard(title: 'NPM', content: npm),
InfoCard(title: 'Name', content: nama),
InfoCard(title: 'Class', content: kelas),
],
),
// Memberikan jarak vertikal 16 unit.
const SizedBox(height: 16.0),
// Menempatkan widget berikutnya di tengah halaman.
Center(
child: Column(
// Menyusun teks dan grid item secara vertikal.
children: [
// Menampilkan teks sambutan dengan gaya tebal dan ukuran 18.
const Padding(
padding: EdgeInsets.only(top: 16.0),
child: Text(
'Selamat datang di Football News',
style: TextStyle(
fontWeight: FontWeight.bold,
fontSize: 18.0,
),
),
),
// Grid untuk menampilkan ItemCard dalam bentuk grid 3 kolom.
GridView.count(
primary: true,
padding: const EdgeInsets.all(20),
crossAxisSpacing: 10,
mainAxisSpacing: 10,
crossAxisCount: 3,
// Agar grid menyesuaikan tinggi kontennya.
shrinkWrap: true,
// Menampilkan ItemCard untuk setiap item dalam list items.
children: items.map((ItemHomepage item) {
return ItemCard(item);
}).toList(),
),
],
),
),
],
),
),
);
As best practice, run the flutter analyze command in the root folder of your project after your code has been written.
This is usually done to ensure that there are no issues in your code that can hinder performance or application functionality. If you follow the tutorial correctly, the result of the command should show that there are no issues detected in your project.
football_news % flutter analyze
Analyzing football news...
No issues found! (ran in 1.4s)
If there is an issue in your code (such as in the section below), try to resolve the issue according to the tutorial or review the code line where the issue occurred.
football_news % flutter analyze
Analyzing football_news...

  error • The constructor being called isn't a const constructor • lib/main.dart:37:13 • const_with_non_const

1 issue found. (ran in 1.5s)
This step can also help with the building process that will be done in some of the tutorials that are coming.
Penutup
Congratulations! You have successfully completed Tutorial 6! 🐼🎉
You can try running the Flutter application using the flutter run command, as shown in the tutorial.
Now, you have mastered the basics of Flutter, starting from installation to understanding the basic structure of the application.
-
Learn and remember the code that you wrote above correctly.
-
After completing all steps in the tutorial, your Flutter application should now be able to display the initial screen as shown below.

The screenshot above is taken from the Indonesian tutorial. Some text content might differ with the English tutorial.
-
At the end of the tutorial, the local directory structure should look like this.
football_news
|-- android
|-- build
|-- ios
|-- lib
│   ├── main.dart
│   └── menu.dart
|-- linux
|-- macos
|-- test
|-- web
|-- windows
|-- analysis_options.yaml
|-- pubspec.lock
|-- pubspec.yaml
`-- README.md -
Perform
add,commitdanpushto update the GitHub repository. -
Run the following command to perform
add,commitdanpushgit add .
git commit -m "<commit_message>"
git push -u origin <main_branch>- Change
<commit_message>according to your preference. Example:git commit -m "tutorial 6 selesai". - Change
<main_branch>according to the name of the main branch. Example:git push -u origin main or git push -u origin master.
- Change
Additional References
- Docs | Flutter
- Write your first app | Flutter
- An Introduction to Flutter: The Basics
- Flutter Course for Beginners – 37-hour Cross Platform App
- An Introduction to Flutter Clean Architecture
Kontributor
- Jeremi Felix (LIX)
- Trias Fahri (FHR)
- Sayyid Thariq Gilang Muttaqien (YID)
- Fakhri Habibi (FAW)
- Alexander William Lim (EN Translation)
Credits
This tutorial was developed based on PBP Odd 2025 dan PBP Odd 2024 written by the 2024 Platform-Based Programming Teaching Team. All tutorials and instructions included in this repository are designed so that students who are taking Platform-Based Programming courses can complete the tutorials during lab sessions.